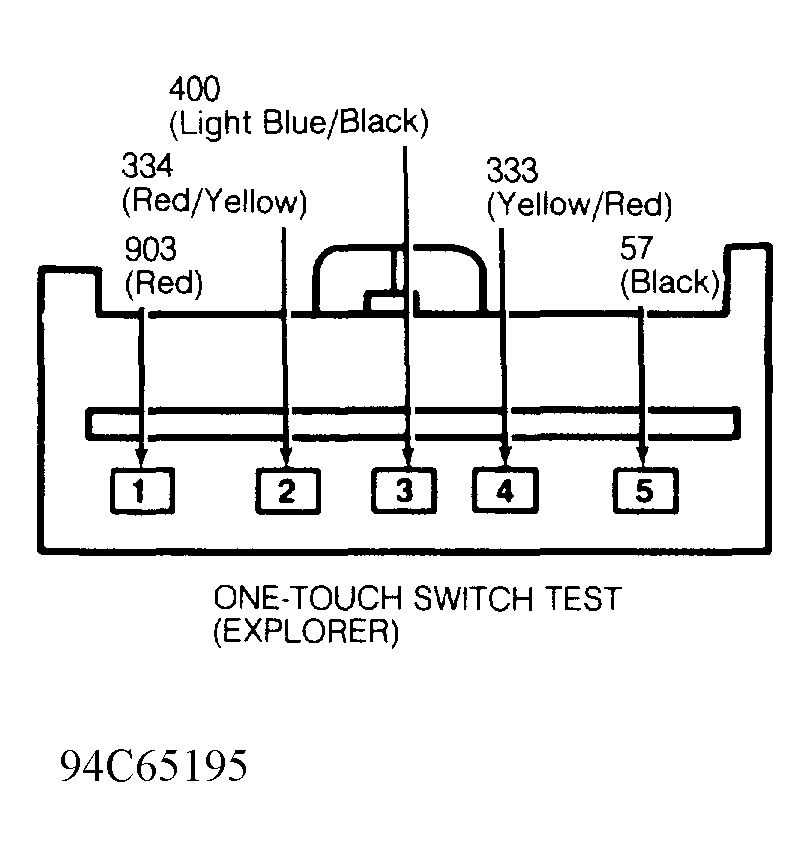
One-Touch Window Switch
- Remove window switch from vehicle. See WINDOW SWITCH under REMOVAL & INSTALLATION. Use a self-powered test light or ohmmeter to test one-touch switch. With ignition switch lock cylinder in accessory position, connect test light between pin No. 5 (ground), circuit No. 57 and pin No. 3 (power), circuit No. 400. See Fig 1
. Test light should go on.
- With test light connected to pin No. 3 (power) and circuit No. 400, connect other end of test light to pin No. 1 of motor. Test light should go on. With test light connected to pin No. 3 (power) and circuit No. 400, connect other end of test light to pin No. 2 of power window switch in down position and circuit No. 334. Test light should come on.
- With test light connected to pin No. 3 (power) and circuit No. 400, connect other end of test light to pin No. 4 of power window switch in up position and circuit No. 333. Test light should come on.
- Use a self-powered test light or ohmmeter to test one-touch window switch. With one-touch window switch removed from vehicle, Check continuity between pins No. 1 and 2. See WINDOW SWITCH under REMOVAL & INSTALLATION. Test light should come on. Check continuity between pins No. 1 and 3. Test light should not come on. If continuity is not present, replace one-touch window switch.
 Courtesy of FORD MOTOR CO.