Diagnostic Procedure
- Depress the brake pedal while the brakelights are being observed. Do the brakelights operate correctly? If so, go to next step. If not, go to step 8.
- Test shift interlock actuator and ignition relay. See SHIFT INTERLOCK & IGNITION RELAY under COMPONENT TESTS. Are the shift interlock actuator and ignition relays okay? If so, go to next step. If not, replace faulty relay and test the system for normal operation.
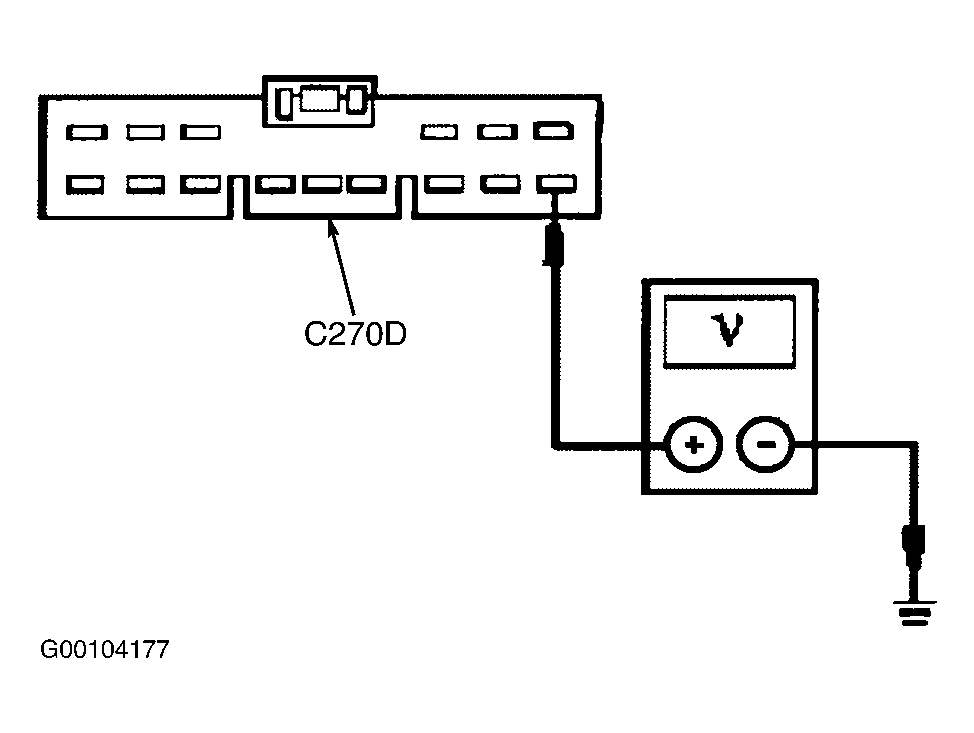
- Turn ignition switch to OFF position. Disconnect Central Junction Box (CJB) harness connector C270D. Turn ignition switch to ON position. Measure the voltage between CJB harness connector C270D terminal No. 7 and ground. See Fig 1. Is the voltage greater than 10 volts? If so, go to step 5. If not, go to next step.
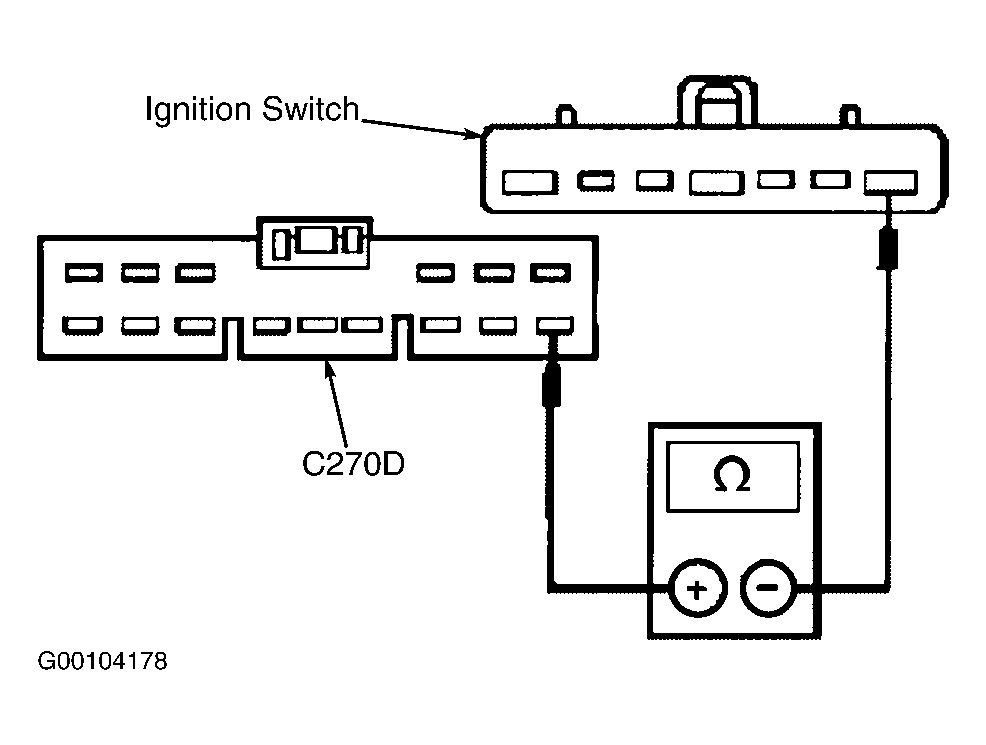
- Turn ignition switch to OFF position. Disconnect CJB harness connector C270D and ignition switch. Measure the resistance between CJB harness connector C270D terminal No. 15 and ignition switch terminal No. 1. See Fig 2. Is the resistance less than 5 ohms? If so, diagnose ignition switch concern. See appropriate STEERING COLUMN SWITCHES article in ACCESSORIES & EQUIPMENT. If not, repair open in ignition feed circuit and test the system for normal operation.
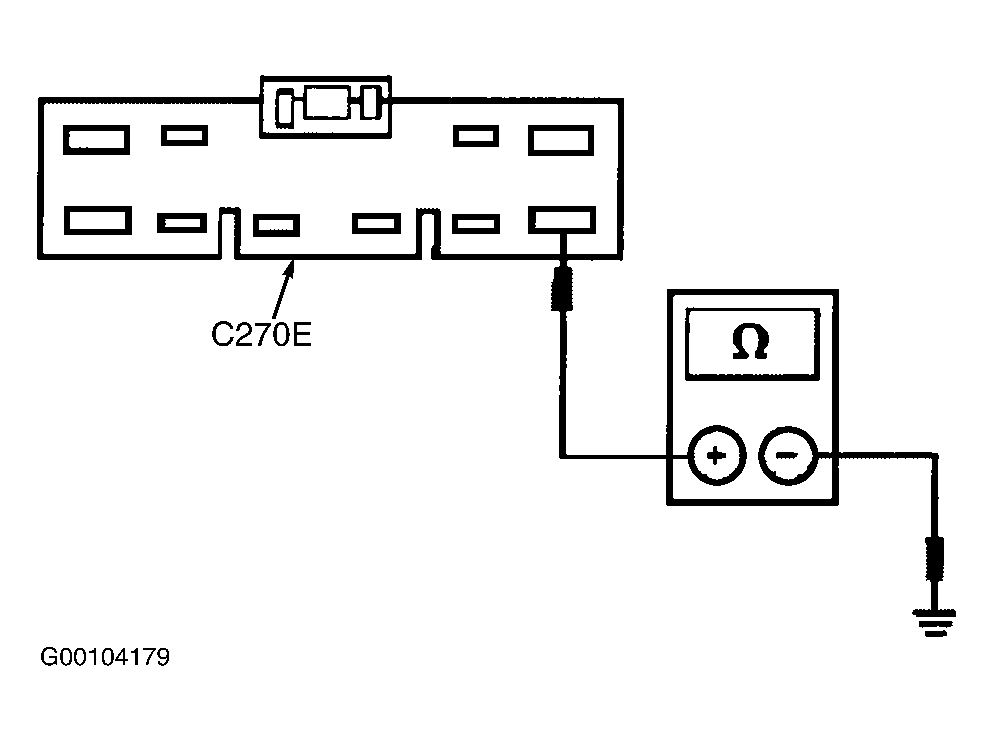
- Disconnect CJB harness connector C270E. Measure the resistance in ground circuit between CJB harness connector C270E terminal No. 10 and ground. See Fig 3. Is the resistance less than 5 ohms? If so, go to next step. If not, repair open in ground circuit and test the system for normal operation.
- Connect CJB harness connectors C270E and C270D. Disconnect shift interlock actuator relay harness connector C2068. Turn ignition switch to ON position. Measure the voltage between shift interlock actuator relay terminal No. 86 and ground. See Fig 4. Is the voltage greater than 10 volts? If so, go to next step. If not, repair open in shift interlock actuator relay ignition feed circuit and test the system for normal operation.
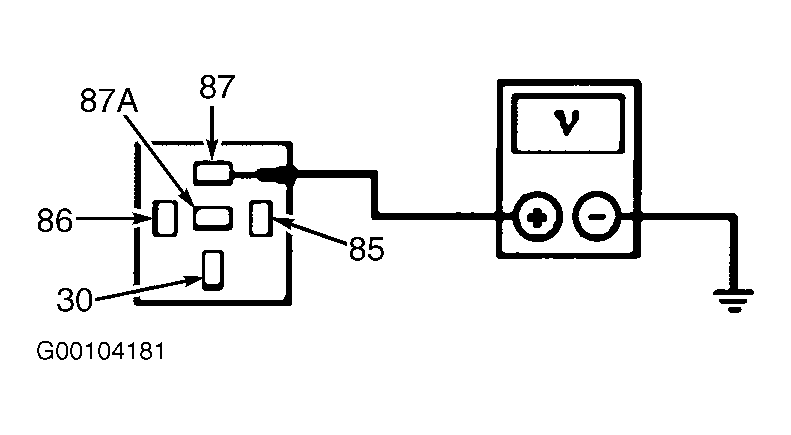
- Disconnect shift interlock actuator relay harness connector. Measure the voltage between shift interlock actuator relay terminal No. 87 and ground while the brake pedal is depressed. See Fig 5. Is the voltage greater than 10 volts? If so, go to step 10. If not, go to next step.
- Disconnect Brake Pedal Position (BPP) switch. Measure voltage in battery feed circuit at BPP switch harness connector terminal No. 2. Is the voltage greater than 10 volts? If so, go to next step. If not, repair open in battery feed circuit and test the system for normal operation.
- Measure resistance between terminals No. 1 and 2 of BPP switch while the brake pedal is depressed. Is the resistance less than 5 ohms? If so, repair open in Light Green wire between shift interlock actuator relay and BPP switch and test the system for normal operation. If not, replace BPP switch. See BRAKE PEDAL POSITION SWITCH under REMOVAL & INSTALLATION. After repairs, test the system for normal operation.
- Turn ignition switch to OFF position. Connect shift interlock actuator relay. Disconnect shift interlock actuator diode harness connector. Turn ignition switch to ON position. Measure the voltage between shift interlock actuator diode terminal No. 1 and ground. Is the voltage greater than 10 volts? If so, go to next step. If not, repair open in Gray/Yellow wire between shift interlock actuator diode and shift interlock actuator relay. After repairs, test the system for normal operation.
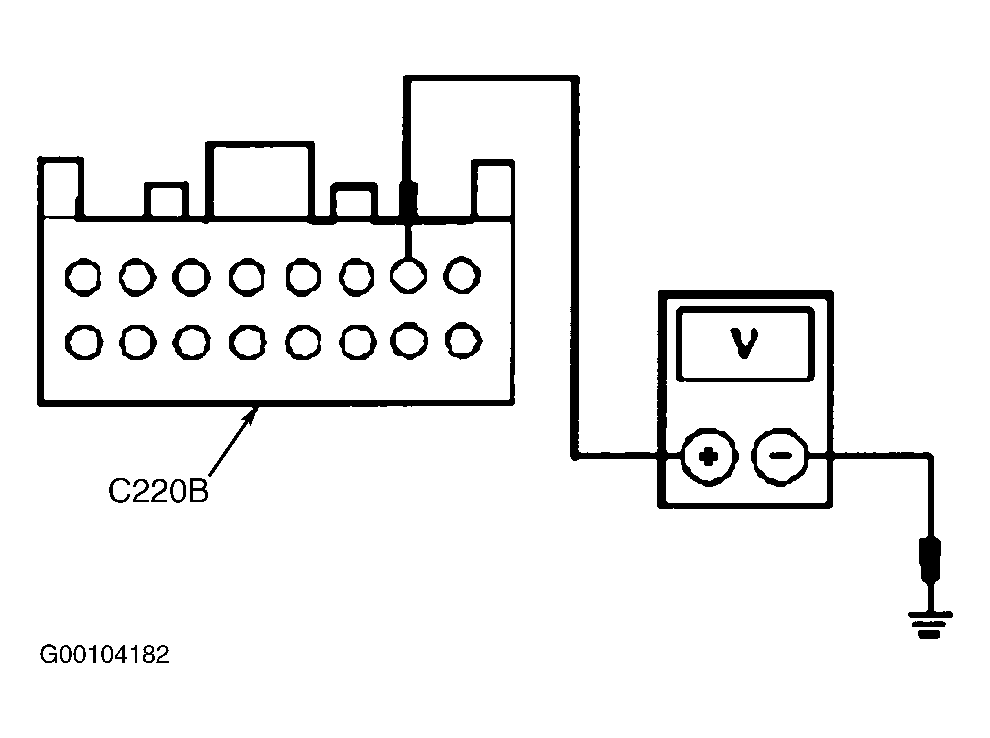
- Turn ignition switch to OFF position. Disconnect instrument cluster harness connector C220B. Connect shift interlock actuator diode. Turn ignition switch to ON position. Measure the voltage between instrument cluster harness connector C220B terminal No. 2 and ground. See Fig 6. Is the voltage greater than 10 volts? If so, go to next step. If not, repair open in White/Red wire between instrument cluster and shift interlock actuator diode. After repairs, test the system for normal operation.
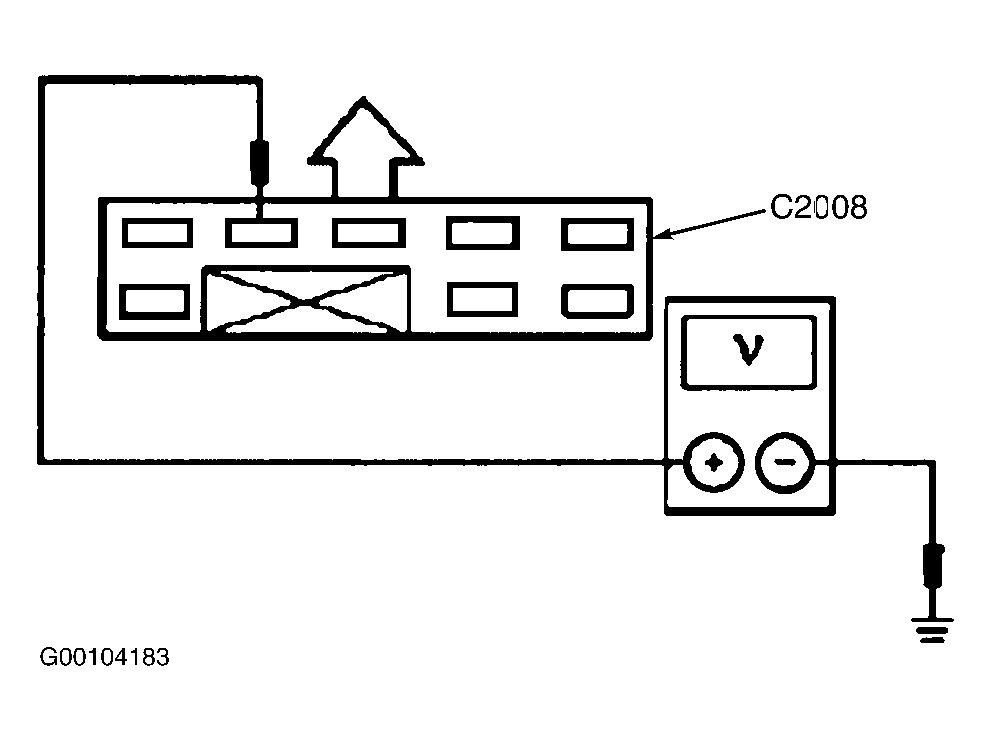
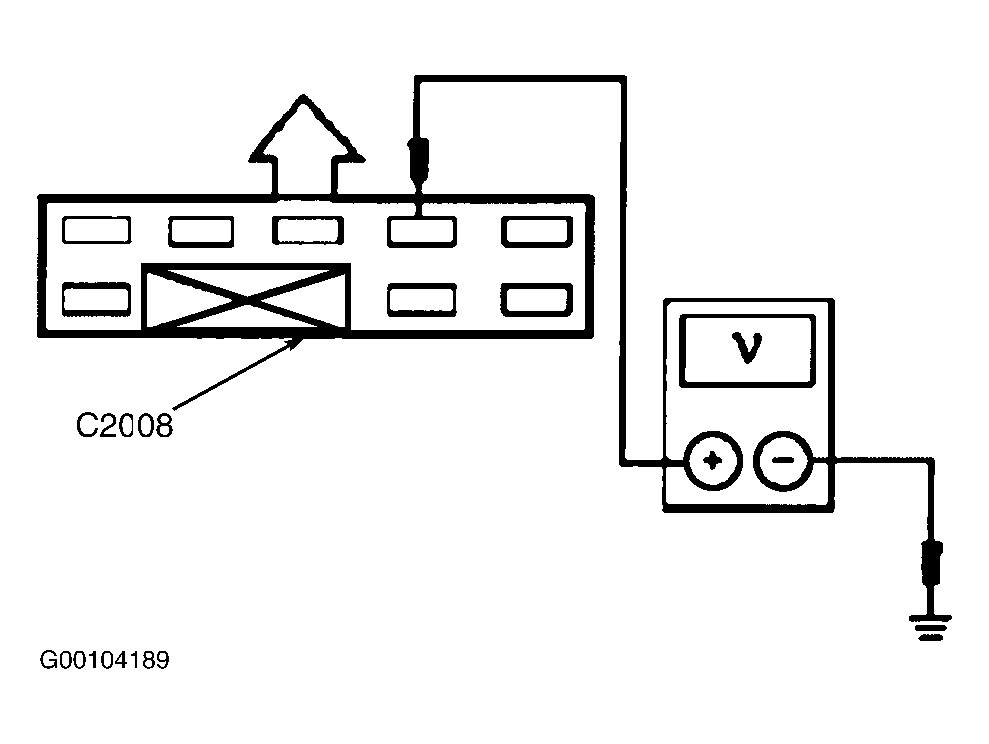
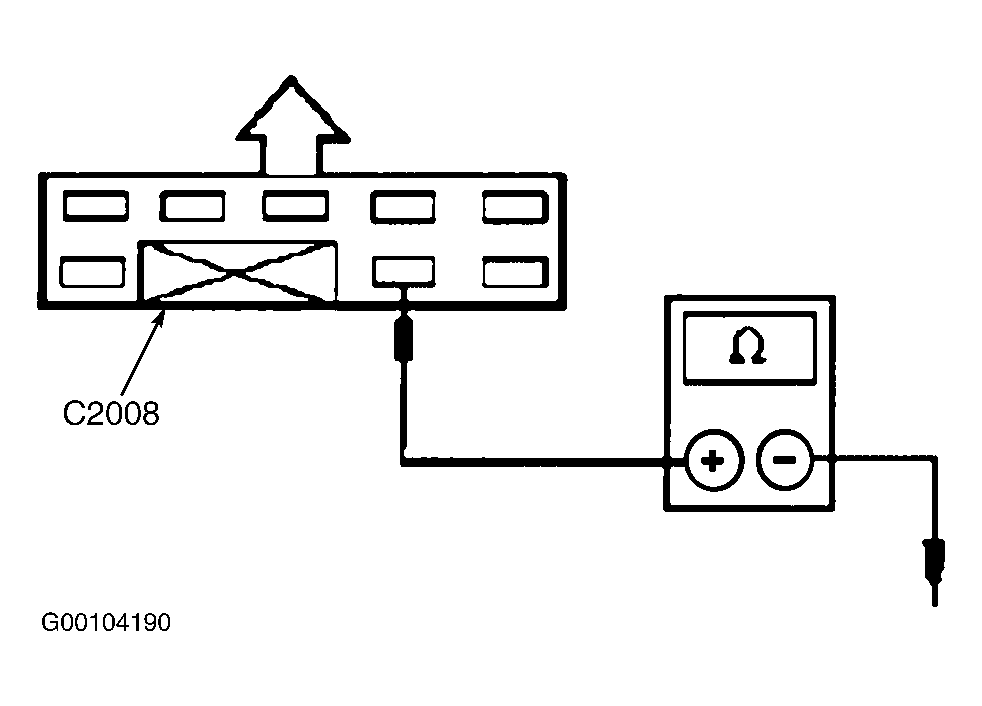
- Turn ignition switch to OFF position. Connect instrument cluster harness connector C220B. Disconnect shift interlock actuator/module harness connector C2008. Turn ignition switch to ON position. Measure the voltage between shift interlock actuator/module harness connector C2008 terminal No. 7 and ground. See Fig 7. Is the voltage greater than 10 volts? If so, go to step 14. If not, go to next step.
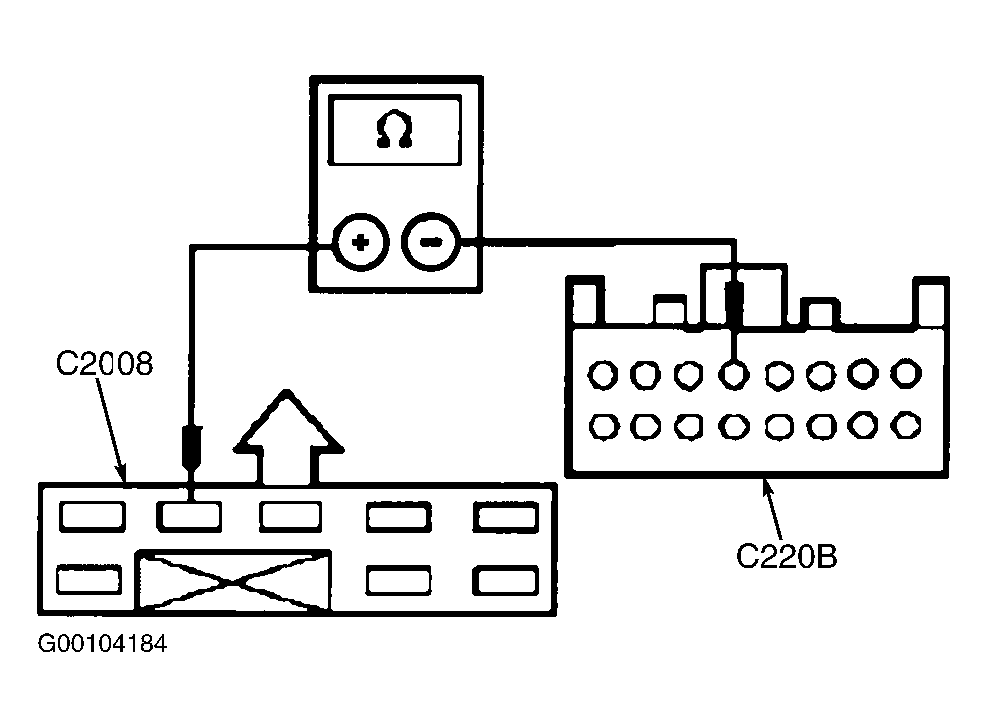
- Turn ignition switch to OFF position. Disconnect instrument cluster harness connector C220B. Measure the resistance between shift interlock actuator/module harness connector C2008 terminal No. 7 and instrument cluster harness connector C220B terminal No. 5. See Fig 8. Is the resistance less than 5 ohms? If so, replace instrument cluster. See appropriate INSTRUMENT PANELS article in ACCESSORIES & EQUIPMENT. After repairs, test the system for normal operation. If not, repair open in Light/Blue wire between shift interlock actuator/module and instrument cluster and test the system for normal operation.
- Measure the resistance between shift interlock actuator/module C2008 terminals No. 3 and 7 (component side) while selecting each gearshift position. See Fig 9. Is the resistance greater than 10 k/ohms while in the Park position, and less than 5 ohms while in any other selected gearshift position? If so, go to next step. If not, replace shift interlock actuator/module. See SHIFT INTERLOCK ACTUATOR under REMOVAL & INSTALLATION. After repairs, test the system for normal operation.
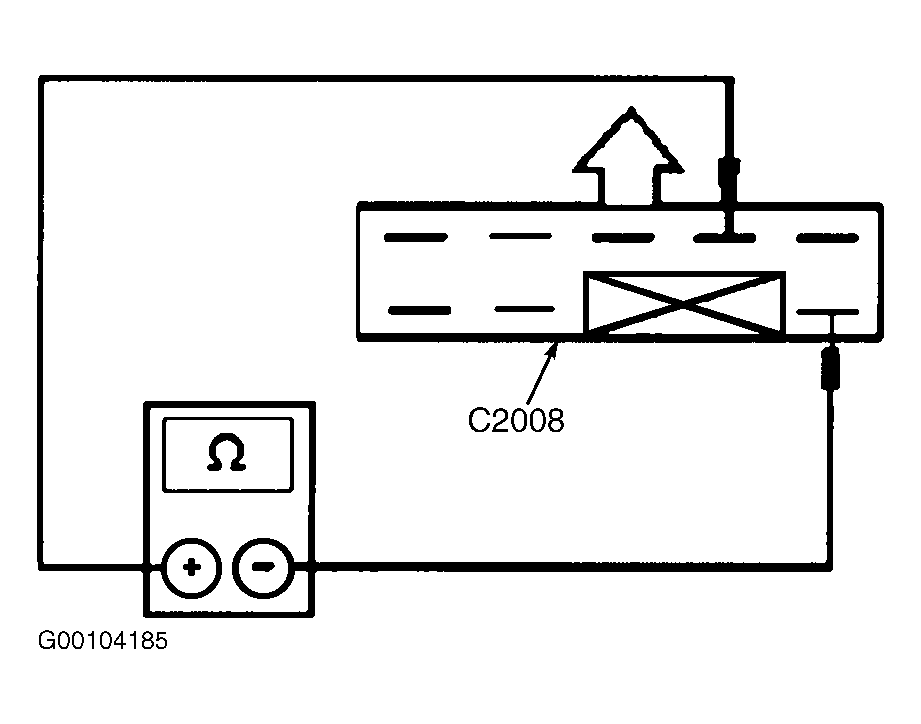
- Measure the resistance between shift interlock actuator/module harness connector C2008 terminal No. 3 and ground. See Fig 10. Is the resistance less than 5 ohms? If so, go to next step. If not, repair open in shift interlock actuator/module ground circuit and test the system for normal operation.
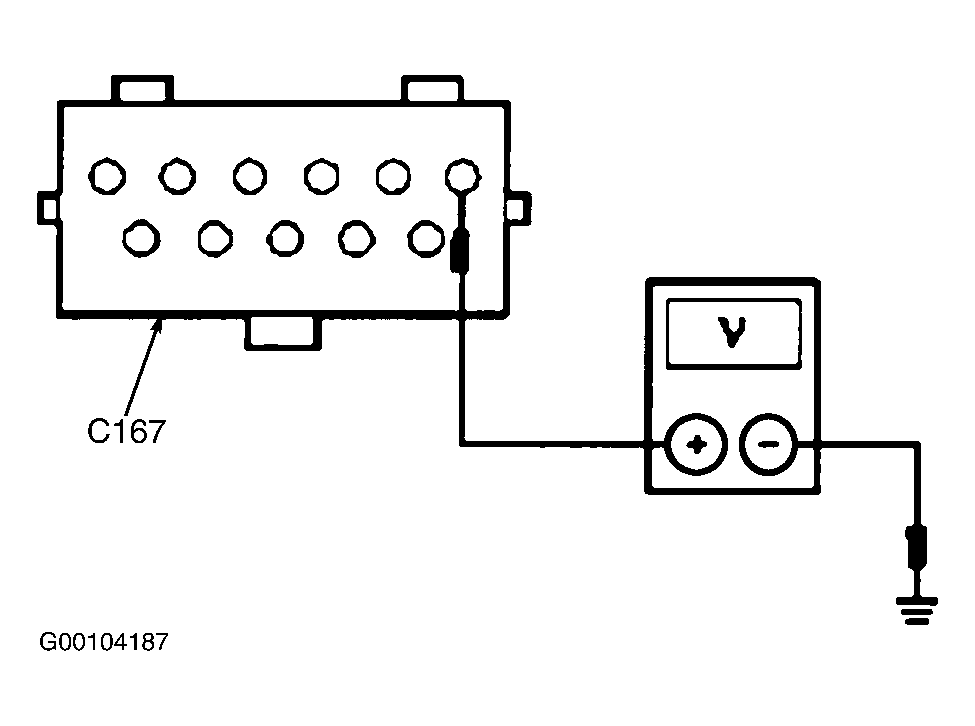
- Turn ignition switch to OFF position. Connect shift interlock actuator/module harness connector. Disconnect Transmission Range (TR) sensor harness connector C167. Turn ignition switch to ON position. Measure the voltage between TR sensor harness connector C167 terminal No. 11 and ground. See Fig 11. Is the voltage greater than 10 volts? If so, go to next step. If not, repair open in ignition feed circuit and test the system for normal operation.
- Ensure gearshift lever is in Park position. Measure the resistance between TR sensor C167 terminals No. 1 and 11 (component side). Is the resistance less than 5 ohms? If so, go to next step. If not, replace TR sensor. See TRANSMISSION RANGE SENSOR under REMOVAL & INSTALLATION. After repairs, test the system for normal operation.
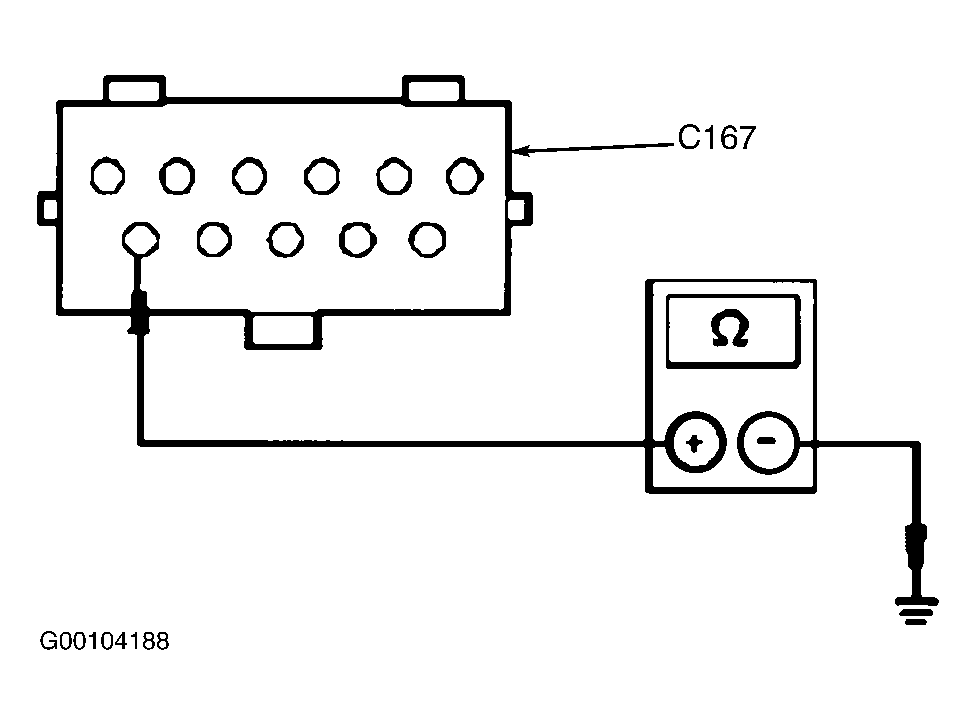
- Measure the resistance between TR sensor harness connector C167 terminal No. 1 and ground. See Fig 12. Is the resistance less than 5 ohms? If so, go to next step. If not, repair open in ground circuit and test the system for normal operation.
- Turn ignition switch to OFF position. Connect TR sensor harness connector C167. Disconnect shift interlock actuator/module harness connector C2008. Turn ignition switch to ON position. Measure the voltage between shift interlock actuator/module harness connector C2008 terminal No. 5 and ground. See Fig 13. Is the voltage greater than 10 volts? If so, go to next step. If not, repair open in Red wire between shift interlock actuator/module and shift interlock actuator relay. After repairs, test the system for normal operation.
- Turn ignition switch to OFF position. Measure the resistance between shift interlock actuator/module harness connector C2008 terminal No. 2 and ground. See Fig 14. Is the resistance less than 5 ohms? If so, replace shift interlock actuator/module. See SHIFT INTERLOCK ACTUATOR under REMOVAL & INSTALLATION. After repairs, test the system for normal operation. If not, repair open in shift lock solenoid ground circuit and test the system for normal operation.
 Courtesy of FORD MOTOR CO.
 Courtesy of FORD MOTOR CO.
 Courtesy of FORD MOTOR CO.
 Courtesy of FORD MOTOR CO.
 Courtesy of FORD MOTOR CO.
 Courtesy of FORD MOTOR CO.
 Courtesy of FORD MOTOR CO.
 Courtesy of FORD MOTOR CO.
 Courtesy of FORD MOTOR CO.
 Courtesy of FORD MOTOR CO.
 Courtesy of FORD MOTOR CO.
 Courtesy of FORD MOTOR CO.
 Courtesy of FORD MOTOR CO.
 Courtesy of FORD MOTOR CO.