Diagnostic Procedure
- Apply the brake pedal and view brakelights. Do the brakelights illuminate? If so, go to step 7. If not, go to next step.
- Ensure ignition switch is in OFF position. Measure resistance in fuse No. 15 (5-amp). Is the resistance 5 ohms or less? If so, go to step 4. If not, go to next step.
- Disconnect Brake Pedal Position (BPP) switch harness connector. Measure the resistance between BPP switch harness connector terminal No. 3 and ground. Is the resistance 10 k/ohms or less? If so, repair short to ground in White/Yellow wire and test the system for normal operation. If not, go to next step.
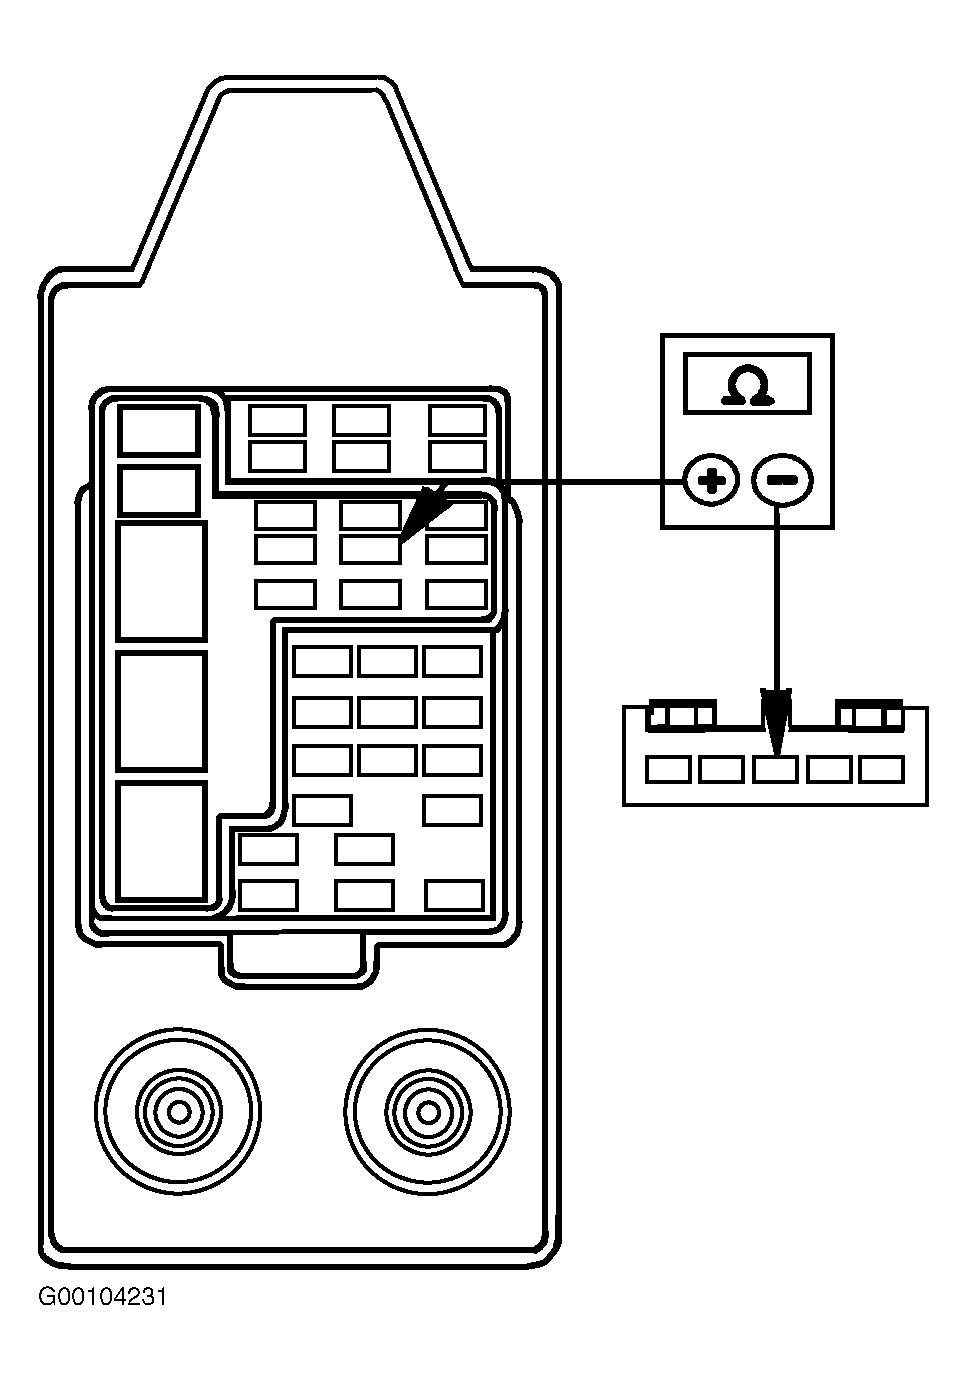
- Measure the resistance between output side of fuse No. 15 (5-amp) and the BPP switch harness connector terminal No. 3. See Fig 1. Is the resistance 5 ohms or less? If so, go to next step. If not, repair open in White/Yellow wire and test the system for normal operation.
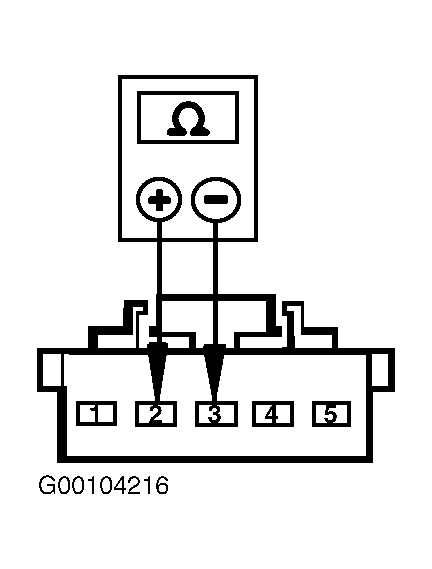
- Measure the resistance of the BPP switch while open (OFF) and closed (ON). See Fig 3. Is the resistance of switch greater than 10 k/ohms while OFF, and 5 ohms or less while ON? If so, go to next step. If not, replace BPP switch. See BRAKE PEDAL POSITION SWITCH under REMOVAL & INSTALLATION. After repairs, test the system for normal operation.
- Measure the resistance between BPP switch harness connector terminal No. 1 and ground. See Figure. Is the resistance 10 k/ohms or less? If so, repair short to ground in Red/Light Green wire and test the system for normal operation. If not, go to next step.
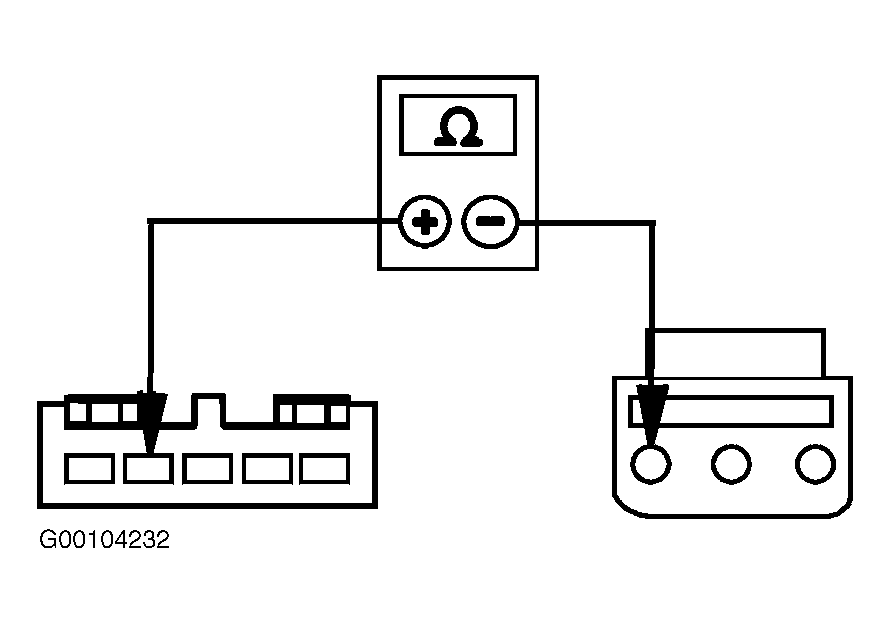
- Measure the resistance between the shift interlock actuator harness connector terminal No. 1 and the BPP switch harness connector terminal No. 2. See Fig 2. Is the resistance 5 ohms or less? If so, go to next step. If not, repair open in Red/Light Green wire and test the system for normal operation.
- Measure the voltage between shift interlock actuator harness connector terminal No. 3 and ground. See Figure. Does battery voltage exist? If so, go to step 12. If not, go to next step.
- Measure resistance in fuse No. 6 (5-amp). Is the resistance 5 ohms or less? If so, go to step 11. If not, go to next step.
- Measure the resistance between shift interlock actuator harness connector terminal No. 3 and ground. See Figure. Is the resistance 10 k/ohms or less? If so, repair short to ground in Gray/Yellow wire and test the system for normal operation. If not, go to next step.
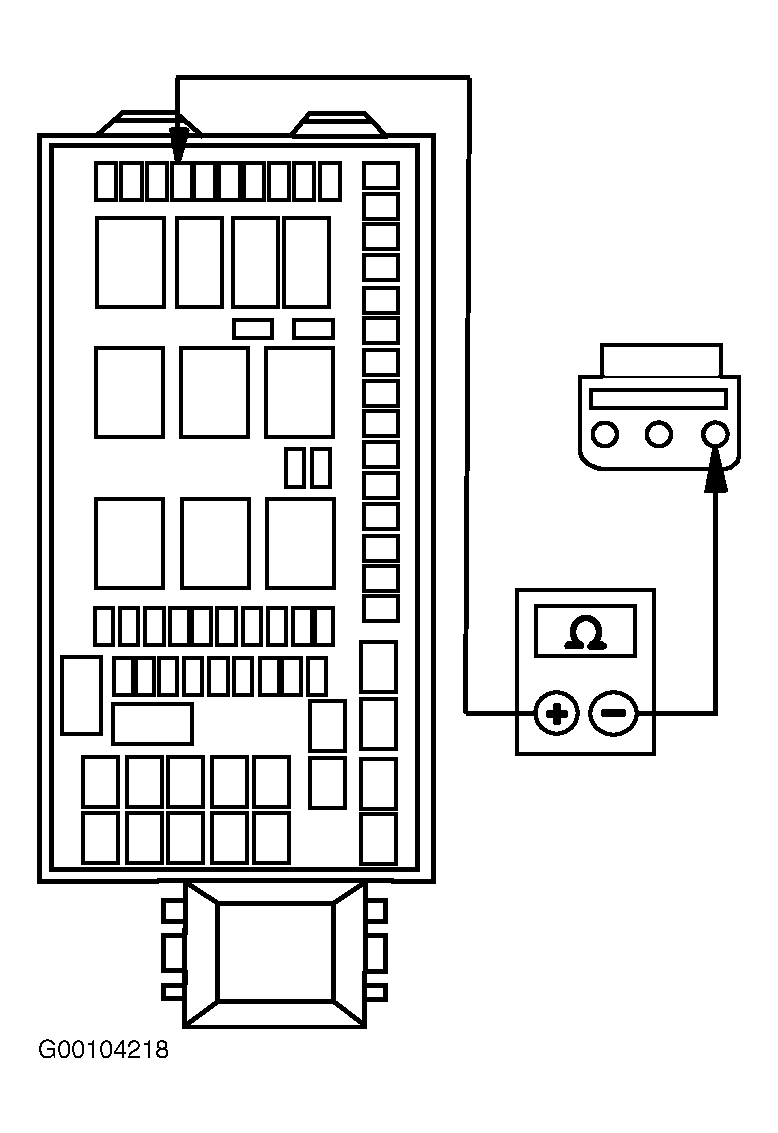
- Measure the resistance between output side of fuse No. 6 (5-amp) and the shift interlock actuator harness connector terminal No. 3. See Fig 4. Is the resistance 5 ohms or less? If so, go to next step. If not, repair open in Gray/Yellow wire and test the system for normal operation.
- Measure the resistance between the shift interlock actuator harness connector terminal No. 2 and ground. See Figure. Is the resistance 5 ohms or less? If so, replace shift interlock actuator and test the system for normal operation. See SHIFT INTERLOCK ACTUATOR under REMOVAL & INSTALLATION. If not, repair open in Black wire and test the system for normal operation.
 Courtesy of FORD MOTOR CO.
 Courtesy of FORD MOTOR CO.
 Courtesy of FORD MOTOR CO.
 Courtesy of FORD MOTOR CO.