Selector Lever Assembly: Removal
NOTE:
Removal steps in this procedure may contain installation details.
- 1.
NOTE:
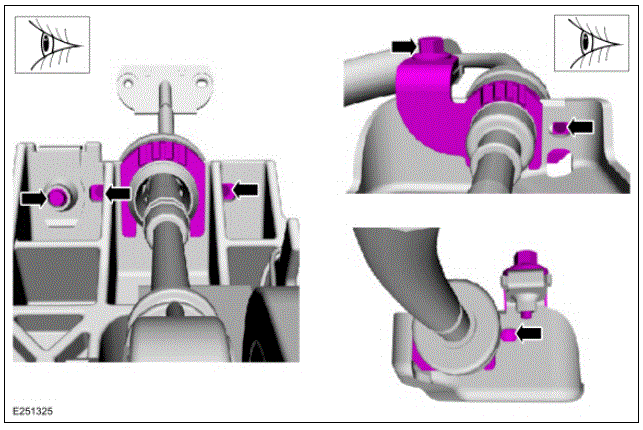
6F35
Prior to replacing the selector lever assembly for a no start or high shift effort concern, verify the selector lever cable to bracket clip is fully seated at the transmission and selector lever assembly. Unseated cables can cause selector lever cable binding and prevent the manual shaft from completely returning to the P position.
Torque: 62 lb.in (7 Nm)
 Courtesy of FORD MOTOR CO. Courtesy of FORD MOTOR CO.
|
- 2.
NOTE:
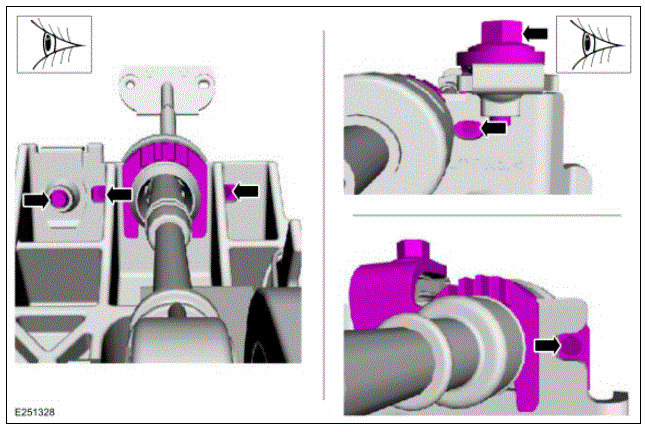
6F50/6F55
Prior to replacing the selector lever assembly for a no start or high shift effort concern, verify the selector lever cable to bracket clip is fully seated at the transmission and selector lever assembly. Unseated cables can cause selector lever cable binding and prevent the manual shaft from completely returning to the P position.
Torque: 62 lb.in (7 Nm)
 Courtesy of FORD MOTOR CO. Courtesy of FORD MOTOR CO.
|
- 3.
Apply the parking brake.
 Courtesy of FORD MOTOR COMPANY Courtesy of FORD MOTOR COMPANY
|
- 4.
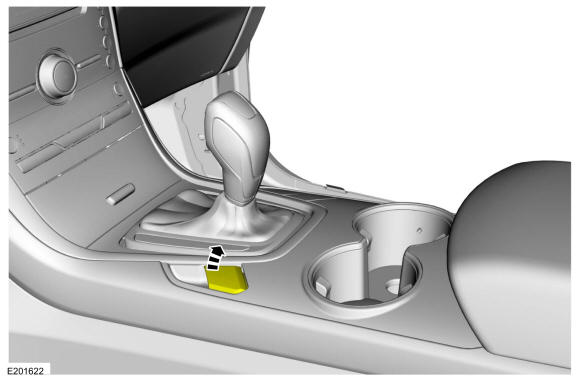
Open the floor console stowage bin lid.
 Courtesy of FORD MOTOR COMPANY Courtesy of FORD MOTOR COMPANY
|
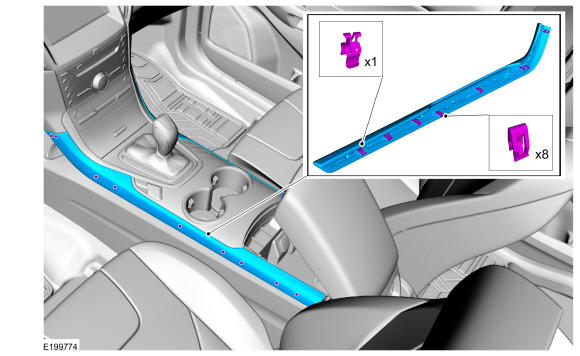
- 5.
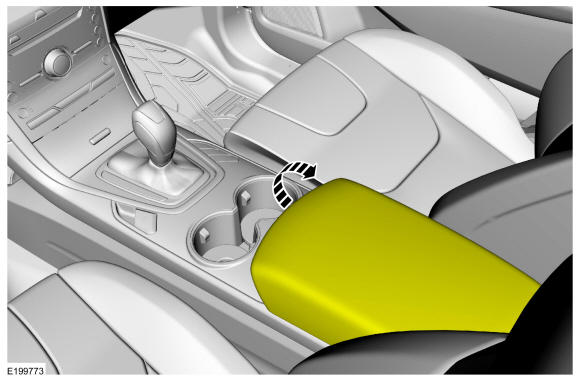
On both sides. Detach the clips and remove the floor console upper finish panels.
 Courtesy of FORD MOTOR COMPANY Courtesy of FORD MOTOR COMPANY
|
- 6.
Detach the clips and remove the lower center stack finish panel.
 Courtesy of FORD MOTOR COMPANY Courtesy of FORD MOTOR COMPANY
|
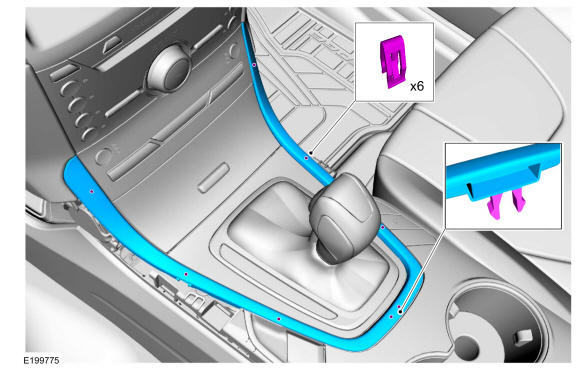
- 7.
Detach the clips, disconnect the electrical connectors and remove the floor console upper trim panel.
 Courtesy of FORD MOTOR COMPANY Courtesy of FORD MOTOR COMPANY
|
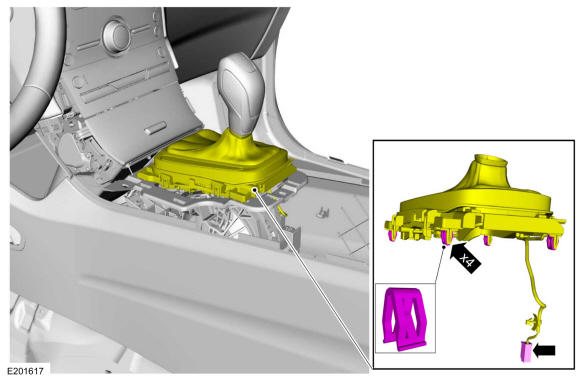
- 8.
Release the clips, lift the selector lever bezel up and disconnect the electrical connector.
 Courtesy of FORD MOTOR COMPANY Courtesy of FORD MOTOR COMPANY
|
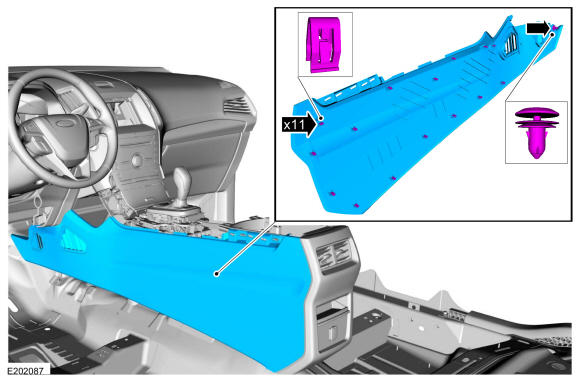
- 9.
On both sides. Release the clips, remove the LH and the RH lower floor console side trim panels.
 Courtesy of FORD MOTOR COMPANY Courtesy of FORD MOTOR COMPANY
|
- 10.
Remove the bolts and the media hub bin.
 Courtesy of FORD MOTOR COMPANY Courtesy of FORD MOTOR COMPANY
|
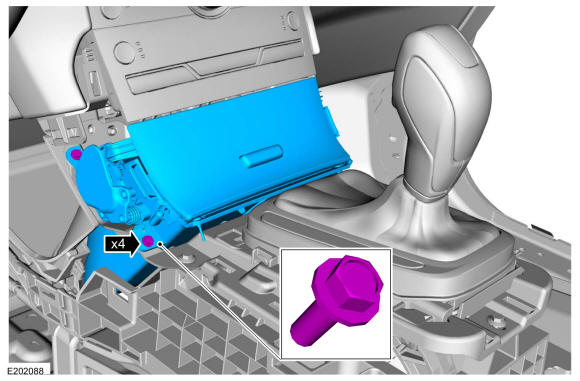
- 11.
Remove the bolts and the floor console support bracket.Torque: 22 lb.in (2.5 Nm)
 Courtesy of FORD MOTOR COMPANY Courtesy of FORD MOTOR COMPANY
|
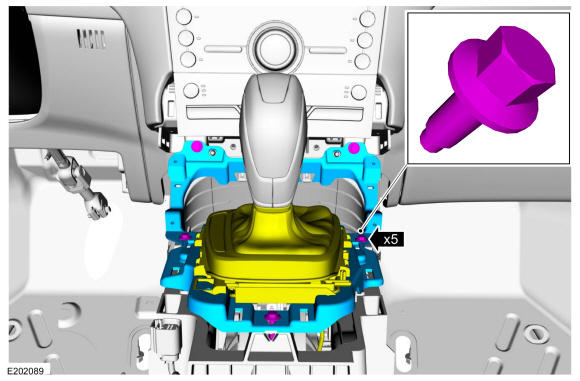
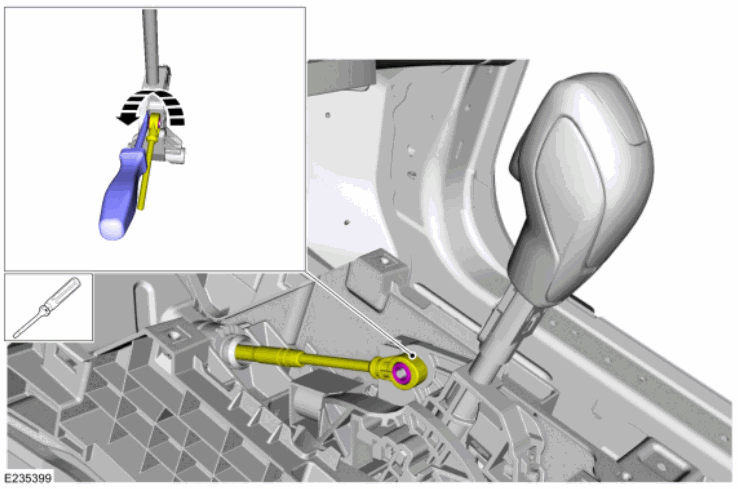
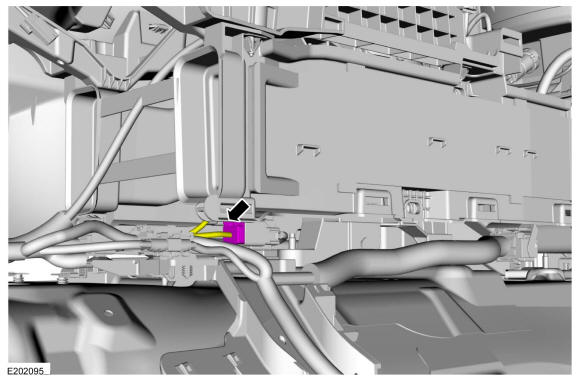
- 12.
NOTE:
Do not pull or pry on the selector lever cable or the selector lever cable end may be damaged. Use a screwdriver and turn the screwdriver as shown in illustration to pry the cable end off the post as close to the post as possible.
Using a screwdriver, pry the selector lever cable end from the selector lever.
 Courtesy of FORD MOTOR COMPANY Courtesy of FORD MOTOR COMPANY
|
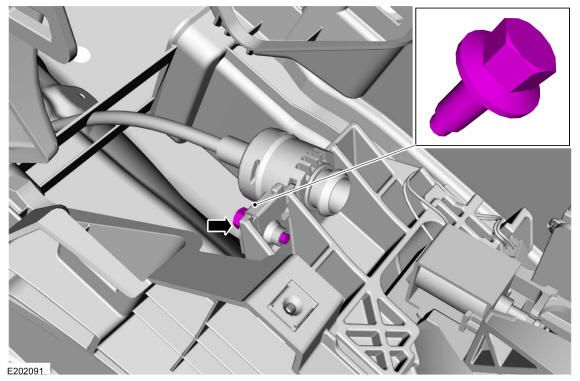
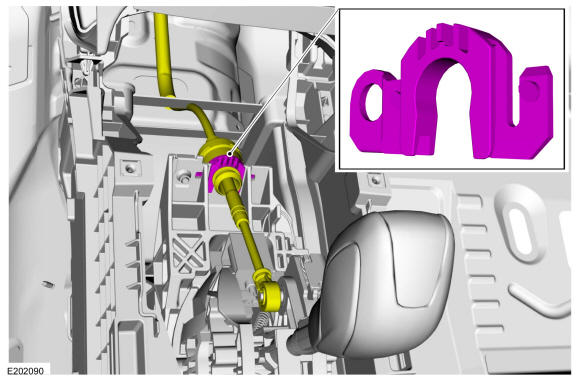
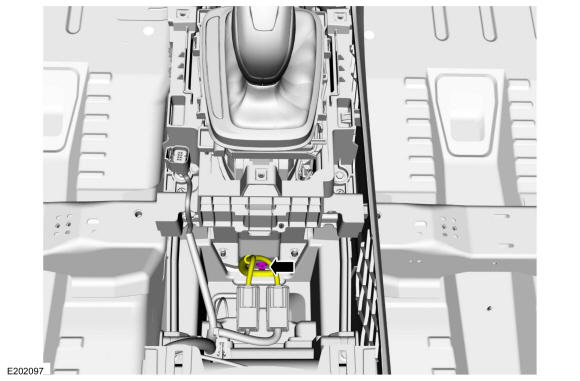
- 13.
Remove the selector lever cable retainer.
 Courtesy of FORD MOTOR COMPANY Courtesy of FORD MOTOR COMPANY
|
- 14.
Disconnect the selector lever cable retainer from the bracket.
 Courtesy of FORD MOTOR COMPANY Courtesy of FORD MOTOR COMPANY
|
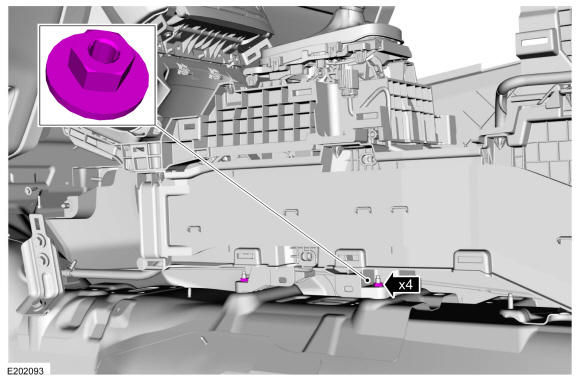
- 15.
Remove the nuts.Torque: 80 lb.in (9 Nm)
 Courtesy of FORD MOTOR COMPANY Courtesy of FORD MOTOR COMPANY
|
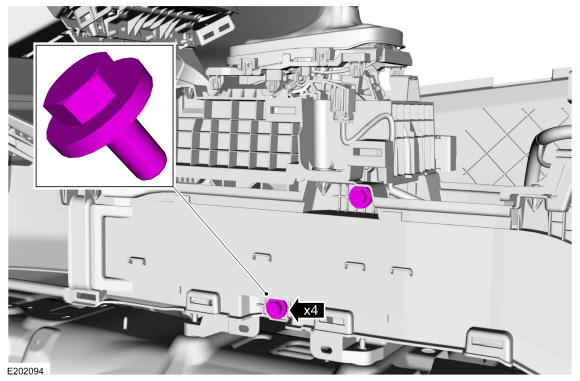
- 16.
Remove the bolts.Torque: 71 lb.in (8 Nm)
 Courtesy of FORD MOTOR COMPANY Courtesy of FORD MOTOR COMPANY
|
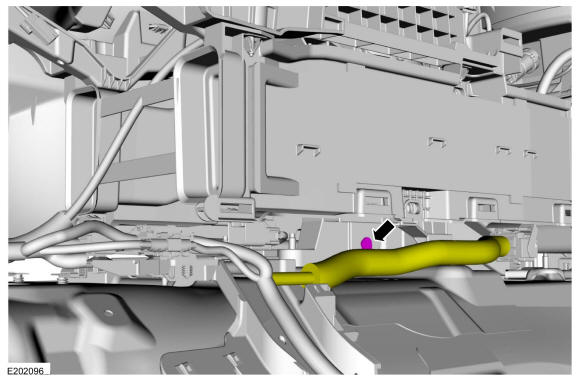
- 17.
Remove the wiring retainer.
 Courtesy of FORD MOTOR COMPANY Courtesy of FORD MOTOR COMPANY
|
- 18.
Disconnect the electrical connector.
 Courtesy of FORD MOTOR COMPANY Courtesy of FORD MOTOR COMPANY
|
- 19.
Remove the wiring retainer and position aside the wiring harness.
 Courtesy of FORD MOTOR COMPANY Courtesy of FORD MOTOR COMPANY
|
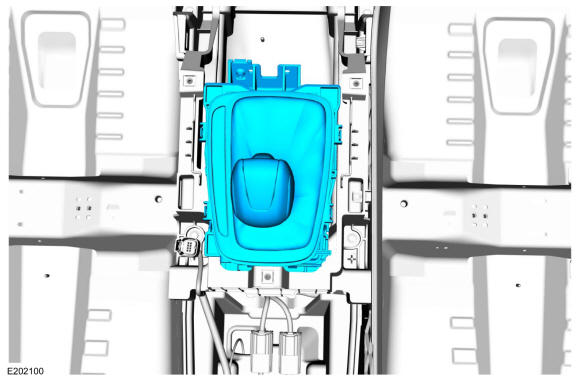
- 20.
Remove the selector lever assembly.
 Courtesy of FORD MOTOR COMPANY Courtesy of FORD MOTOR COMPANY
|