-
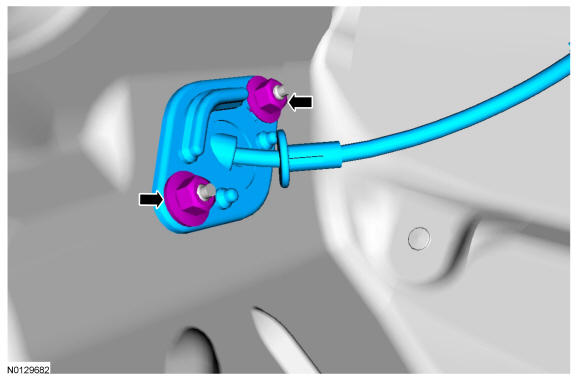
- Tighten to 7 Nm (62 lb-in).
 Courtesy of FORD MOTOR COMPANY Courtesy of FORD MOTOR COMPANY
|
-
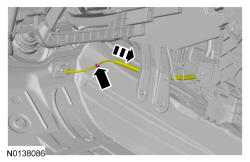
NOTE:
Route the selector lever cable under the heater housing as noted during removal.
 Courtesy of FORD MOTOR COMPANY Courtesy of FORD MOTOR COMPANY
|
 Courtesy of FORD MOTOR COMPANY Courtesy of FORD MOTOR COMPANY
|
-
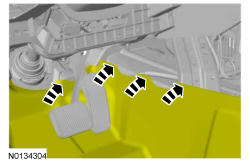
NOTE:
When installing the selector lever cable, make sure the selector lever cable locking tabs are locked in place. Press the selector lever cable into the selector lever housing and listen for the selector lever cable retainer to click in place. Pull back on the selector lever cable to make sure the selector lever is locked into the selector lever housing.
 Courtesy of FORD MOTOR COMPANY Courtesy of FORD MOTOR COMPANY
|
 Courtesy of FORD MOTOR COMPANY Courtesy of FORD MOTOR COMPANY
|
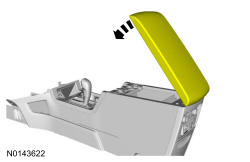
-
NOTE:
Failure to use a piece of cardboard between the LH center console lower trim panel and the center console can result in damage to the side of the center console.
 Courtesy of FORD MOTOR COMPANY Courtesy of FORD MOTOR COMPANY
|
 Courtesy of FORD MOTOR COMPANY Courtesy of FORD MOTOR COMPANY
|
 Courtesy of FORD MOTOR COMPANY Courtesy of FORD MOTOR COMPANY
|
- Place the selector lever in DRIVE.
 Courtesy of FORD MOTOR COMPANY Courtesy of FORD MOTOR COMPANY
|
-
NOTE:
To prevent selector lever cable damage, do not apply force to the selector lever cable between the manual control lever and the selector lever cable bracket.
NOTE:
When installing the selector lever cable, make sure the selector lever cable locking tabs are locked in place. Press the selector lever cable into the selector lever cable bracket and listen for the selector lever cable retainer to click in place. Pull back on the selector lever cable to make sure the selector lever is locked into the selector lever cable bracket.
 Courtesy of FORD MOTOR COMPANY Courtesy of FORD MOTOR COMPANY
|
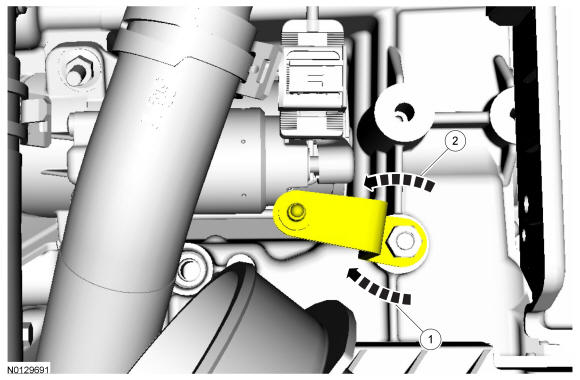
-
- Rotate the manual control lever clockwise until it stops.
- Rotate the manual control lever counterclockwise one detent.
 Courtesy of FORD MOTOR COMPANY Courtesy of FORD MOTOR COMPANY
|
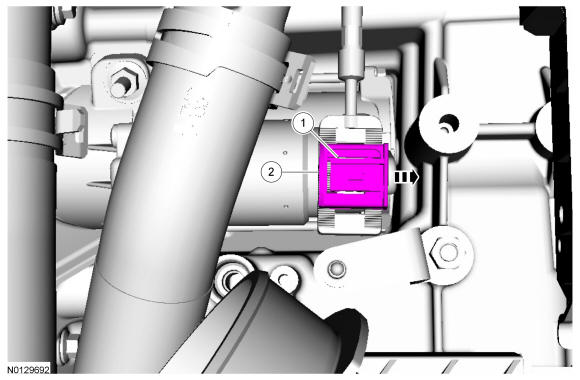
-
- Gently pry the latch up.
- Push the lock tab to slide it over.
 Courtesy of FORD MOTOR COMPANY Courtesy of FORD MOTOR COMPANY
|
 Courtesy of FORD MOTOR COMPANY Courtesy of FORD MOTOR COMPANY
|
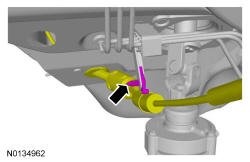
-
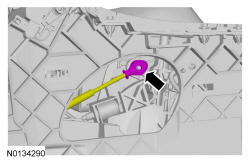
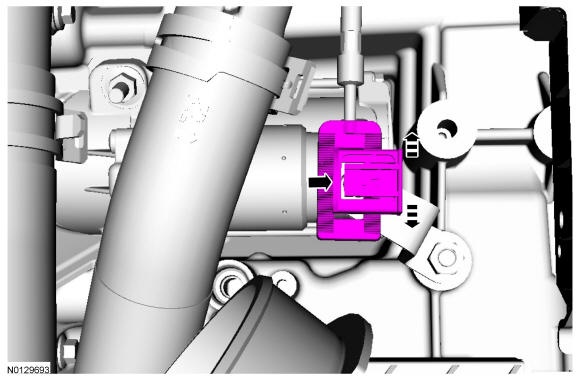
NOTE:
To prevent selector lever cable damage, do not apply force to the selector lever cable between the manual control lever and the selector lever cable bracket.
NOTE:
Make sure the selector lever cable end is correctly installed onto the manual control lever ball stud by pulling back on the selector lever cable end.
 Courtesy of FORD MOTOR COMPANY Courtesy of FORD MOTOR COMPANY
|
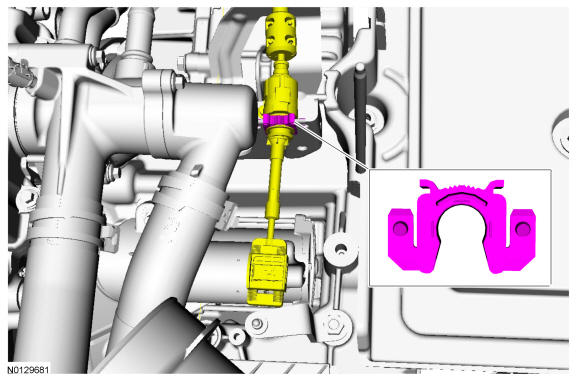
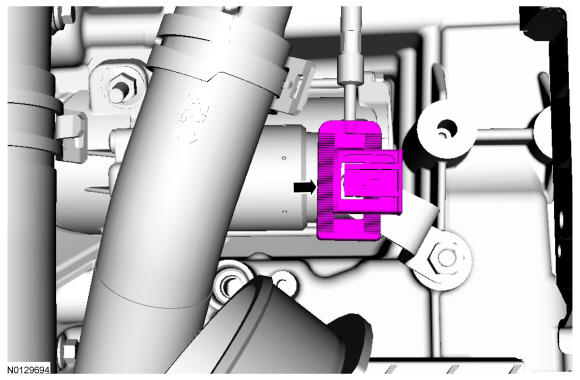
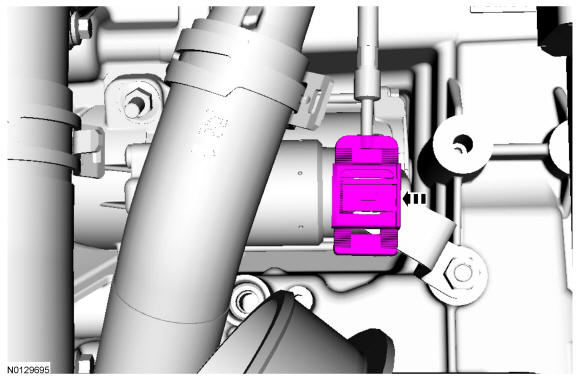
-
NOTE:
After locking the adjuster, pull back on the adjuster to make sure it is securely installed.
 Courtesy of FORD MOTOR COMPANY Courtesy of FORD MOTOR COMPANY
|
- Install the ACL and outlet pipe. Refer to INTAKE AIR DISTRIBUTION AND FILTERING
.
- Verify the vehicle starts in PARK and NEUTRAL only and the reverse lamps illuminate in REVERSE.