Draining & Refilling
- Remove drain plug to drain fluid. See Fig 1.
- If transmission oil filter is to be changed, remove oil pan using the following steps:
- Remove 19 bolts.
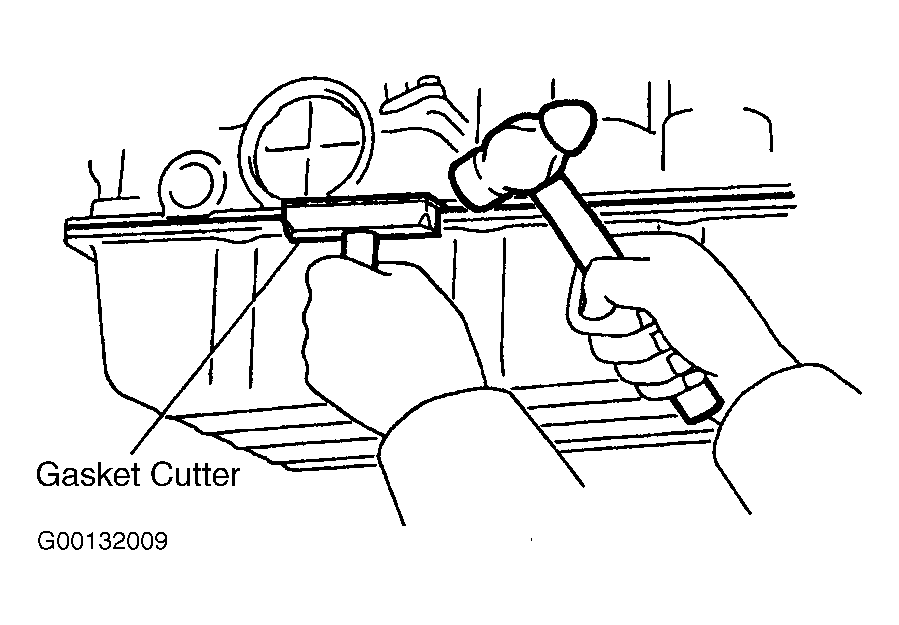
- Install gasket cutter in space between pan and transmission body and carefully cut old sealer around entire surface of pan. See Fig 2.
- Remove oil filter using the following steps:
- Remove 4 bolts and oil filter. See Fig 3.
- Remove 3 gaskets.
- Clean transmission oil pan.
- Remove magnets from oil pan and use them to collect any steel chips. Look carefully at chips and particles in pan and on magnet to anticipate the type of wear you will find in transmission. Steel is magnetic and typically results from bearing, gear and clutch plate wear. Brass is non-magnetic and typically results from bushing wear. Remove and clean the magnet in the pan of all metal particles.
- Install oil filter with 3 new gaskets and 4 bolts. See Fig 3.
- Install transmission oil pan using the following steps:
- Install 3 magnets in oil pan.
- Remove any packing material and be careful not to drop oil on contacting surfaces of transmission case and oil pan.
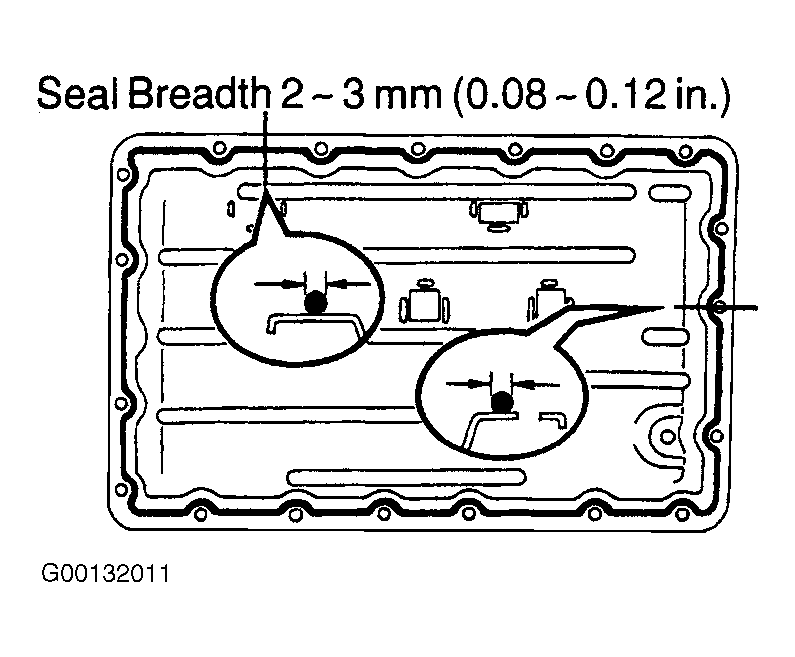
- Apply appropriate sealant to oil pan. See Fig 4.
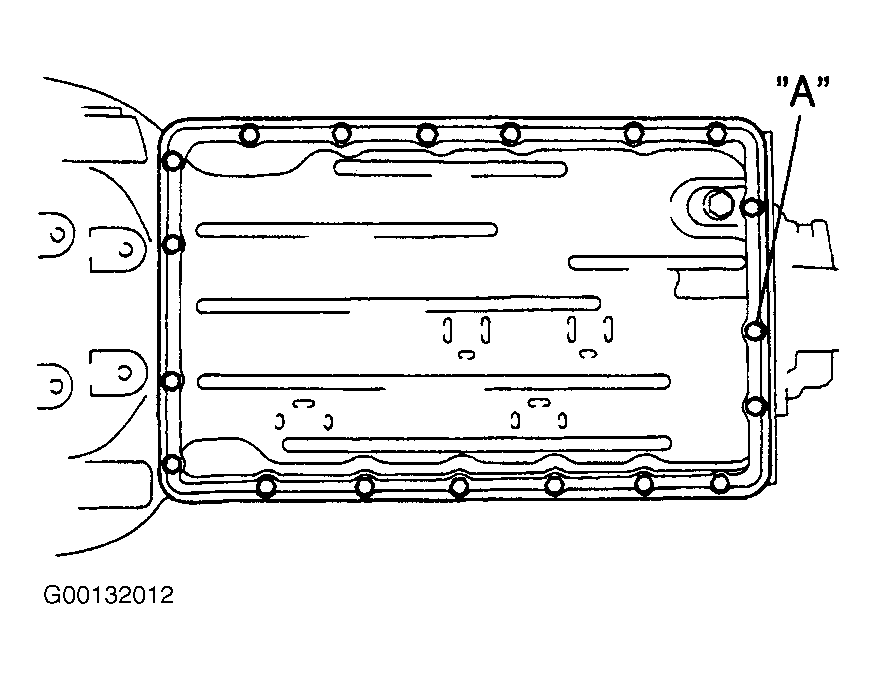
- Replace bolt "A" only. See Fig 1. Tighten bolts to specification.
- Install drain plug and new gasket. Tighten to specification. See TORQUE SPECIFICATIONS .
- With engine off, add new fluid through oil filler tube.
- Start engine and move gearshift lever through all positions. Place gearshift lever back into Park. Check fluid level. Add fluid to bring level up to COOL mark on dipstick.
- Recheck fluid level when engine and transmission reaches operating temperature of 158-176°F (70-80°C). Add fluid up to HOT mark on dipstick. See FLUID CAPACITIES .
 Courtesy of © TOYOTA, LICENSE AGREEMENT TMS1002
 Courtesy of © TOYOTA, LICENSE AGREEMENT TMS1002
 Courtesy of © TOYOTA, LICENSE AGREEMENT TMS1002
 Courtesy of © TOYOTA, LICENSE AGREEMENT TMS1002