Shift Lever: Reassembly: Reassembly
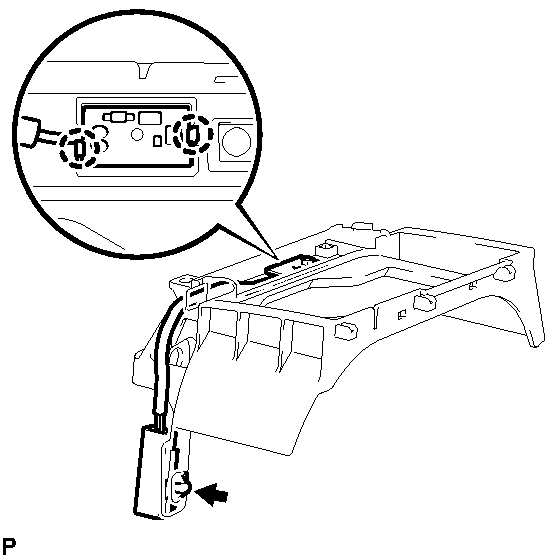
- INSTALL INDICATOR LIGHT WIRE SUB-ASSEMBLY
- Attach the 2 claws to install the wire to the control position indicator plate and connect the connector clamp.
 Courtesy of © TOYOTA, LICENSE AGREEMENT TMS1002
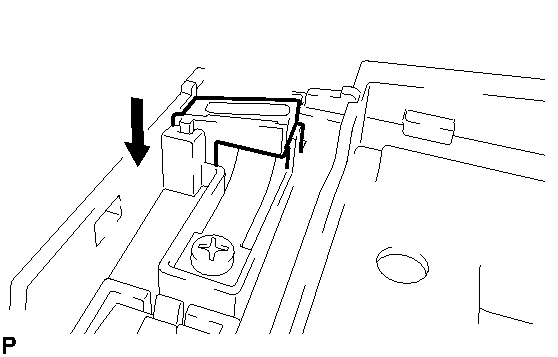
- INSTALL SHIFT LOCK RELEASE BUTTON
- Attach the claw to install the button.
 Courtesy of © TOYOTA, LICENSE AGREEMENT TMS1002
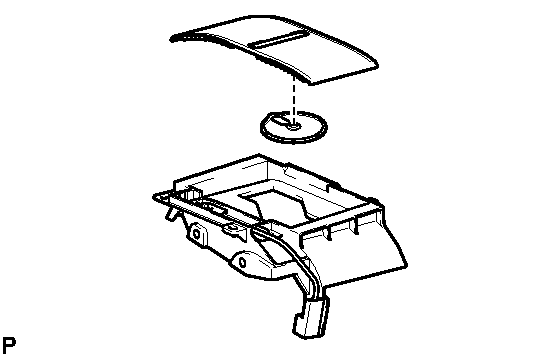
- INSTALL POSITION INDICATOR SLIDE COVER
- Install the No. 2 slide cover to the slide cover.
 Courtesy of © TOYOTA, LICENSE AGREEMENT TMS1002
- Install the slide cover to the shift position indicator.
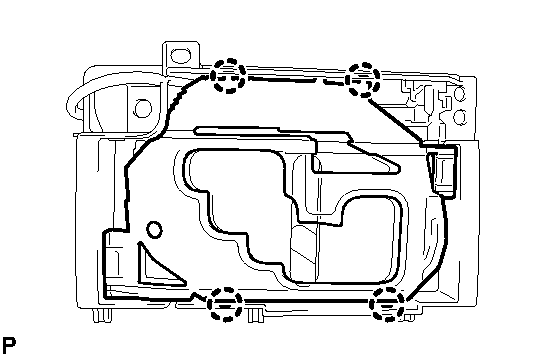
- INSTALL POSITION INDICATOR LENS
- Attach the 4 claws to install the lens to the shift position indicator.
 Courtesy of © TOYOTA, LICENSE AGREEMENT TMS1002
- INSTALL SHIFT LEVER CAP
- Attach the 2 claws to install the cap.
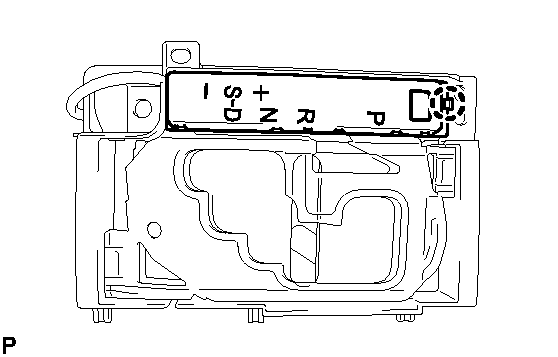
- INSTALL CONTROL POSITION INDICATOR PLATE
- Attach the claw to install the indicator plate.
 Courtesy of © TOYOTA, LICENSE AGREEMENT TMS1002
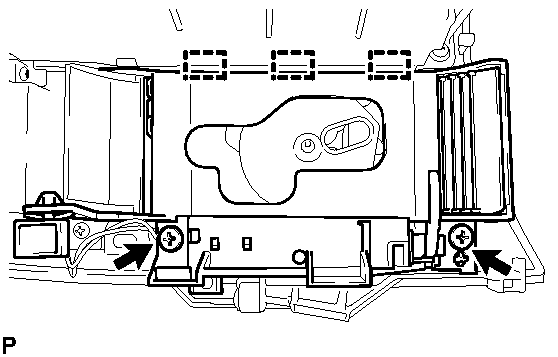
- INSTALL SHIFT POSITION INDICATOR
- Attach the 3 hooks and then install the shift position indicator to the rear console upper panel with the 2 screws.
 Courtesy of © TOYOTA, LICENSE AGREEMENT TMS1002