Injector Base Removal/Installation
Injector Base Removal and Installation
Removal
1. Relieve the fuel pressure Service and Repair.
2. Remove the drive belt Service and Repair.
3. Remove the power steering (P/S) pump and the P/S hose bracket Cylinder Head Removal.
4. Remove the intake manifold Intake Manifold Removal/Installation.
5. Remove the injectors Service and Repair.
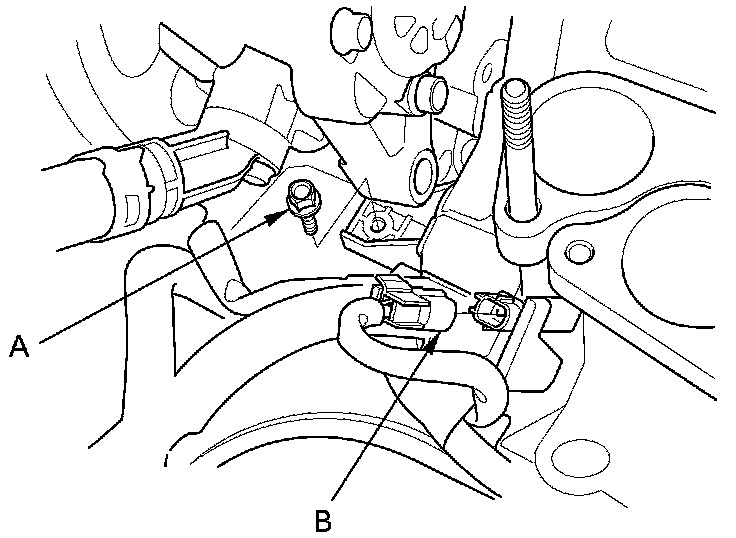
6. Remove the harness holder mounting bolt (A) and disconnect the knock sensor connector (B).
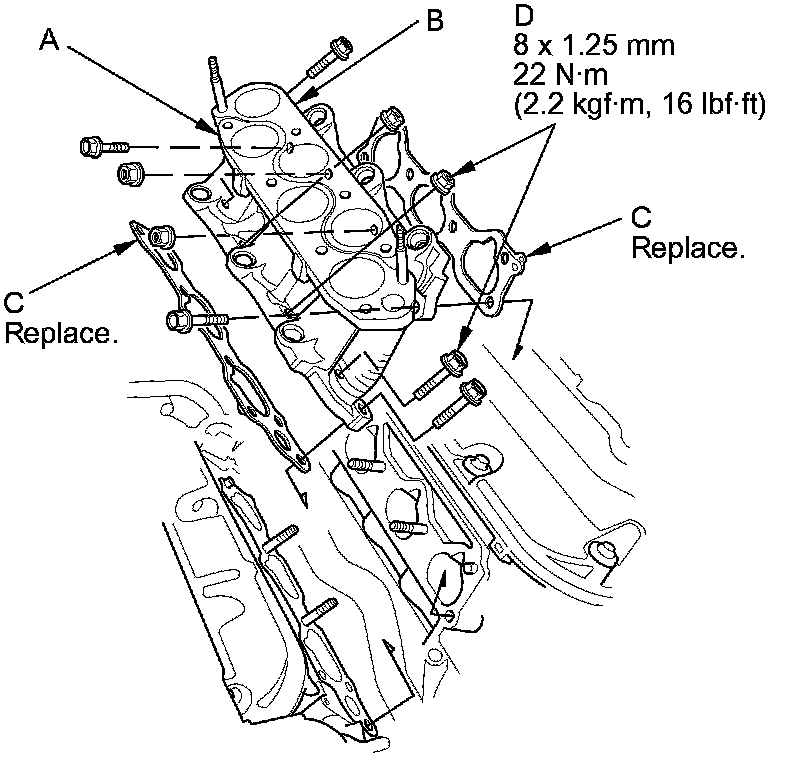
7. Remove the injector base mounting bolts/nuts (A), then remove the front injector base (B) and the rear injector base (C).

Installation
1. Install the front injector base (A) and the rear injector base (B) with new gaskets (C), and tighten the injector base mounting bolts/nuts (D) in a crisscross pattern in three steps, beginning with the inner nuts.
NOTE: The front injector base gasket is different from the rear one. Do not mix injector base gasket types.
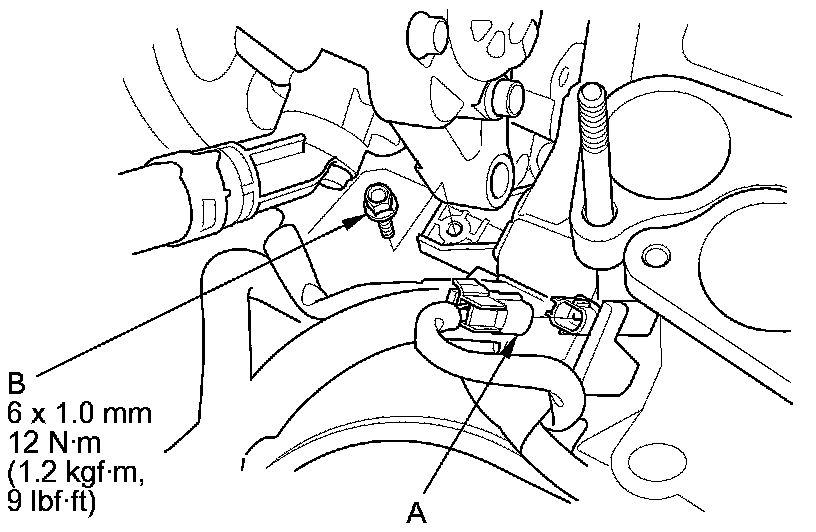
2. Connect the knock sensor connector (A) and install the harness holder mounting bolt (B).
3. Install the injectors Service and Repair.
4. Install the intake manifold Intake Manifold Removal/Installation.
5. Install the P/S pump and the P/S hose bracket Cylinder Head Installation.
6. Install the drive belt Service and Repair.
7. Inspect for fuel leaks. Turn the ignition switch to ON (II),or press the engine start/stop button to select the ON mode (do not operate the starter) so the fuel pump runs for about 2 seconds and pressurizes the fuel line. Repeat this operation three times, then check for fuel leakage at any point in the fuel line.