September 30: LEMON manuals is back up on a temporary server! Slowness is possible
Climate Control Switch Assembly Removal/Installation
- Remove the audio-HVAC display module assembly (see
AUDIO-HVAC DISPLAY MODULE ASSEMBLY REMOVAL/INSTALLATION
).
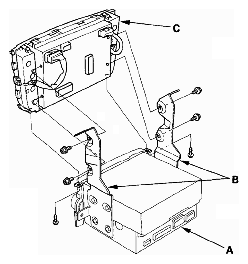
- Remove the self-tapping screws and the audio unit (A) and bracket (B) from the display panel control unit (C).
 Courtesy of AMERICAN HONDA MOTOR CO., INC.
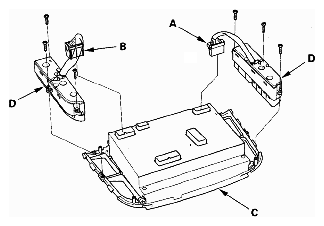
- Disconnect 10P connector (A) and 16P connector (B) from the display panel control unit (C). Remove the self-tapping screws and the climate control switch assemblies (D).
 Courtesy of AMERICAN HONDA MOTOR CO., INC.
- Install the control switch assembly in the reverse order of removal. After installation, operate the control switch assembly controls to see if they work properly.
- Run the self-diagnostic function to confirm that there are no problems in the system (see HOW TO RETRIEVE A DTC (WITHOUT HDS)
).