AcuraLink Control Unit-XM Receiver Removal/Installation (With AcuraLink (USA Models With Navigation))
AcuraLink Control Unit-XM Receiver Removal/Installation
With AcuraLink
SRS components are located in this area. Review the SRS component locations Locations, and the precautions and procedures Service and Repair before doing repairs or service.
1. Remove the center console Center Console Removal/Installation.
2. Remove the HandsFreeLink control unit Service and Repair.
3. Remove the audio-navigation unit Audio-Navigation Unit Removal/Installation.
4. Remove the bolts (A), and loosen the bolt (B).
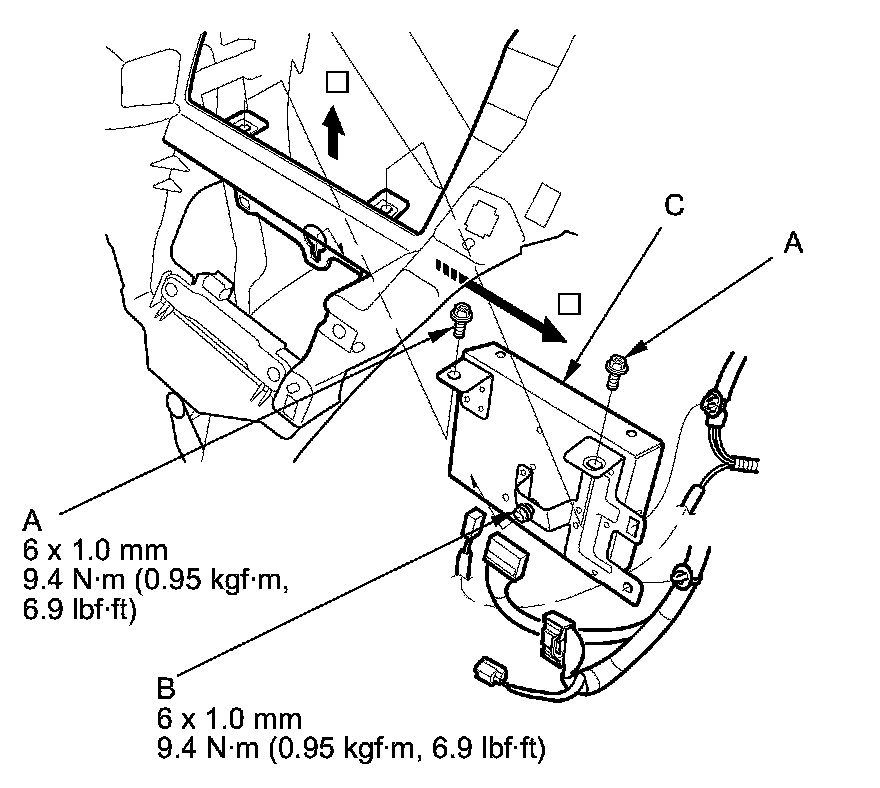
5. Pull the AcuraLink control unit (XM receiver) (C) out, then disconnect the connectors from the AcuraLink control unit (XM receiver), and detach the clips.
6. Install the AcuraLink control unit (XM receiver) in the reverse order of removal.
NOTE: If you replaced the AcuraLink control unit (XM receiver) make sure it has the latest software AcuraLink Control Unit Update (With AcuraLink (USA Models With Navigation)).
7. Call XM Satellite Radio to update the client's account with the new XM/HIP serial number. Also call Acura Client Services to reactivate the AcuraLink.