VTC Oil Control Solenoid Valve Removal/Test/Installation
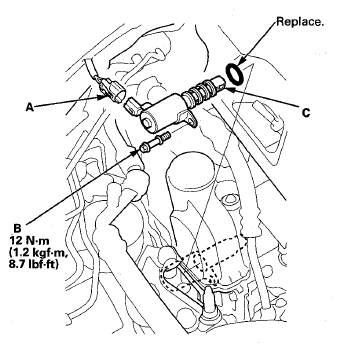
- Disconnect the VTC oil control solenoid valve 2P connector (A).
 Courtesy of AMERICAN HONDA MOTOR CO., INC.
- Remove the bolt (B) and the VTC oil control solenoid valve (C).
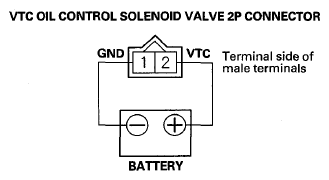
- Connect VTC oil control solenoid valve 2P connector terminal No. 2 to the battery positive terminal with a jumper wire. Connect VTC oil control solenoid valve 2P connector terminal No. 1 to the battery negative terminal with a jumper wire.
 Courtesy of AMERICAN HONDA MOTOR CO., INC.
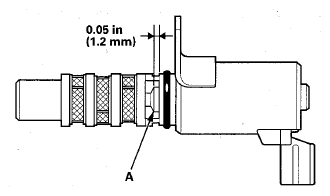
- Measure the clearance of the valve (A). The clearance should be at least 0.05 in (1.2 mm).
- If the clearance is as specified, the valve is OK, reinstall it with a new O-ring.
- If the clearance is not as specified, install a new valve and O-ring.
NOTE:
- Before you install the valve, make sure its mating surface to the cylinder head is clean and dry.
- Coat the O-ring with new engine oil before you install it.
- Do not install the valve while wearing cloth fibrous gloves. Be careful not to contaminate the cylinder head opening.
 Courtesy of AMERICAN HONDA MOTOR CO., INC.