Exhaust System: Installation
- While exhaust system is on the floor, apply a soapy solution to the following in order to ease the installation of hangers:
- The inner diameter of the front exhaust hanger.
- The exhaust pipe hanger rod.
- The inner diameter of the tail pipe hangers.
- The tail pipe hanger rods.
- Press front exhaust hanger over exhaust pipe hanger rod. Place a NEW seal on left catalytic converter flange. Place a NEW gasket over right catalytic converter studs.
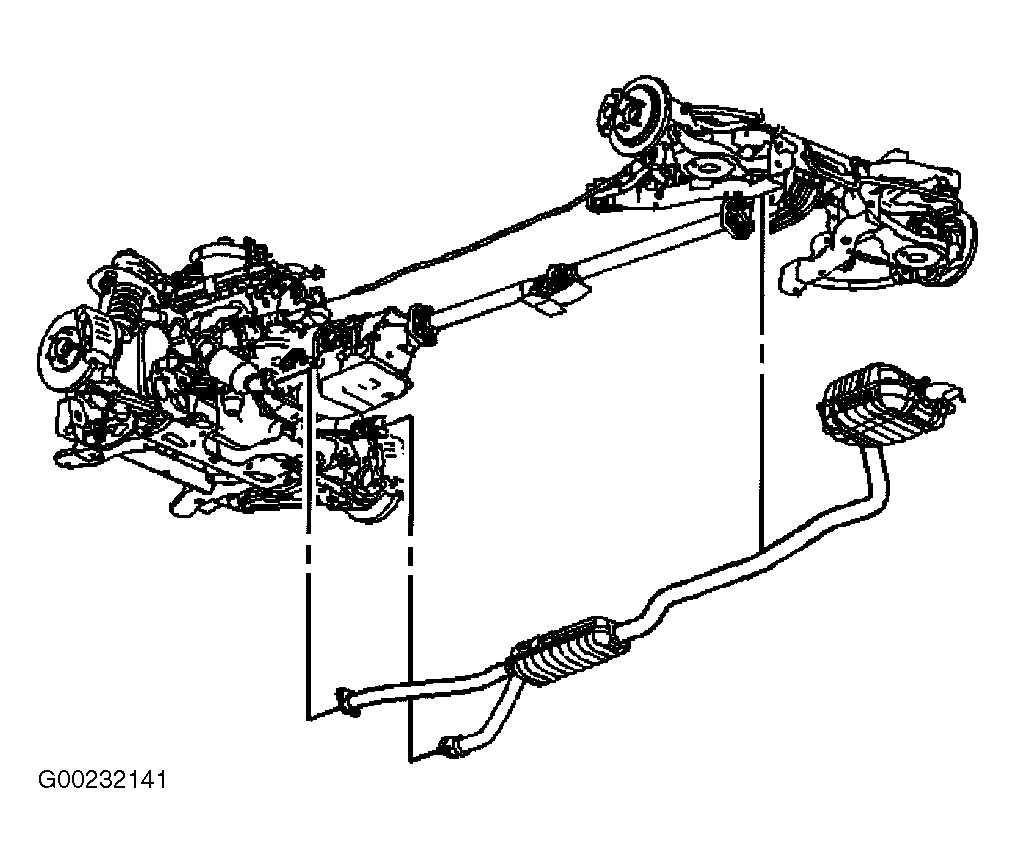
- With the aid of an assistant, raise exhaust system into position, aligning exhaust pipe flanges with studs located in rear of catalytic converters. See Fig 2
. Finger tighten 4 nuts to catalytic converter studs.
- Press tail pipe hangers over tail pipe hanger rods. Press front exhaust hanger over rear suspension hanger rod
- Tighten 2 left catalytic converter nuts previously installed. Tighten catalytic converter nuts to specification. See TORQUE SPECIFICATIONS
. Tighten 2 right catalytic converter nuts previously installed. Tighten catalytic converter nuts to specification.
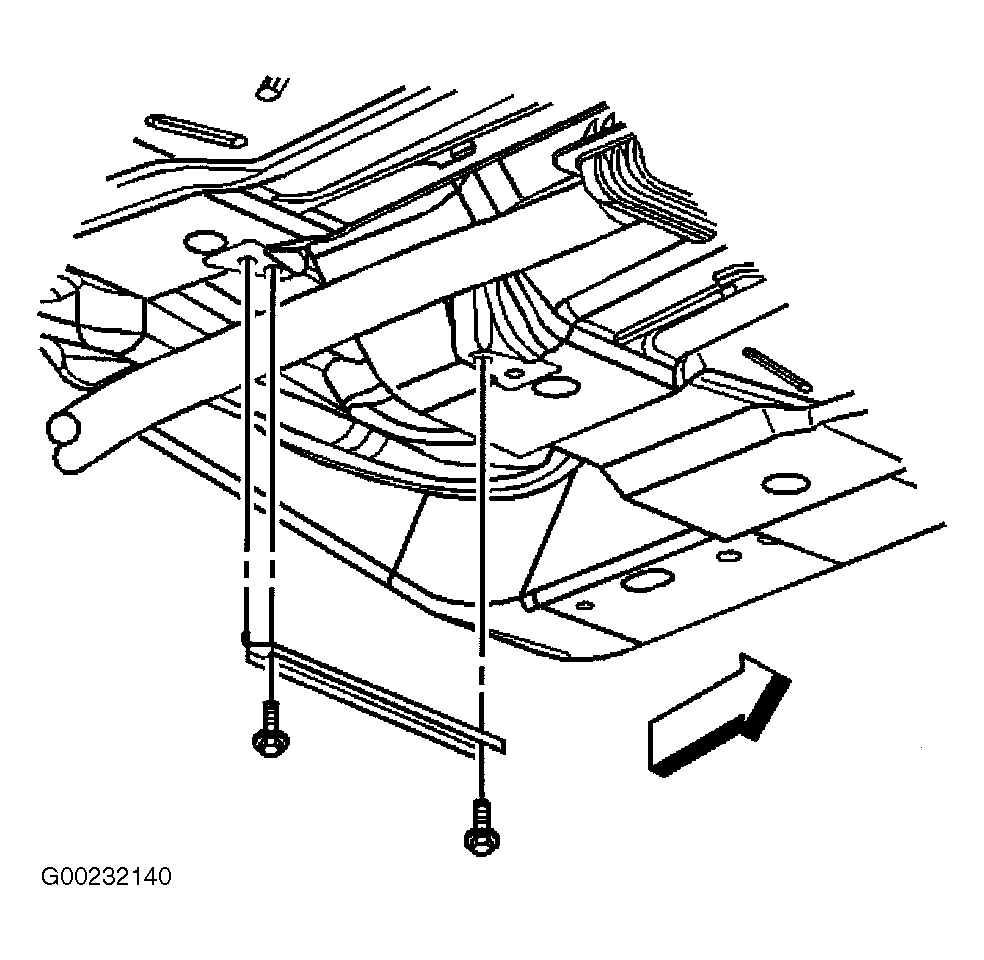
- Position floor panel tunnel brace to floor panel. See Fig 1
. Install 2 bolts securing floor panel tunnel brace to floor panel. Tighten floor panel tunnel brace bolts to specification. Lower vehicle.
 Courtesy of GENERAL MOTORS CORP.
 Courtesy of GENERAL MOTORS CORP.