Windshield Outside Moisture Sensor Lens Replacement
WARNING: This page does not describe the selected car, but rather 8 other vehicles, including the 2012 GMC Yukon XL, 2012 GMC Yukon, 2012 Chevrolet Tahoe, 2012 Chevrolet Suburban, and 2012 Chevrolet Avalanche. However, it is still accessible from the selected car via links, so may be relevant.
 Courtesy of GENERAL MOTORS COMPANY
 Windshield Outside Moisture Sensor Lens Replacement
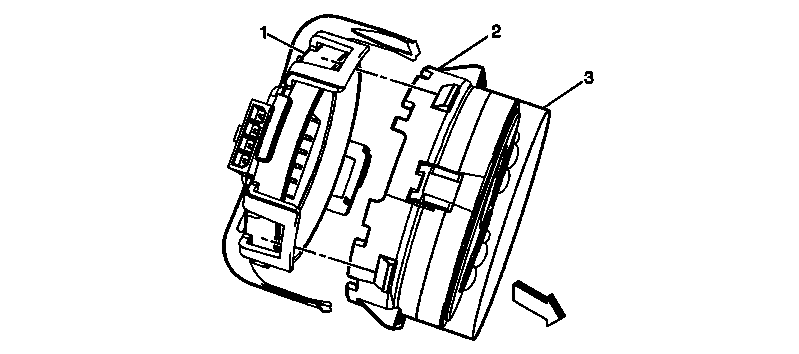
| Callout |
Component Name |
Procedure
Remove the rain sensor module from the windshield bracket. Refer to Windshield Outside Moisture Sensor Replacement . |
| 1 |
Windshield Moisture Sensor Procedure
- Wearing latex rubber gloves, hold the moisture sensor in the left or right hand.
- Release the 3 clips securing the lens to the sensor. Be careful when disengaging the sensor and the lens cover, keep the sensor electronics free from any dirt, debris or foreign material while open.
- Discard the old moisture sensor lens.
|
| 2 |
Windshield Moisture Sensor Lens |
| 3 |
Windshield Moisture Sensor Lens Cover Procedure
- Remove the old conductive jell residue from the windshield mounting bracket.
- Clean the area of the windshield that contacts the windshield moisture sensor lens with a 50/50 mixture of isopropyl alcohol and water by volume on a dampened lint free cloth.
- Align and secure the two sensor halves back as one unit.
- Remove the plastic protective covering from the lens.
- Position and install the moisture sensor back onto the windshield bracket.
- Connect the electrical cover.
- Secure the rain sensor module trim cover.
|