Disassemble
Remove or DisconnectTools Required:
J 6435 External Snap Ring Pliers
J 8433 Puller Set
J 37825 Puller Plate Assembly
J 37827 Puller Pilot
J 37828 Puller Fingers
J 37872 Spanner Wrench
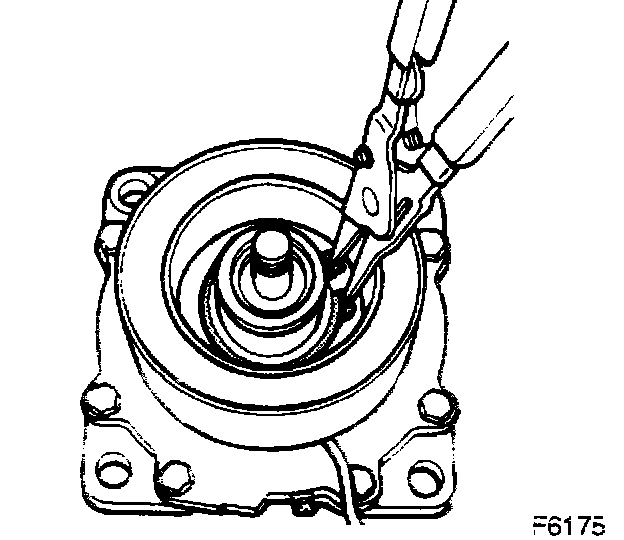
Removing The Nut:
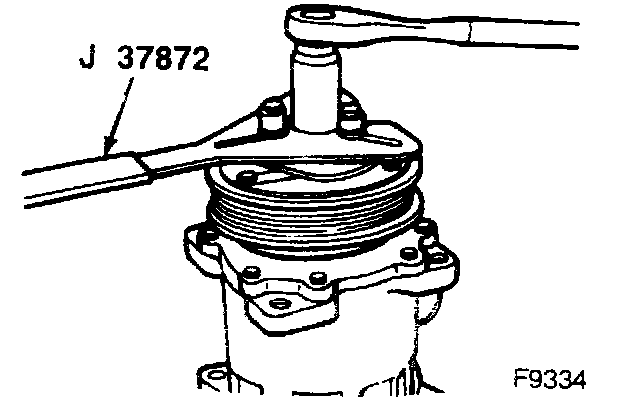
- Insert the two pins of the J 37872 into any two threaded holes of the clutch front plate. Hold the clutch plate stationary.
1. Hex nut using a 14 mm socket.
Removing The Clutch Plate:
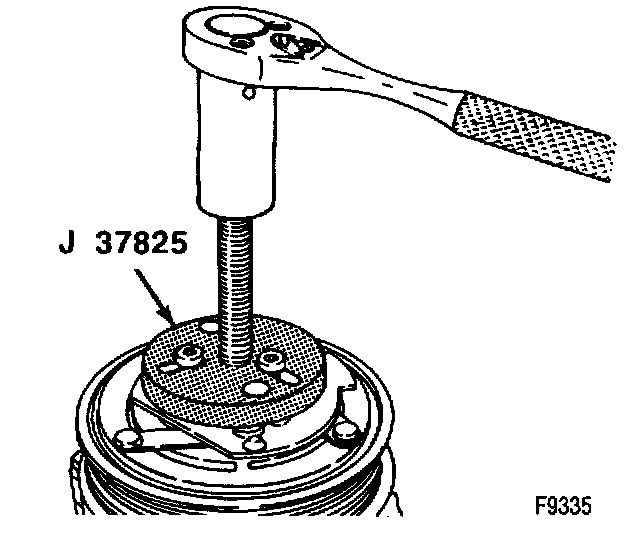
2. Clutch front plate using J 37825.
- Align the puller center bolt to the compressor shaft.
- Thumb tighten the three puller bolts into the threaded holes.
- Turn the center bolt to the right with the socket wrench until the front plate is loosened.
Removing The Internal Snap Ring:

3. External front housing snap ring with J 6435.
4. Rotor pulley assembly.
- Insert J 37828 into the groove
Removing The Rotor Pulley:
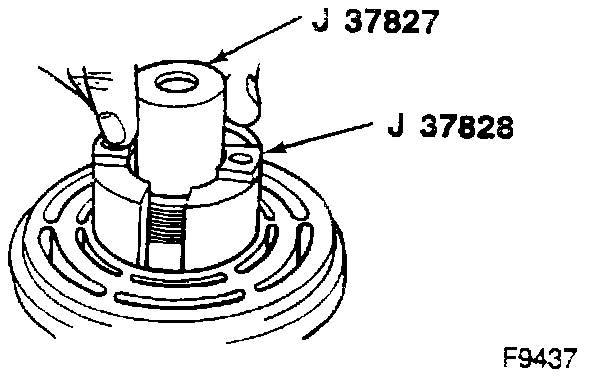
- Insert J 37827 over the exposed shaft.
- Align the thumb head bolts of J 8433 to the puller fingers and tighten.
Removing The Rotor Pulley (2 Of 2):
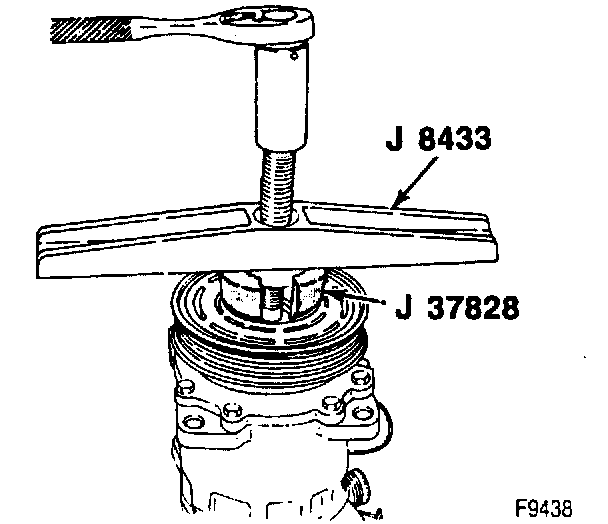
- Turn the puller center bolt to the right with a socket wrench until the rotor pulley is free.
5. Clutch coil.
- Loosen the coil lead wire from the clip on top of the compressor front housing.
Removing The Coil Snap Ring:
- Remove. the snap ring. Remove the coil.