Compressor Sealing Washers
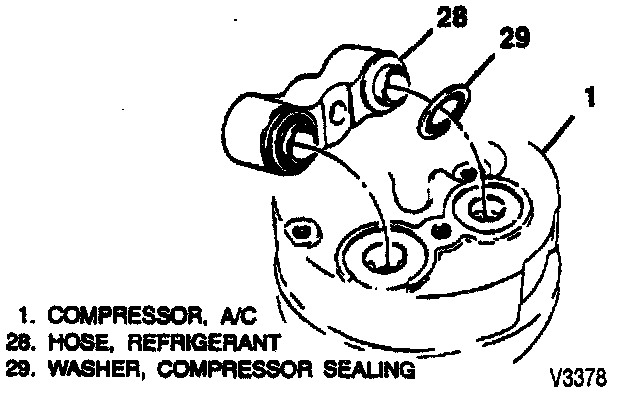
Sealing Washer Installation-Figure 43:
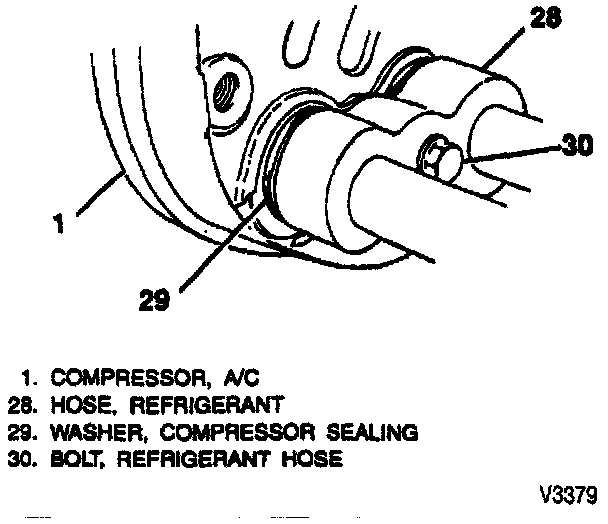
Sealing Washer Installation-Figure 44:
The connection between the compressor rear head and air conditioning face assembly has been redesigned. This design eliminates the O-ring seal and uses a "sealing washer" which consists of a metal washer with a molded rubber seal. The "sealing washer" has an intentional gap of 1.2-mm (3/64-inch) between the compressor rear head and suction discharge block assembly.
- When installing sealing washers, keep dirt and foreign material from getting on the sealing surfaces of the washers, hose block, or compressor ports. Clean all sealing surfaces with a lint-free rag.
- Do not reuse sealing washer
- Sealing washers do not have to be oiled prior to assembly.
1. Install sealing washer onto pilots of suction/discharge block fitting. Washers must "bottom" against surface of block fitting (figure 43).
2. Install hose block to the compressor making sure the sealing washers are seated within the compressor machined surfaces (figure 44).
3. Hold block in place, hand tighten attachment bolt (30).
- Tighten bolt (30) to 34 Nm (25 lbs. ft.).
IMPORTANT: If correct washers are used, there should be a 1.2-mm (0.047-inch) space between the suction/discharge hose block and the compressor rear head.