Removal Procedure
 Courtesy of GENERAL MOTORS CORP.
- Remove the left inner fender brace. Refer to Brace Replacement - Front Fender Upper Diagonal
.
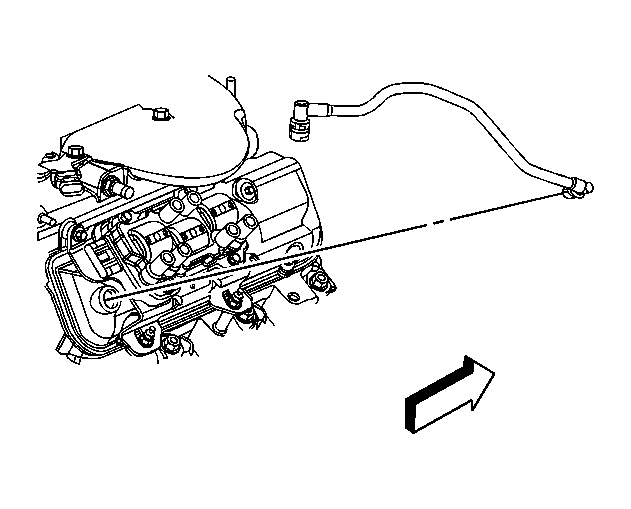
- Loosen the air cleaner outlet duct clamp at the throttle body.
- Remove the air cleaner outlet duct from the throttle body.
- Disconnect the positive crankcase ventilation (PCV) tube from the air inlet duct. Refer to Quick Connect Fitting(s) Service (Plastic Collar) .
 Courtesy of GENERAL MOTORS CORP.
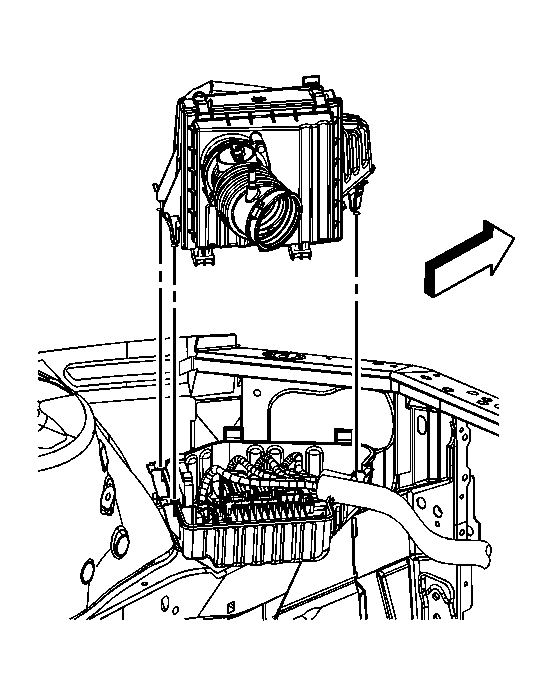
- Disconnect the mass air flow (MAF) sensor electrical connector.
- Remove the upper air cleaner housing from the lower housing. Disengage the tabs on the upper housing from the slots on the lower housing.
- Without disconnecting the powertrain control module (PCM) connectors, remove the PCM and the harness from the lower air cleaner housing.
- Without disconnecting the transmission control module (TCM) connectors, remove the TCM and the harness from the lower air cleaner housing.
- Loosen the air cleaner outlet duct clamp at the air cleaner assembly.
- Remove the air cleaner outlet duct from the air cleaner.
 Courtesy of GENERAL MOTORS CORP.
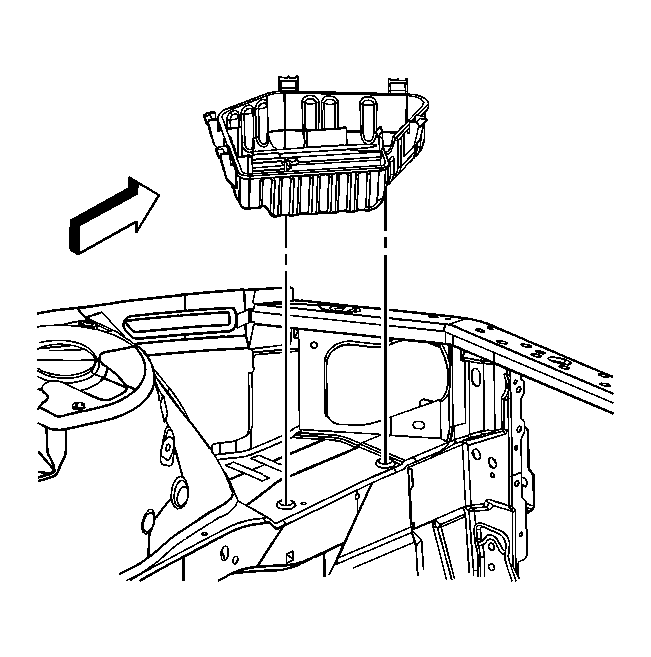
- Remove the lower air cleaner housing by pulling the housing from the 2 rubber grommets on the inner rail.
- Inspect the air cleaner housing assembly for signs of damage and replace if necessary.