Front Disc Brake Pads Replacement
WARNING: This page is about a different car, the 2013 GMC Acadia, 2013 Chevrolet Traverse, and 2013 Buick Enclave. However, it is still accessible from the selected car via links, so may be relevant.
 Courtesy of GENERAL MOTORS COMPANY
 Front Disc Brake Pads Replacement
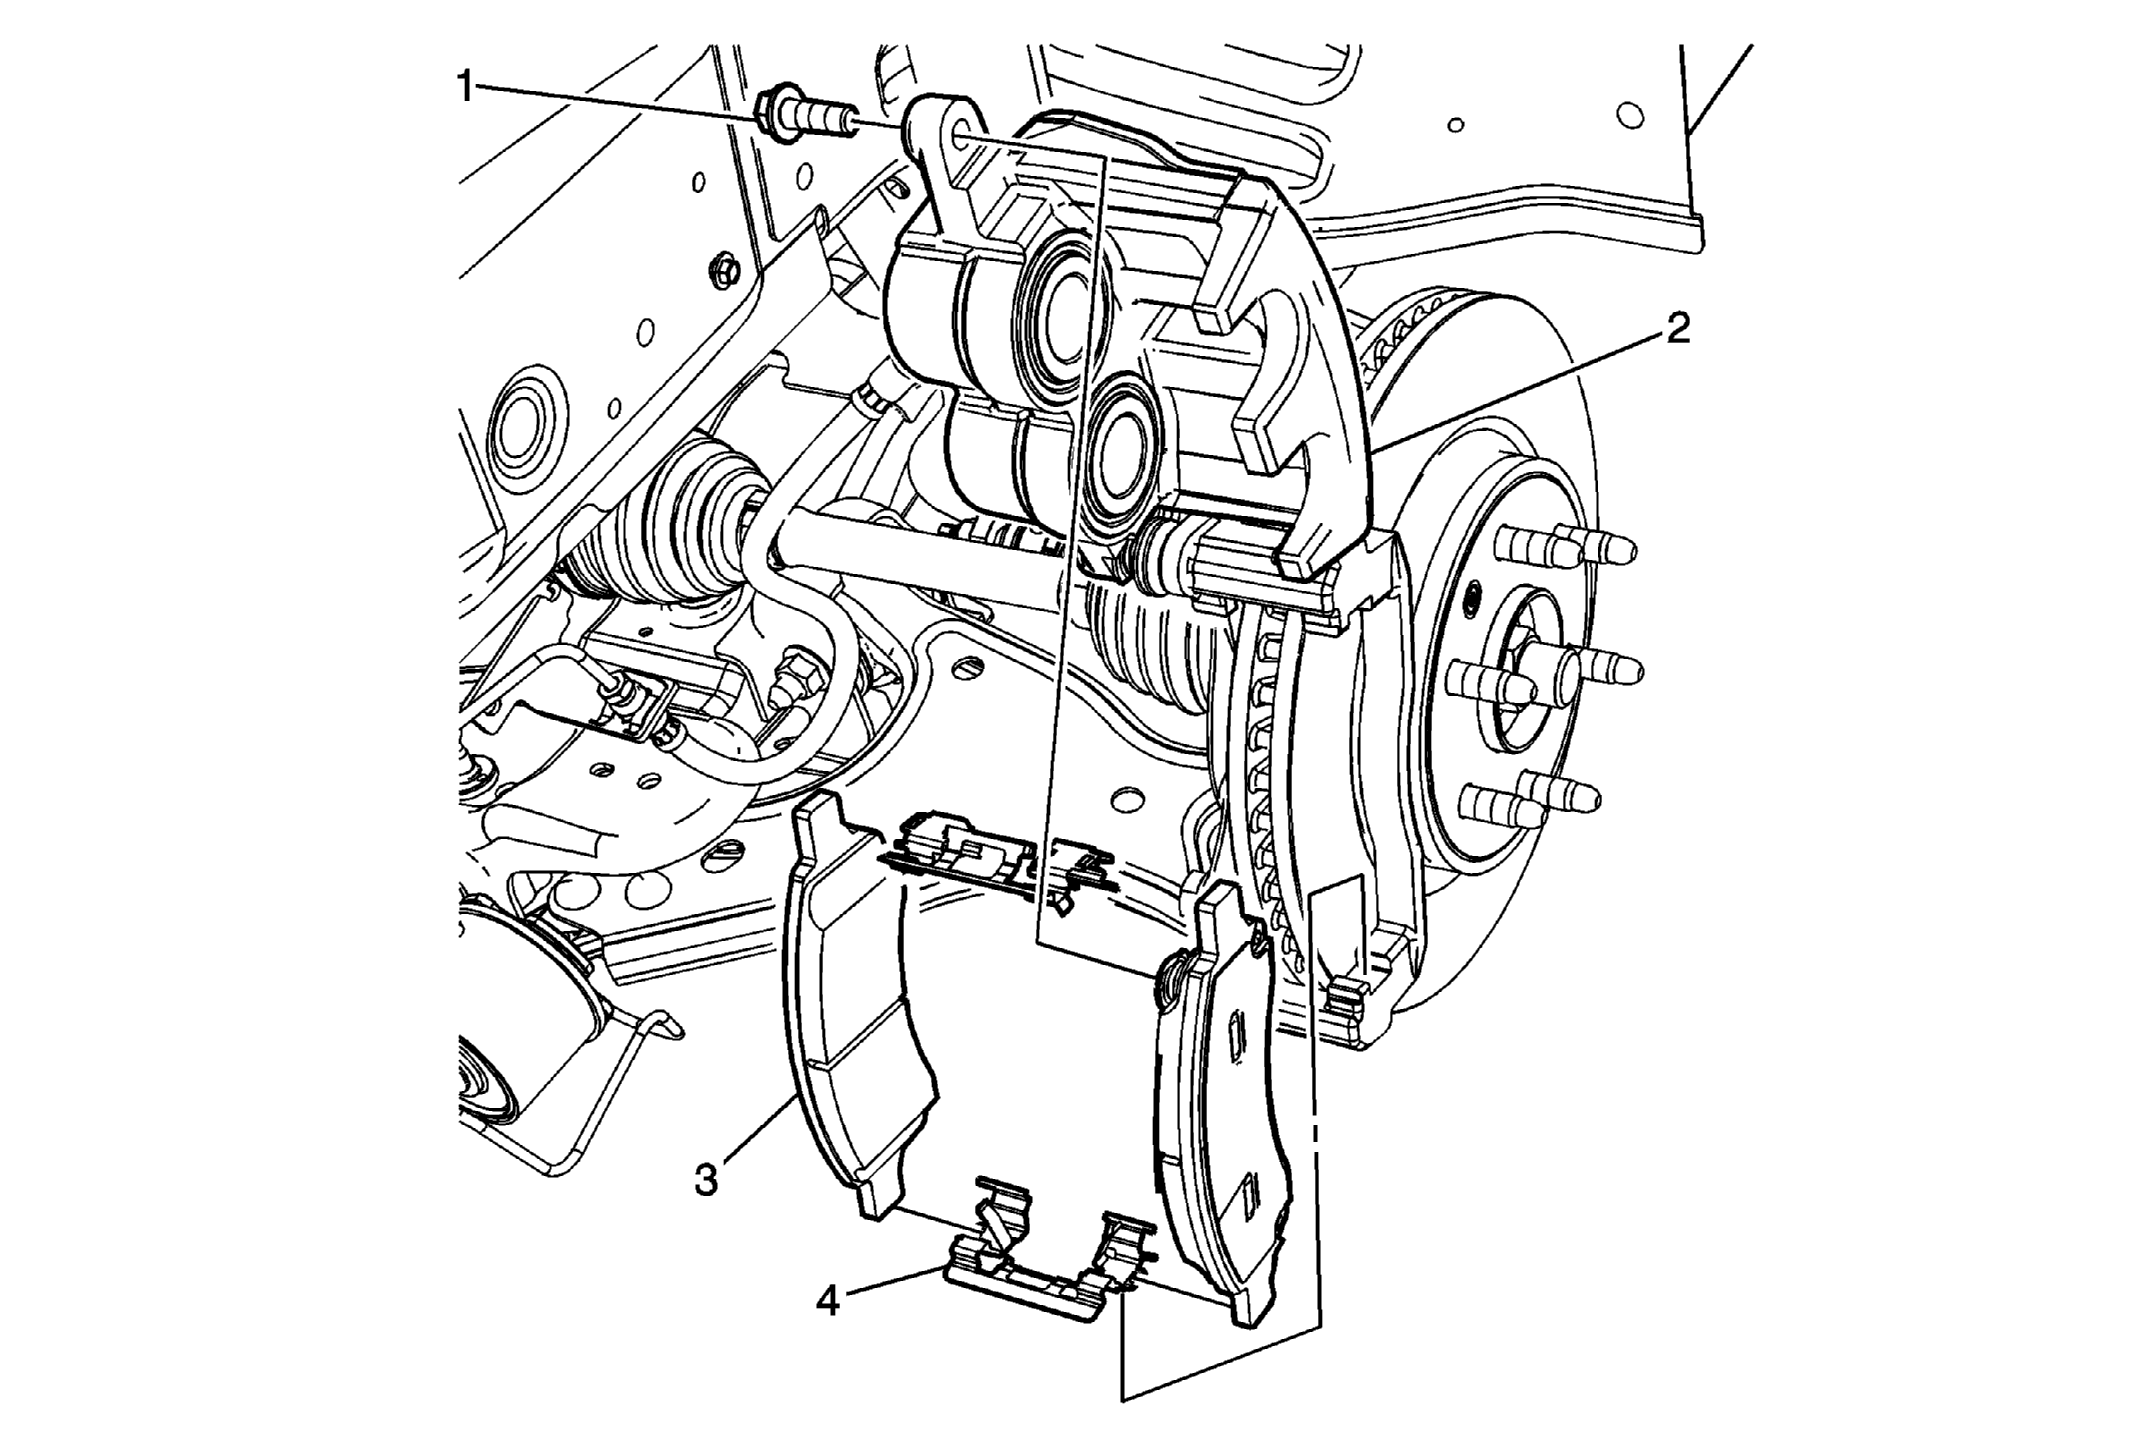
| Callout |
Component Name |
NOTE:
Always replace disc brake pads in axle sets.
Preliminary Procedures
- Inspect the fluid level in the brake master cylinder reservoir.
- If the brake fluid level is midway between the maximum-full point and the minimum allowable level, no brake fluid needs to be removed before proceeding.
- If the brake fluid level is higher than midway between the maximum-full point and the minimum allowable level, remove brake fluid to the midway point before proceeding. Discard the brake fluid into an approved container.
- Raise and support the vehicle. Refer to Lifting and Jacking the Vehicle
.
- Remove the tire and wheel assembly. Refer to Tire and Wheel Removal and Installation
.
|
| 1 |
Lower Brake Caliper Guide Pin Bolt
Procedure
- DO NOT use any air tools to remove or install the brake caliper guide pin bolts. Use hand tools ONLY.
- Install an open end wrench to hold the caliper guide pin in line with the brake caliper while removing or installing the caliper guide pin bolts. DO NOT allow the open end wrench to contact the brake caliper. Allowing the open end wrench to contact the brake caliper will cause a pulsation when the brakes are applied.
- Ensure the brake caliper guide pin seal is fully seated in the groove of the brake caliper guide pin and the guide pin slides freely in caliper bracket bore.
Tighten
64 N.m (47 lb ft) |
| 2 |
Brake Caliper Procedure
- Install 2 large C-clamps over the top of the caliper housing and against the back of the outboard brake pad.
- Slowly and evenly tighten the C-clamps until the caliper pistons are completely retracted into the brake caliper bores.
- Remove the C-clamps.
- Without disconnecting the brake hose, pivot the brake caliper upward.
- Support the brake caliper with heavy mechanics wire or equivalent.
|
| 3 |
Disc Brake Pad (Qty: 2)
TIP:
Note the location of the inner and outer brake pads to aid installation. |
| 4 |
Brake Pad Spring (Qty: 2) Procedure
- Inspect the brake caliper guide pins, seals, and brake pad springs for damage and corrosion. Refer to Front Disc Brake Mounting and Hardware Inspection .
- Thoroughly clean the brake pad hardware mating surfaces of the caliper bracket of any debris and corrosion.
- Apply a very thin coating of high temperature silicone brake lubricant to the pad hardware mating surfaces of the caliper bracket only.
- After the installation is complete and with the engine OFF, gradually apply the brake pedal to approximately 2/3 of its travel distance.
- Slowly release the brake pedal.
- Wait 15 seconds, then repeat steps 4-5 until a firm brake pedal is obtained. This will properly seat the brake caliper pistons and brake pads.
- Fill the master cylinder to the proper level. Refer to Master Cylinder Reservoir Filling
.
- Burnish the brake pads and rotors. Refer to Brake Pad and Rotor Burnishing .
|