October 30: LEMON manuals on a temporary server, it is slow and having issues, download the manuals you need! Later in November we will switch back to the fast server.
Steering Linkage Outer Tie Rod Replacement
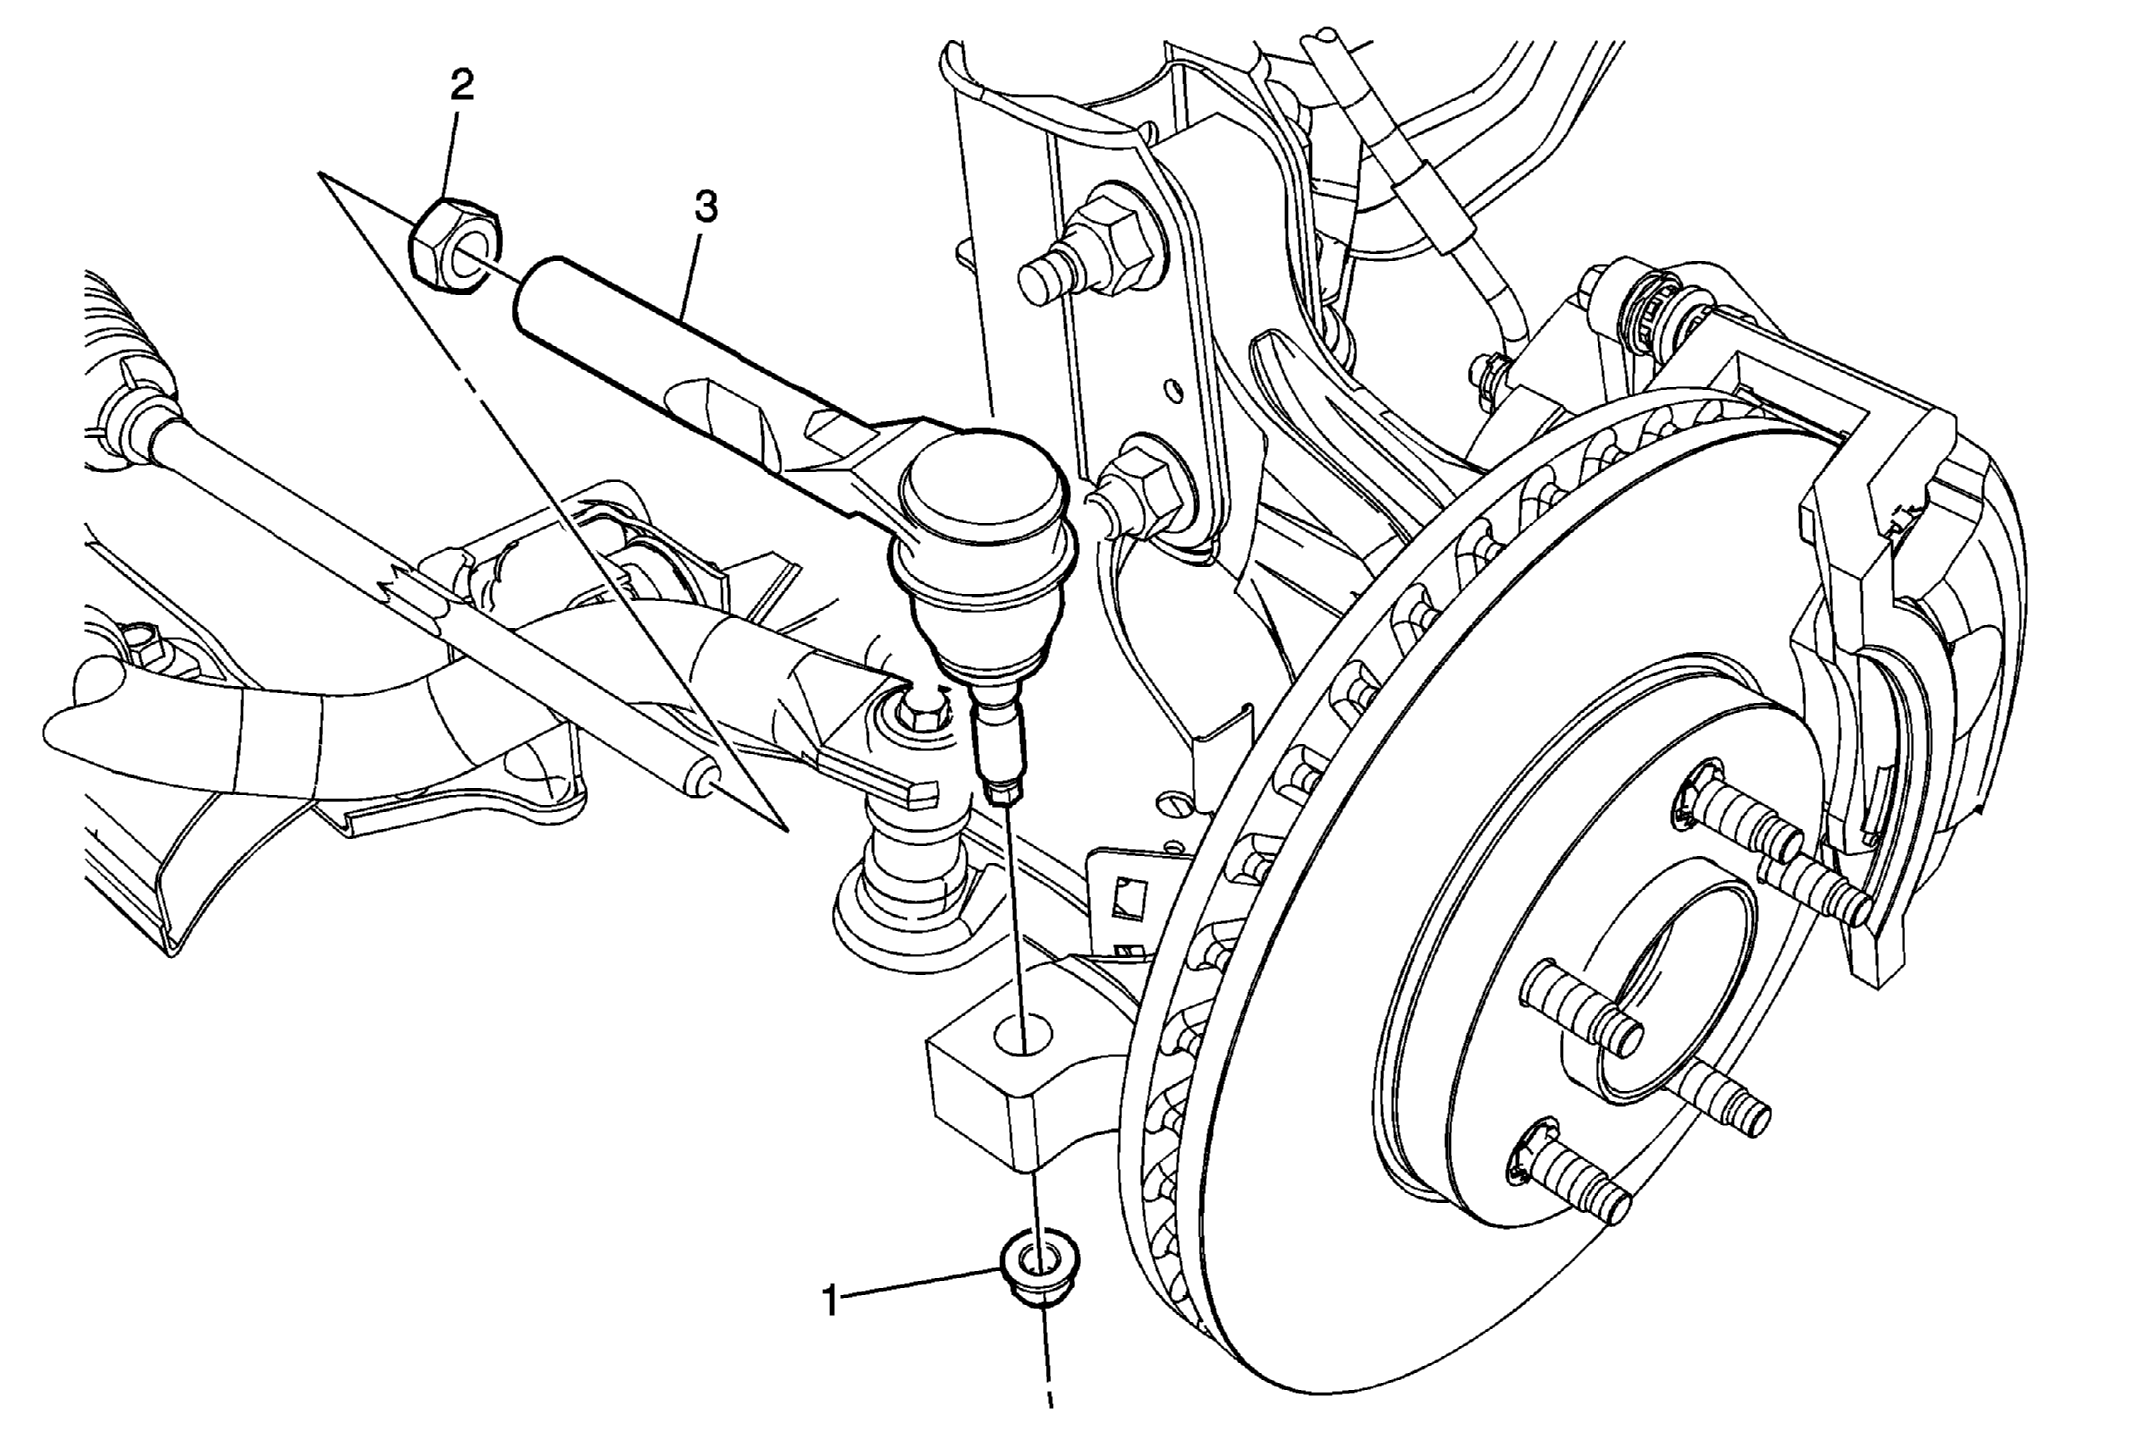 Courtesy of GENERAL MOTORS COMPANY
Steering Linkage Outer Tie Rod Replacement
| Callout |
Component Name |
|
Preliminary Procedures
- Raise and support the vehicle. Refer to Lifting and Jacking the Vehicle
.
- Remove the front tire and wheel assembly. Refer to Tire and Wheel Removal and Installation
.
|
| 1 |
Steering Linkage Outer Tie Rod Nut
CAUTION:
This vehicle is equipped with torque-to-yield or single use fasteners. Install a NEW torque-to-yield or single use fastener when installing this component. Failure to replace the torque-to-yield or single use fastener could cause damage to the vehicle or component.
Procedure
- Remove the steering linkage outer tie rod nut.
Discard the nut.
- Install a NEW steering linkage outer tie rod nut.
Ensure that 2 1/2 to 4 1/2 threads are visible past the nylon washer.
Tighten
- 30 N.m (22 lb ft)
- 120 degrees
|
| 2 |
Steering Linkage Inner Tie Rod Nut Procedure
- Use paint in order to place match marks on the steering linkage inner tie rod nut and on the steering linkage inner tie rod.
- During installation, align the match marks.
- Do not tighten the nut during installation. Tighten the nut after adjusting the front toe. Refer to Wheel Alignment - Steering Wheel Angle and/or Front Toe Adjustment
.
|
| 3 |
Steering Linkage Outer Tie Rod
CAUTION:
Do not free the ball stud by using a pickle fork or a wedge-type tool. Damage to the seal or bushing may result.
Procedure
- Use the J-24319-B
puller in order to disconnect the steering linkage outer tie rod from the steering knuckle.
- After the installation is complete, measure and adjust the front toe. Refer to Wheel Alignment - Steering Wheel Angle and/or Front Toe Adjustment
.
Special Tools
J-24319-B
Steering Linkage and Tie Rod Puller
For equivalent regional tools, refer to Special Tools . |