October 30: LEMON manuals on a temporary server, it is slow and having issues, download the manuals you need! Later in November we will switch back to the fast server.
Control Relay
- Disconnect electrical harness and test continuity between terminals No. 1 and 7, then No. 3 and 7. See Fig 1
. If continuity is measured, replace control relay.
- With harness disconnected, check resistance by placing positive lead of ohmmeter on terminal No. 4 and negative lead of ohmmeter on No. 8. If continuity is measured, replace control relay.
- With harness disconnected, check resistance by placing positive lead of ohmmeter on terminal No. 8 and negative lead of ohmmeter on No. 4. Zero ohms of resistance should be present. If not, replace control relay.
- Test continuity between terminals No. 2 and 5, then No. 2 and 3. Approximately 95 ohms resistance should be present in both cases. If not, replace control relay.
- Test continuity between terminals No. 6 and 4. Approximately 35 ohms resistance should be present. If not, replace control relay.
- Apply 12 volts across terminals No. 6 and 4 while testing resistance between terminals No. 1 and 7. If more than zero ohms resistance is present, replace relay.
- With ohmmeter connected between terminals No. 3 and 7, apply 12 volts to terminal No. 8 and ground terminal No. 4. If more than zero ohms resistance is present, replace relay.
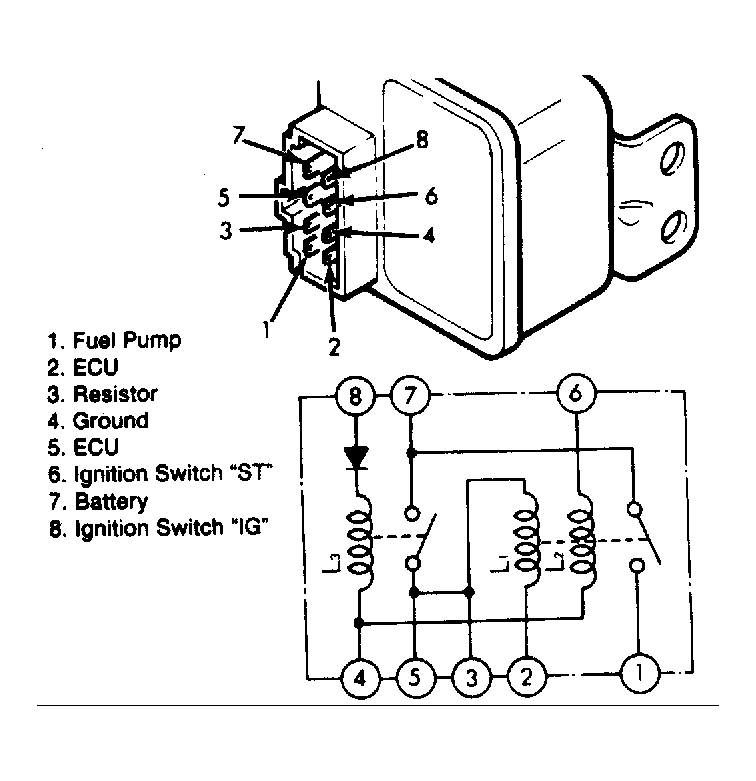 Courtesy of MITSUBISHI MOTOR SALES OF AMERICA.