Test Ch-1A: Charging System No Code Test
- Verify battery condition. Charge or replace battery as necessary. Inspect generator belt tension and condition. Replace generator belt as necessary. Start engine. Using scan tool, set engine speed to 1600 RPM for 30 seconds. Using scan tool, return engine to idle speed and read Diagnostic Trouble Codes (DTCs). If any charging system DTCs are set, see SCAN TOOL DTC MESSAGES
table and perform appropriate test. If no charging system DTCs are set, go to next step.
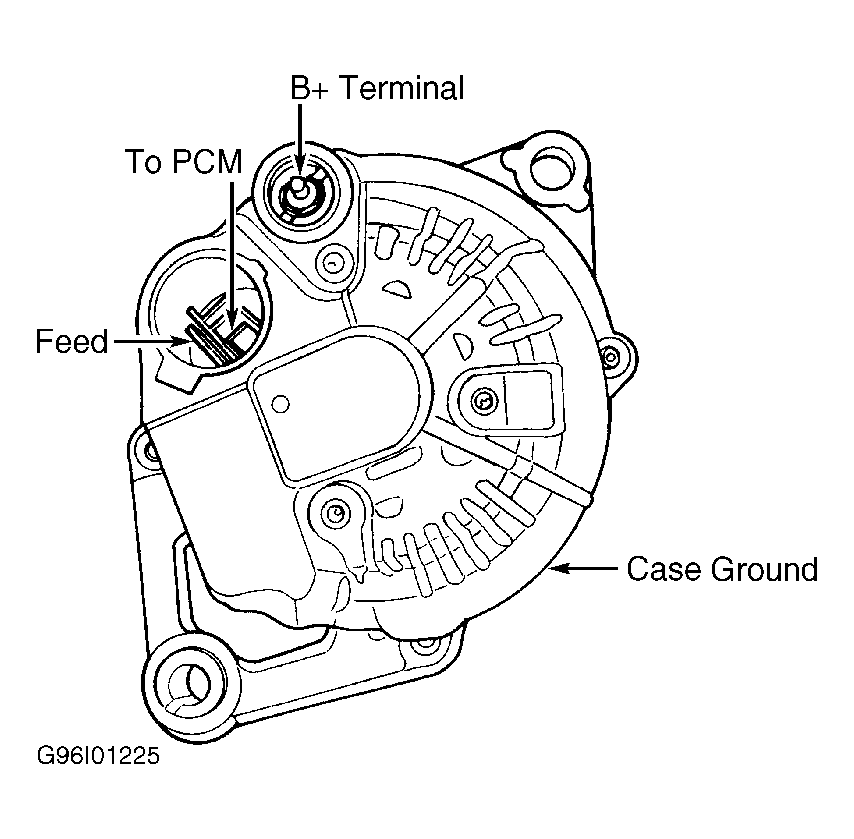
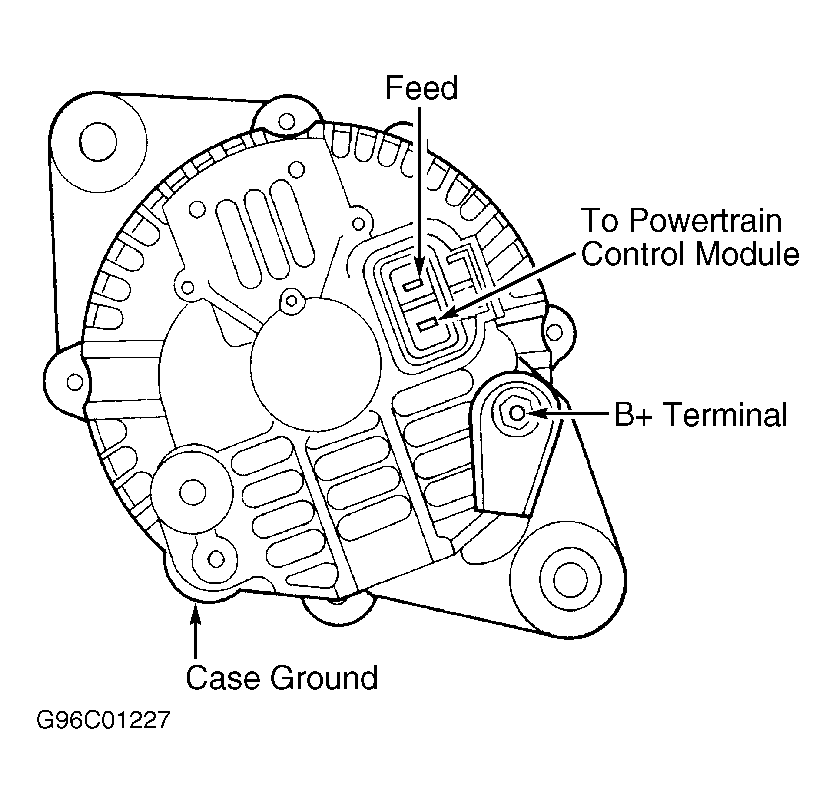
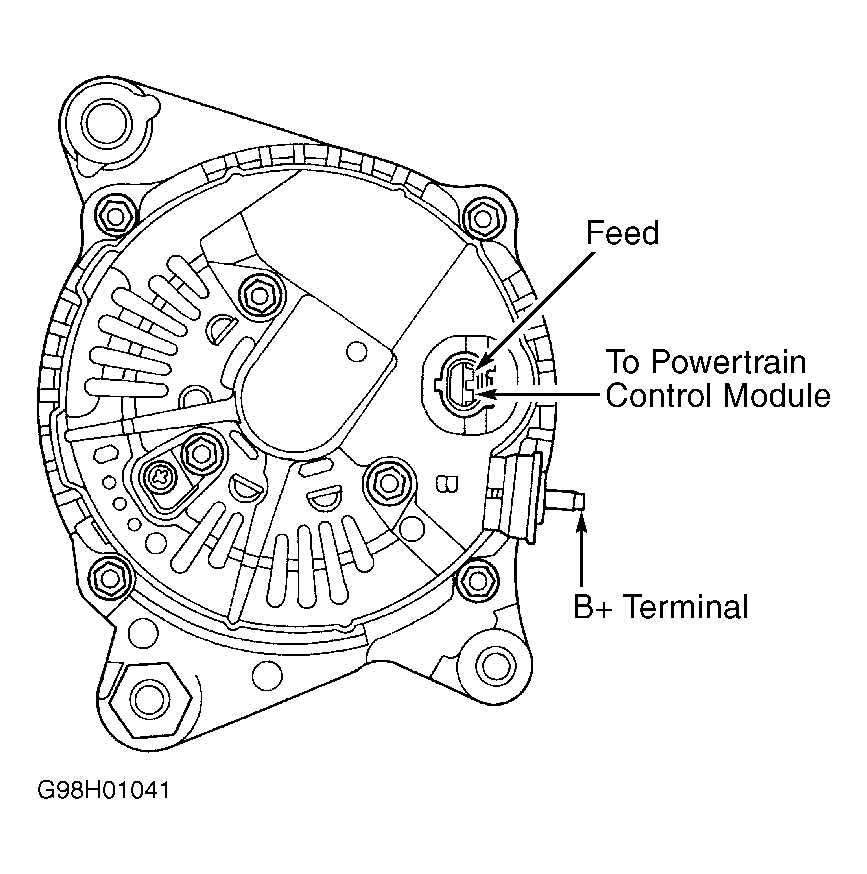
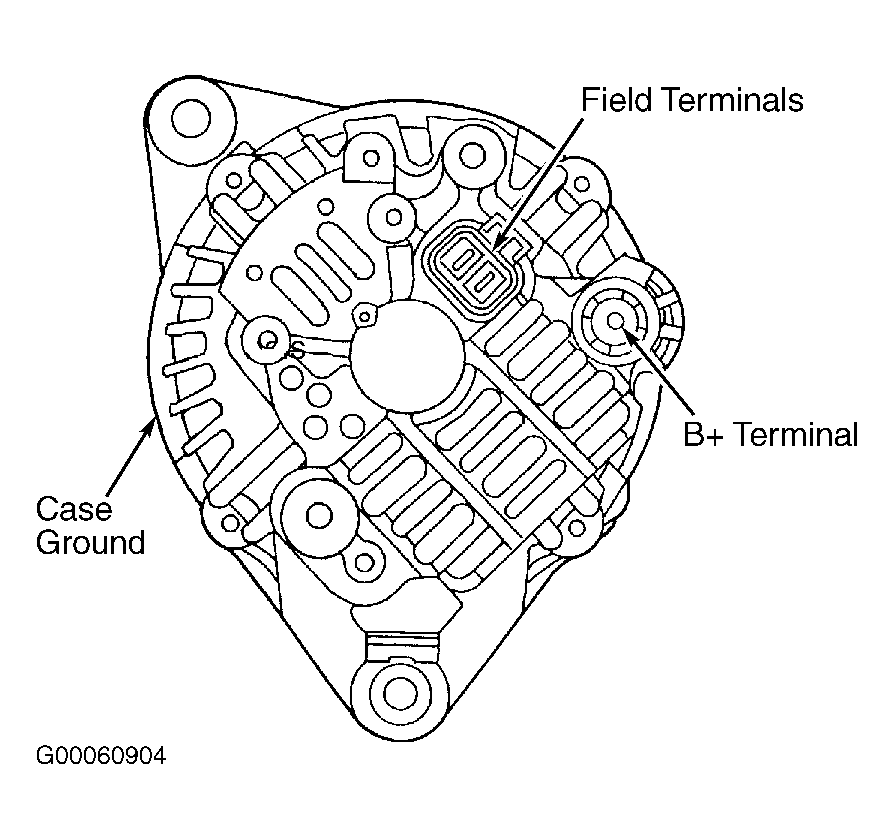
- Turn ignition on with engine off. Using scan tool, actuate generator field. Using scan tool in voltmeter mode, backprobe generator field terminals on back of generator. See Fig 1
, Fig 2
, Fig 3
or Fig 4
. Voltage should cycle from zero volts to battery voltage every 1.4 seconds at both terminals. While observing scan tool, wiggle field terminal wiring harness back to Powertrain Control Module (PCM). If any interruption of voltage cycling occurred, repair wiring harness where wiggling caused failure. Perform TEST VER-3A
. If wiggling did not interrupt voltage cycling, go to next step.
 Courtesy of CHRYSLER CORP.
 Courtesy of CHRYSLER CORP.
 Courtesy of CHRYSLER CORP.
 Courtesy of DAIMLERCHRYSLER CORP.
- Using scan tool, read DTCs. If any charging system DTCs are set, see SCAN TOOL DTC MESSAGES
table and perform appropriate test. If no charging system trouble codes are set, go to next step.
- Turn ignition off. Using an external voltmeter, check voltage between generator case and battery negative terminal. Start engine. If voltage is greater than .1 volt, repair high resistance between generator battery negative terminal and battery negative terminal. Perform TEST VER-3A
. If voltage is .1 volt or less, go to next step.
- Using an external voltmeter, check voltage between generator B+ terminal located on rear of generator and battery positive terminal. See Fig 1
, Fig 2
, Fig 3
or Fig 4
. Ensure voltmeter wires are clear of moving engine parts. Start engine and observe voltmeter. If voltage is .4 volt or less, go to next step. If voltage is more than .4 volt, repair high resistance between generator B+ terminal and battery positive terminal. Perform TEST VER-3A
.
- With ignition on and engine off, read and record battery voltage using scan tool. Using voltmeter, measure and record voltage between battery terminals. If voltage difference is one volt or greater, go to next step. If voltage difference is less than one volt, test is complete.
- With ignition on and engine off, read and record battery voltage using scan tool. Turn ignition off. Disconnect PCM connector. Turn ignition on. Using voltmeter, measure voltage between ground and terminal No. 46 on PCM connector. If voltage is within one volt of scan tool voltage, repair high resistance between PCM connector terminal No. 46 and battery positive terminal. Perform TEST VER-3A
. If voltage is not within one volt of scan tool voltage, replace PCM. Perform TEST VER-3A
.