Condenser Core
Condenser Core - 2.5L, 3.0L (4V)
Removal and Installation
NOTE: If a condenser core leak is suspected, the condenser core must be leak tested before it is removed from the vehicle.
All vehicles
1. With the vehicle in NEUTRAL, position it on a hoist.
2. Recover the refrigerant.
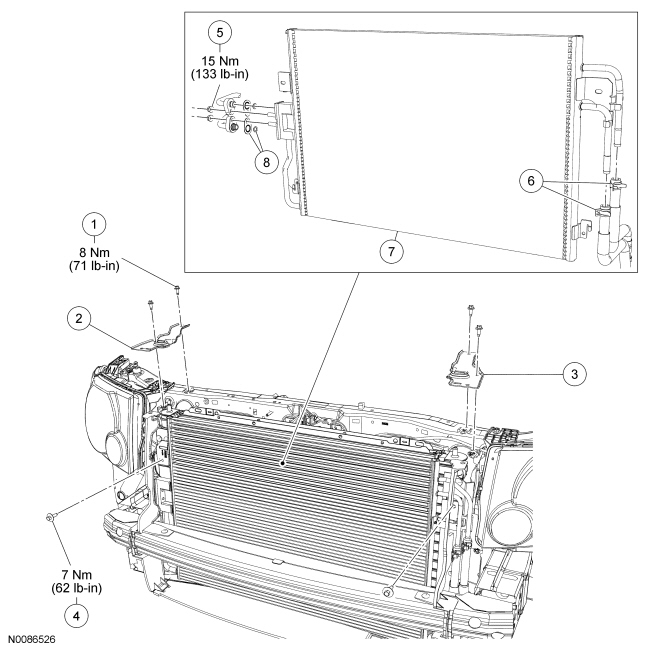
3. Remove the front bumper cover.
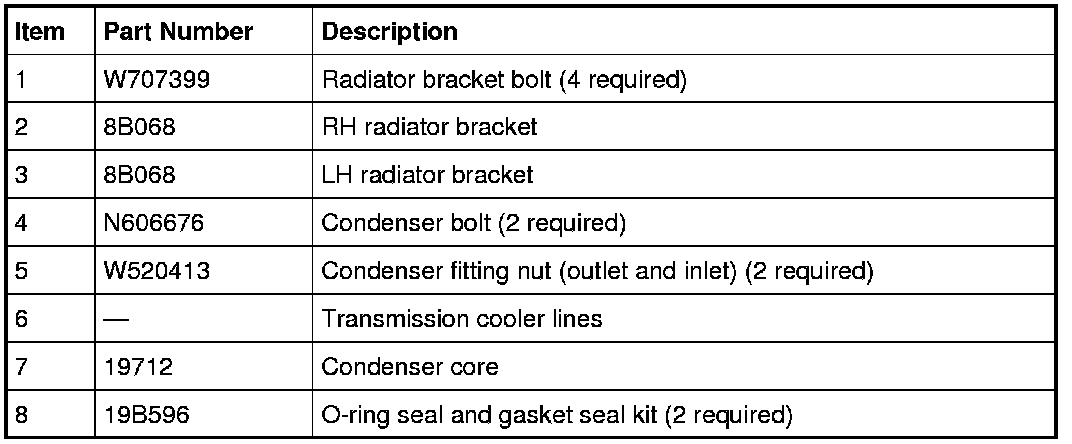
4. Remove the 4 radiator bracket bolts.
- To install, tighten to 8 Nm (71 lb-in).
5. Detach and remove the RH and LH radiator brackets.
6. Remove the condenser outlet and inlet fitting nuts and disconnect the fittings.
- Discard the O-ring and gasket seals.
- To install, tighten to 15 Nm (133 lb-in).
Vehicles with automatic transmission
7. NOTE: The transmission cooler hose inlet (upper tube) attaches to the transmission outlet line (passenger side front of transmission). The transmission cooler outlet (lower tube) attaches to the transmission inlet line (driver side of transmission).
Release the 2 transmission cooler line clamps and disconnect the lines from the A/C condenser.
All vehicles
8. Remove the 2 condenser bolts.
- To install, tighten to 7 Nm (62 lb-in).
9. Remove the condenser core.
10. To install, reverse the removal procedure.
- Install new gasket seals and O-ring seals.
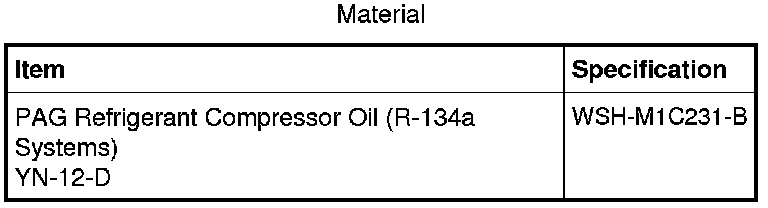
- Lubricate the refrigerant system with the correct amount of clean PAG oil.
11. Evacuate, leak test and charge the refrigerant system.