Evaporator Core: Service and Repair
Air Conditioning Evaporator Core Replacement
Removal Procedure
1. Remove the HVAC module assembly. Refer to Air Conditioning and Heater Module Assembly Removal and Installation Service and Repair.
2. Remove the screws to separate the HVAC module assembly halves.
3. Remove the evaporator temperature sensor control module screw.
4. Reposition the evaporator temperature sensor control module.
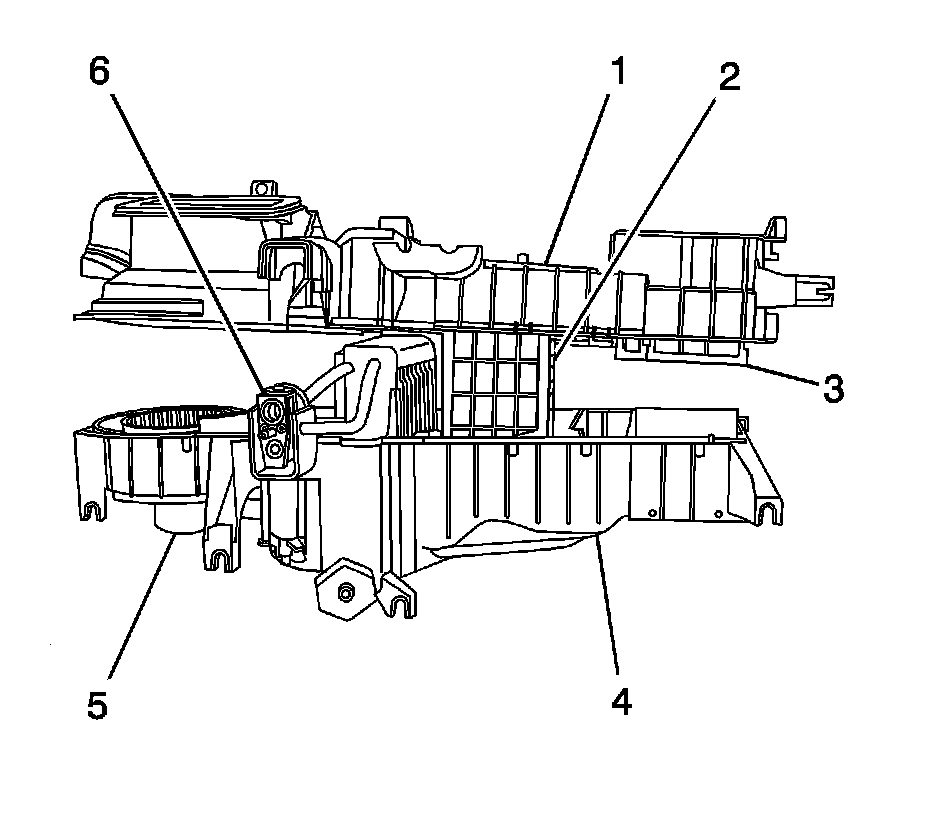
5. Separate the HVAC module assembly (1, 4).
6. Remove the evaporator temperature sensor from the evaporator.
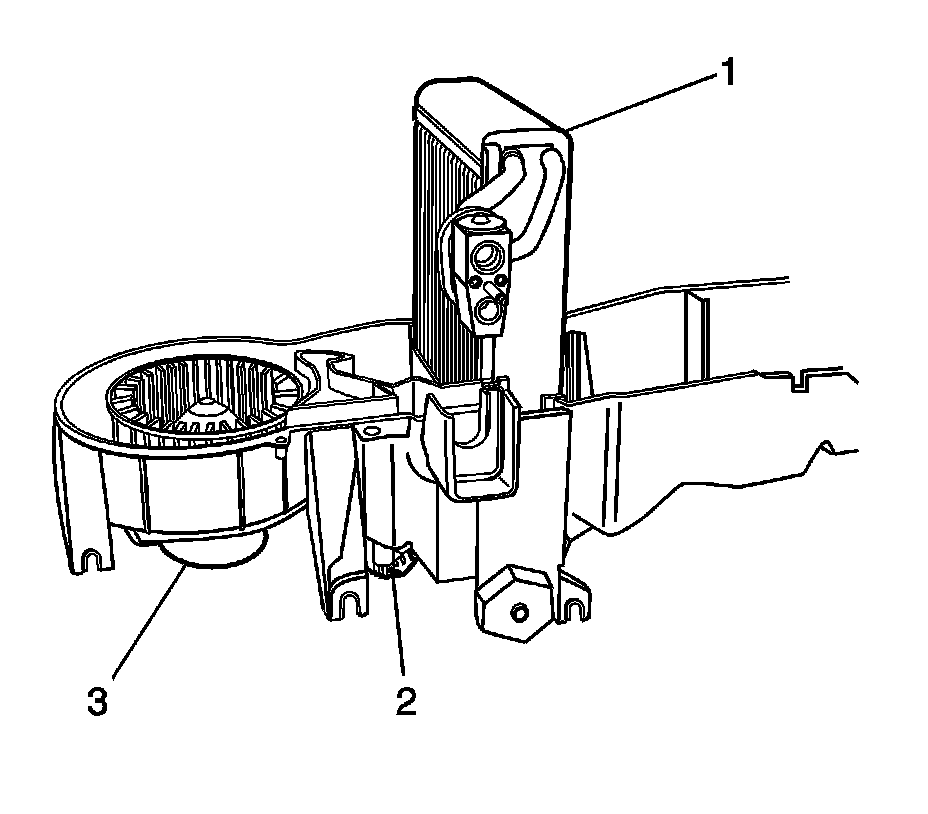
7. Remove the evaporator core (1) from the HVAC module assembly.
Installation Procedure
Note: If replacing the evaporator core, add the refrigerant oil to the evaporator core. Refer to Refrigerant System Specifications Specifications for system capacity information.
1. Install the seal between the HVAC module assembly halves.
2. Install the evaporator core (1) to the HVAC module assembly.
3. Install the evaporator temperature sensor to the evaporator core.
4. Assemble the HVAC module assembly (1, 4).
Caution: Refer to Fastener Caution Fastener Caution.
5. Install the screws to join the HVAC module assembly halves. Tighten the screws to 1.9 Nm (17 lb in).
6. Install the evaporator temperature sensor control module screw. Tighten the to 1.9 Nm (17 lb in).
7. Install the HVAC module assembly. Refer to Air Conditioning and Heater Module Assembly Removal and Installation Service and Repair.