Minor Compressor Repair Procedures
Remove or DisconnectTool Required:
J 34878 Pressure Plate Remover
1. Compressor assembly from vehicle.
Removing Pressure Plate Nut:
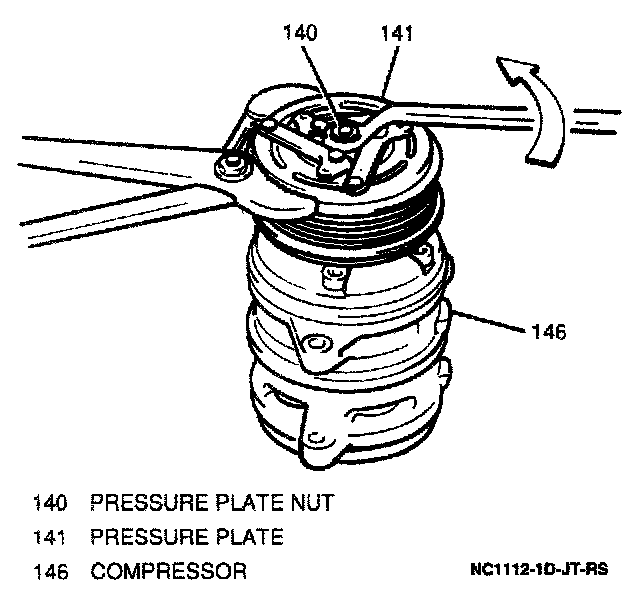
2. Pressure plate nut and washer from compressor drive shaft.
Installing J 34878:
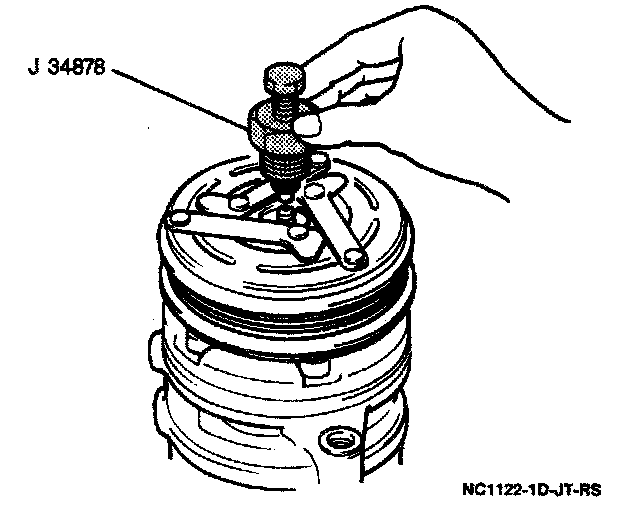
3. Pressure plate from compressor drive shaft, using a J 34878.
Removing Snap Ring:
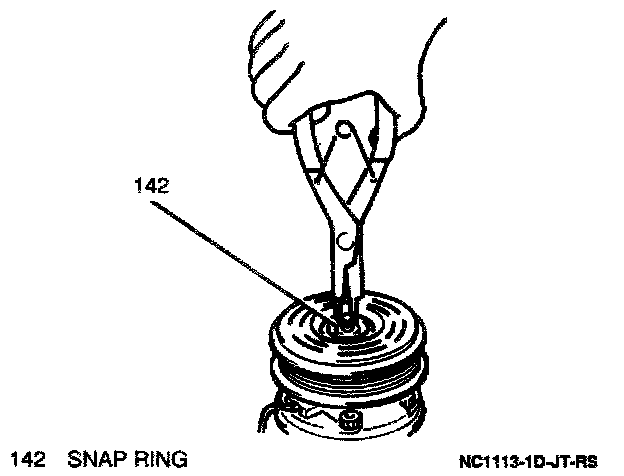
4. Snap ring and shim, using the appropriate snap ring pliers.
5. A/C compressor dutch pulley from compressor. Tap off with plastic hammer if necessary.
NOTICE: Be careful not to damage pulley when tapping it off.
6. Clutch coil wiring retainer from compressor housing (one screw).
7. Clutch coil from compressor.
Inspect
Tool Required:
J 34029-A Digital Multimeter
^ Pressure plate for wear and scoring. Replace if necessary.
^ A/C compressor clutch pulley for wear and scoring. Replace if necessary.
Inspecting A/C Compressor Clutch Coil Resistance:
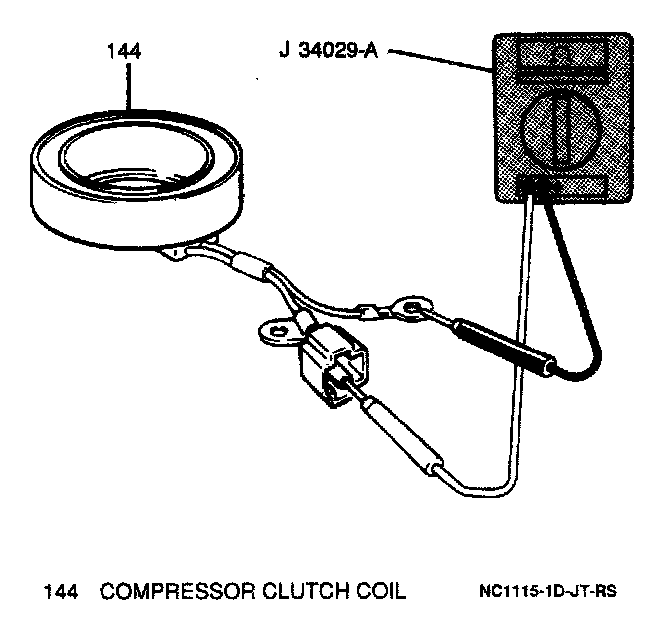
^ Clutch coil for resistance using a J 34029-A. Replace if not within specification.
^ Standard resistance: 3.0 to 3.4 ohms.
Install or Connect
1. Clutch coil to compressor.
2. Clutch coil wiring retainer to compressor housing: secure with one screw.
3. A/C compressor clutch pulley to compressor; secure with snap ring and shim.
4. Pressure plate to compressor drive shaft.
Measure
Measuring Pressure Plate Clearance:
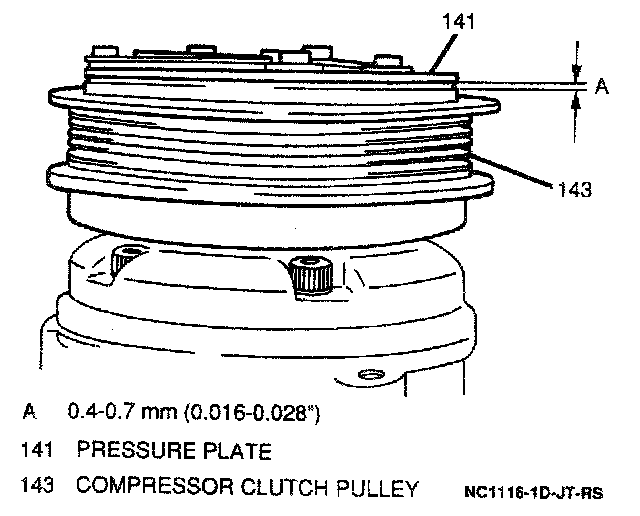
^ Clearance between clutch pulley and pressure plate.
- Standard clearance should be 0.4 to 0.7 mm (0.016 to 0.028-inch).
5. Pressure plate washer and nut to compressor drive shaft.
Tighten
^ Pressure plate nut to 17 N.m (13 lb.ft.).