Compressor Replacement
Remove or Disconnect
1. Discharge and recover refrigerant. Refer to Discharging, Adding Oil, Evacuating and Charging the Refrigeration System.
2. Negative (-) battery cable.
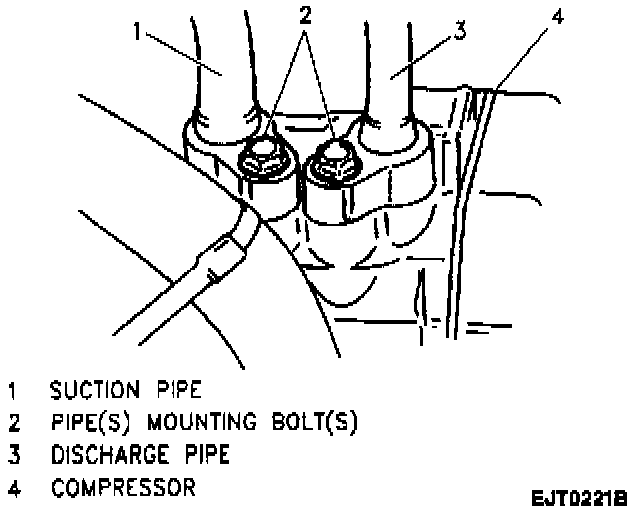
3. One bolt and suction hose from compressor.
4. One bolt and discharge hose from compressor.
5. Discard O-rings.
6. Cap all refrigerant line openings to keep out din and moisture.
7. Compressor clutch electrical connector.
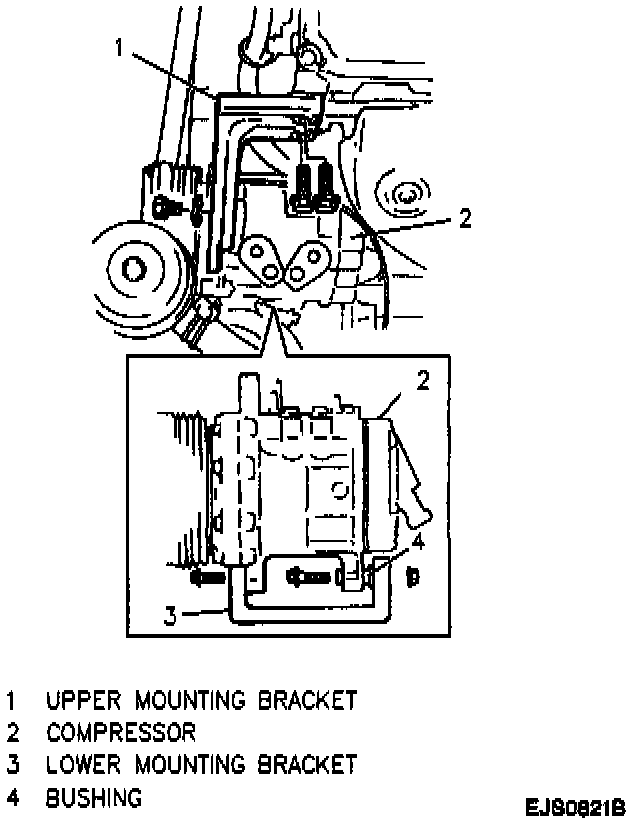
8. One upper bracket-to-compressor mounting bolt.
9. Two lower bracket-to-compressor mounting bolts, while disengaging compressor drive belt from A/C compressor clutch pulley.
10. Compressor from vehicle.
Install or Connect
1. Compressor to vehicle; secure with two lower bracket-to-compressor mounting bolts. Do not fully tighten.
2. Drive belt to compressor pulley.
3. Upper bracket-to-compressor mounting bolt.
4. Compressor clutch electrical connector.
5. Compressor drive belt and adjust belt tension.
Tighten
^ Upper and lower bracket-to-compressor mounting bolts to 18-28 N.m. (13-20 lb. fl.).
6. Coat new discharge and suction hose O-rings with clean refrigerant oil.
7. Discharge and suction hoses to compressor; secure with two bolts.
Tighten
^ Compressor discharge and suction hose bolts to 9.8 N.m. (86.74 lb. in.).
8. Negative (-) battery cable.
9. Evacuate and recharge air conditioning system. Refer to Discharging, Adding Oil, Evacuating and Charging the Refrigeration System.
10. Operate A/C system and check for refrigerant leaks. Refer to Refrigerant Leak Testing.