Ignition Timing: Testing and Inspection
1. Start the engine and allow it to warm up (the radiator fan comes on).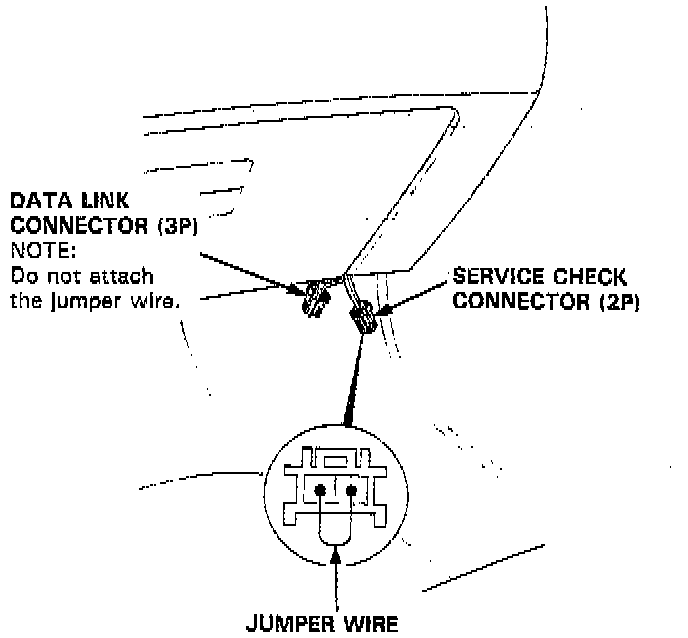
2. Pull out the service check connector located behind the right kick panel. Connect the BLK and BRN terminals with a jumper wire or SCS service connector.
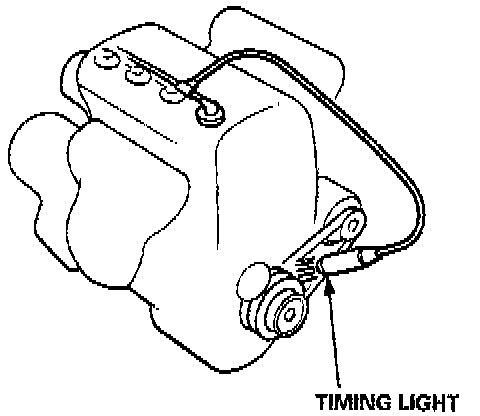
3. Connect a timing light to the No.1 ignition wire and point it toward the pointer on the timing belt cover.
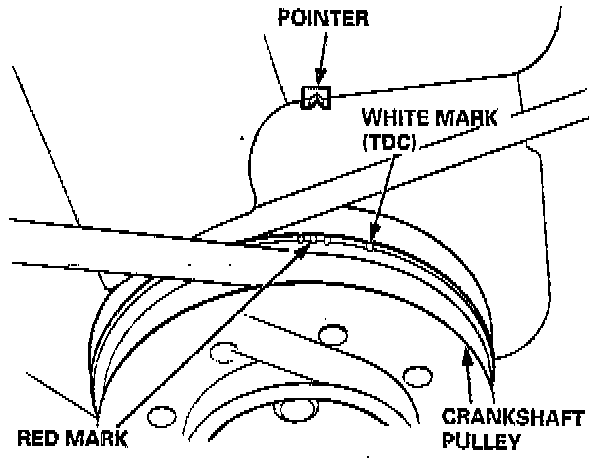
4. Adjust ignition timing, if necessary, to the following specifications:
Ignition Timing:
D15Z1 engine:
M/T: 16° ± 2° BTDC (RED) at 600 ± 50 rpm (USA) or
700 ± 50 rpm (Canada)
D15B8 engine:
M/T: 12° ± 2° BTDC (RED) at 670 ± 50 rpm (USA)
D15B71D16Z6 engine:
M/T: 16° ± 2° BTDC (RED) at 670 ± 50 rpm (USA) or
750 ± 50 rpm (Canada)
A/T 16° ± 2° BTDC (RED) at 700 ± 50 rpm (USA) or
750 ± 50 rpm (Canada)
NOTE:
^ Change lever (M/T) or A/T gear position switch (A/T) in neutral position.
^ All electrical systems should be turned OFF.
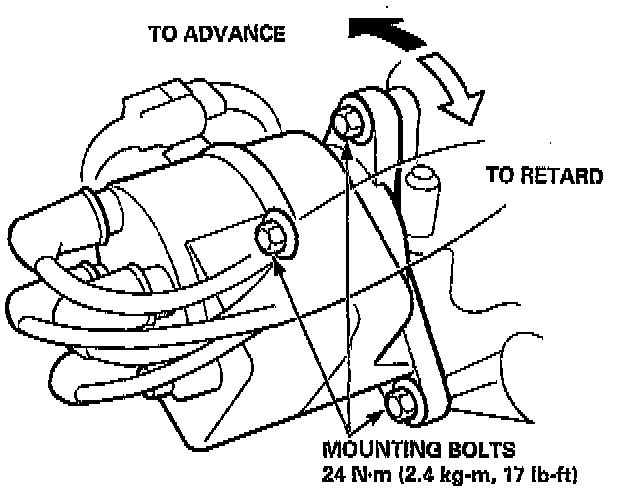
5. If it is necessary to adjust the ignition timing, loosen the distributor mounting bolts, and turn the distributor ignition housing counterclockwise to advance the timing, or clockwise to retard the timing.
6. Tighten the mounting bolts, and recheck the timing.
7. Remove the jumper wire from the service check connector.