Lower Valve Body Assembly Replacement
- Raise the front of the vehicle, and make sure it is securely supported.
- Apply the parking brake, and block the rear wheels securely.
- Remove the air cleaner housing.
- Disconnect the solenoid harness connector (8P).
- Remove the engine under cover on the transmission housing.
- Remove the drain plug (A), and drain the continuously variable transmission fluid (CVT Fluid). Reinstall the drain plug with a new sealing washer (B).
 Courtesy of AMERICAN HONDA MOTOR CO., INC.
- Remove the ATF cooler inlet hose (A) from the ATF cooler inlet line (B). Turn the end of the ATF cooler inlet hose up to prevent CVT Fluid from flowing out, and plug the ATF cooler hose and line.
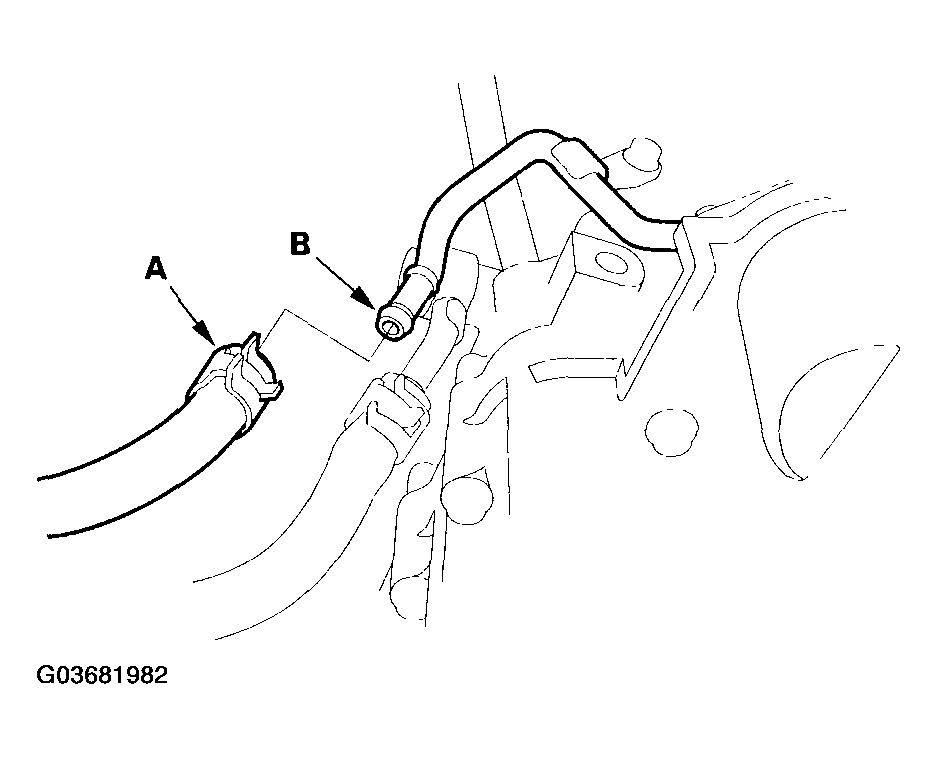 Courtesy of AMERICAN HONDA MOTOR CO., INC.
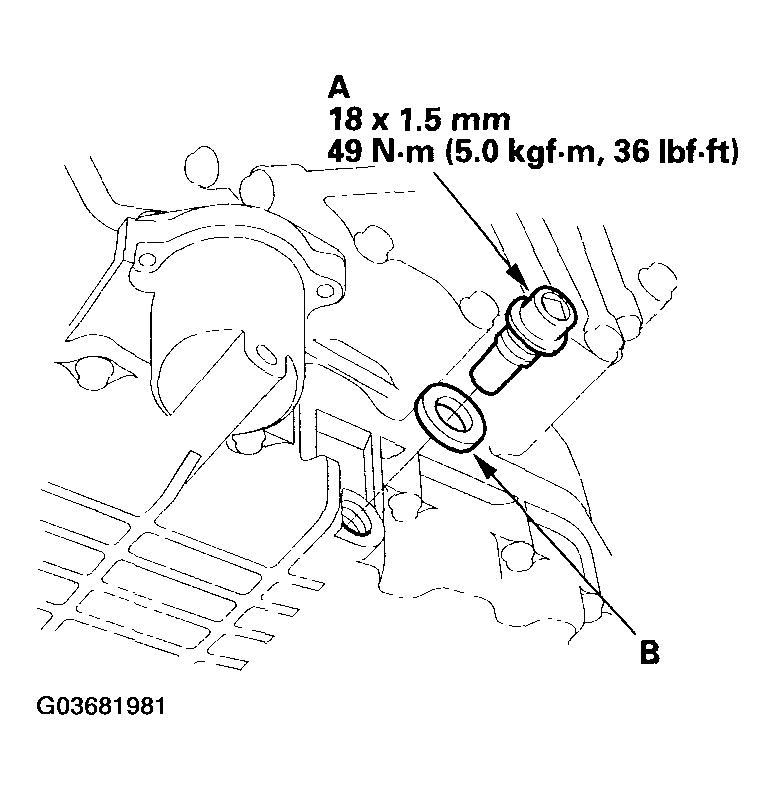
- Remove the bolt (A) securing the ATF cooler inlet line (B) on the transmission.
 Courtesy of AMERICAN HONDA MOTOR CO., INC.
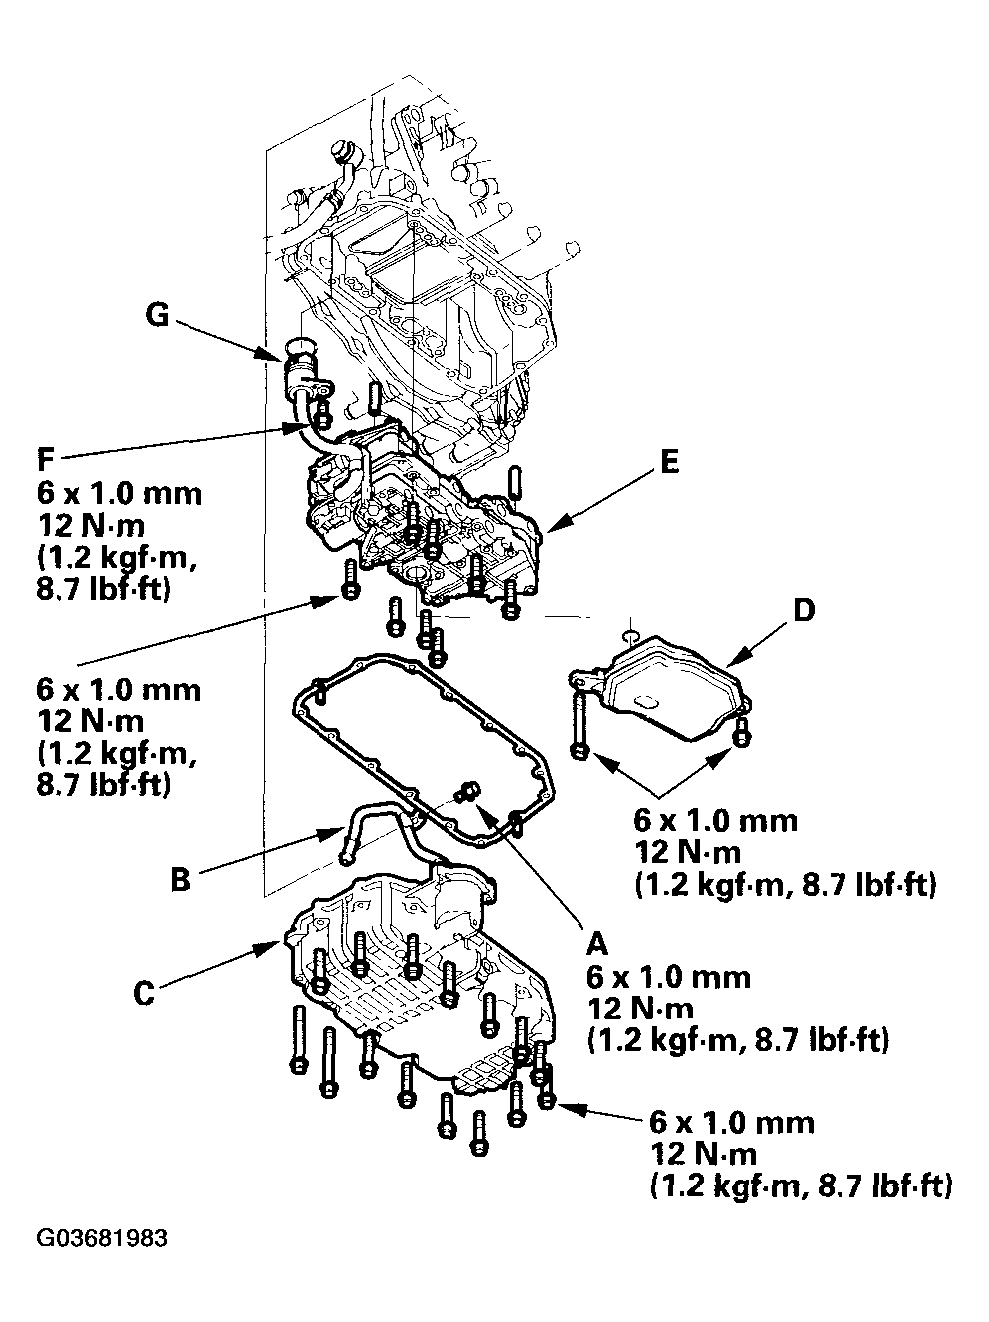
- Remove the ATF pan (C).
- Remove the ATF strainer (D).
- Remove the lower valve body assembly (E), and remove the bolt (F) securing the solenoid harness connector (G) with holding the lower valve body assembly, then remove the harness connector and valve body assembly.
- Replace the lower valve body assembly, and install it in the reverse order of removal.
- Check the solenoid harness connector for rust, dirt, or oil, then connect the connector securely.
- Refill the transmission with CVT Fluid (see
CVT FLUID REPLACEMENT ).
- Install the engine under cover and the air cleaner housing.
- Do the start clutch calibration procedure (see
START CLUTCH CALIBRATION PROCEDURES ).