Removal and Replacement
Alternator Removal and InstallationRemoval
1. Make sure you have the anti-theft codes for the audio unit, then write down the audio presets.
2. Disconnect the negative cable from the battery first, then disconnect the positive cable.
3. Remove the drive belt.
4. Remove the auto-tensioner.
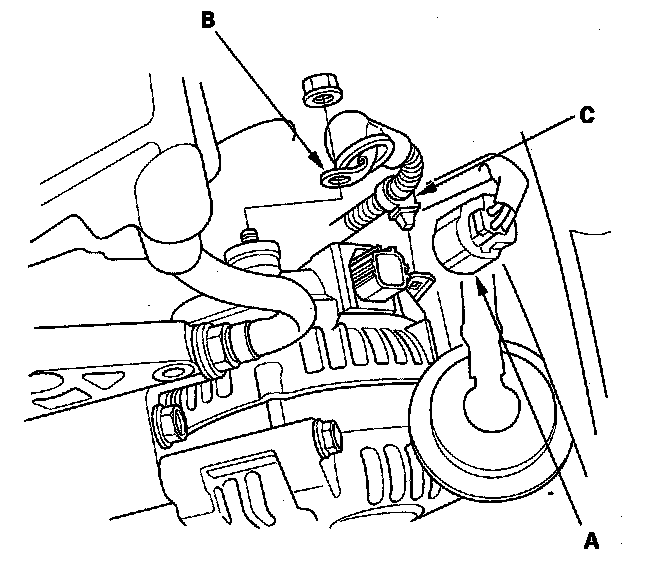
5. Disconnect the alternator connector (A), BLK wire (B), and harness clamp (C) from the alternator.
6. Remove the positive crankcase ventilation (PCV) valve.
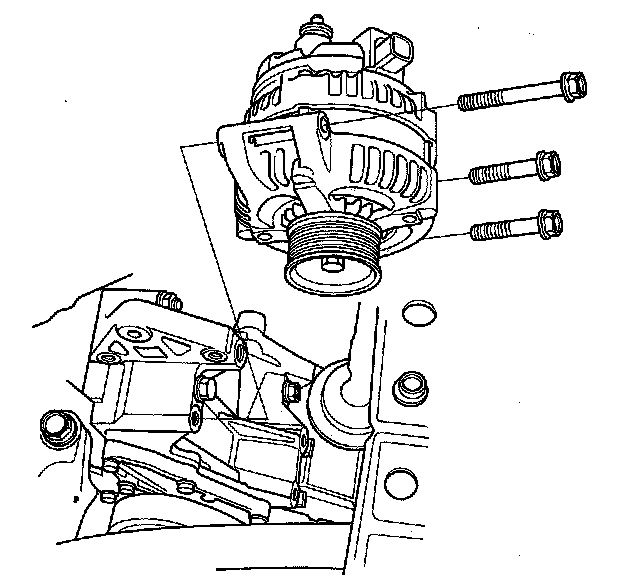
7. Remove the three bolts securing the alternator.
Installation
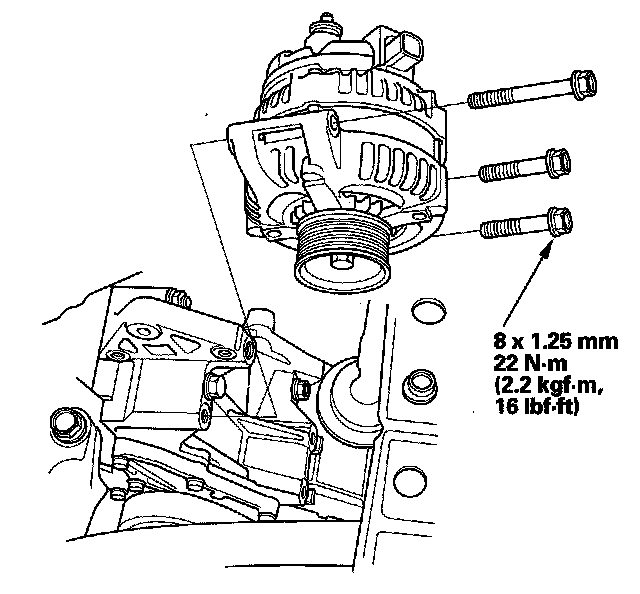
1. Install the alternator.
2. Install the positive crankcase (PCV) valve.
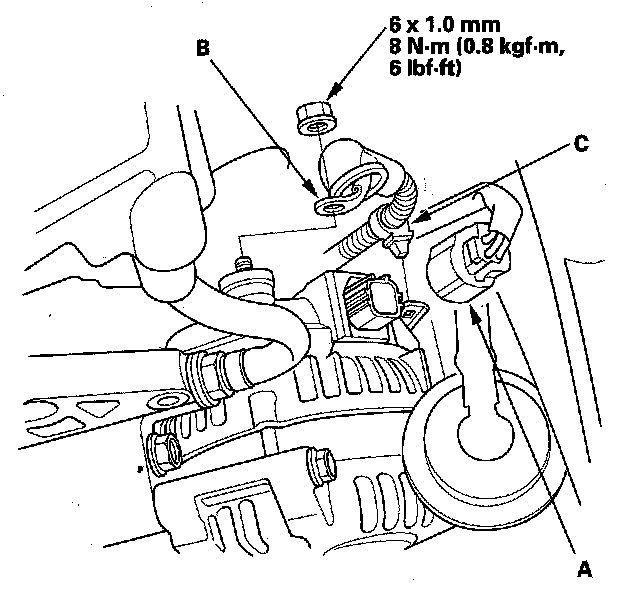
3. Connect the alternator connector (A), BLK wire (B), and harness clamp (C) to the alternator.
4. Install the auto-tensioner.
5. Install the drive belt.
6. Connect the positive cable to the battery first, then connect the negative cable.
7. Enter the anti-theft codes for the audio unit, then enter the audio presets.
8. Set the clock.