Under-Hood Fuse/Relay Box Removal and Installation
Under-hood Fuse/Relay Box Removal and Installation
Special Tools Required
- Relay puller 07AAC-000A1A0
Removal
1. Do the battery terminal disconnection procedure. Procedures
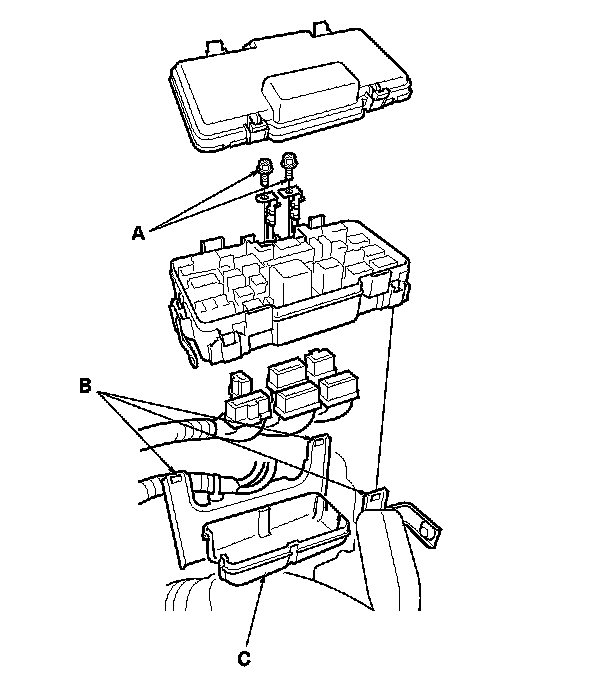
2. Remove the screws (A) for the alternator and battery cable terminals from the under-hood fuse/relay box.
3. Release the tab (B), and then remove the bottom cover (C) from the under-hood fuse/relay box.
4. Disconnect the connectors from the under-hood fuse/relay box.
5. Carefully remove the relays using the relay puller.
NOTE: Do not use pliers. Pliers will damage the relays, which could cause the engine to stall or not start.
Installation
1. Install the relays and connect the connectors to the under-hood fuse/relay box, then install the under-hood fuse/relay box in the reverse order of removal.
2. Install the removed parts in the reverse order of removal.
3. Do the battery terminal reconnection procedure. Procedures
4. Confirm that all systems work properly.