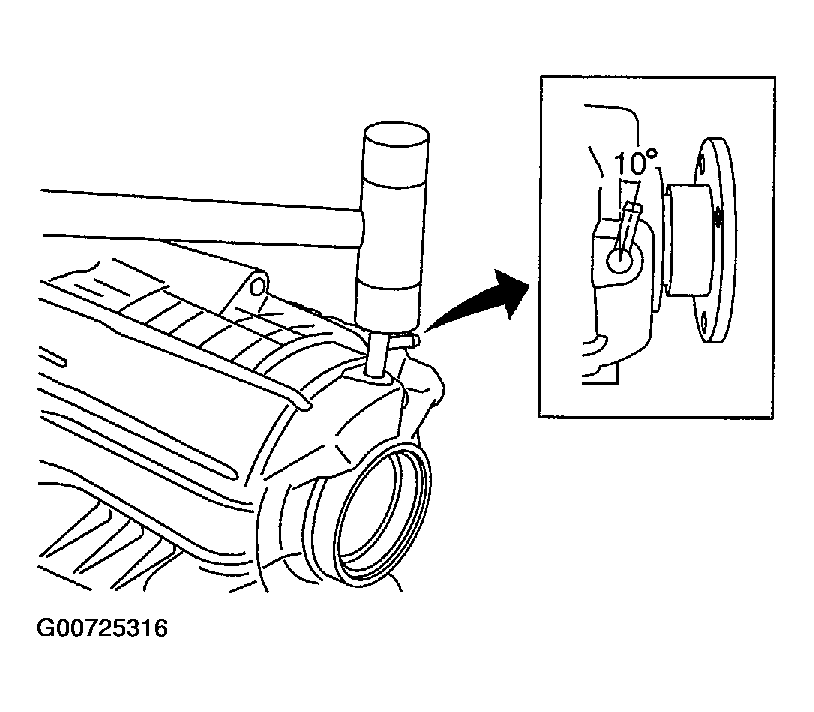
- Install breather tube, with plastic hammer.
CAUTION:
Pay attention to the direction of breather tube.
- Install baffle plate to rear case, and tighten bolt to the specified torque. Refer to COMPONENTS .
 Courtesy of NISSAN MOTOR CO., U.S.A.
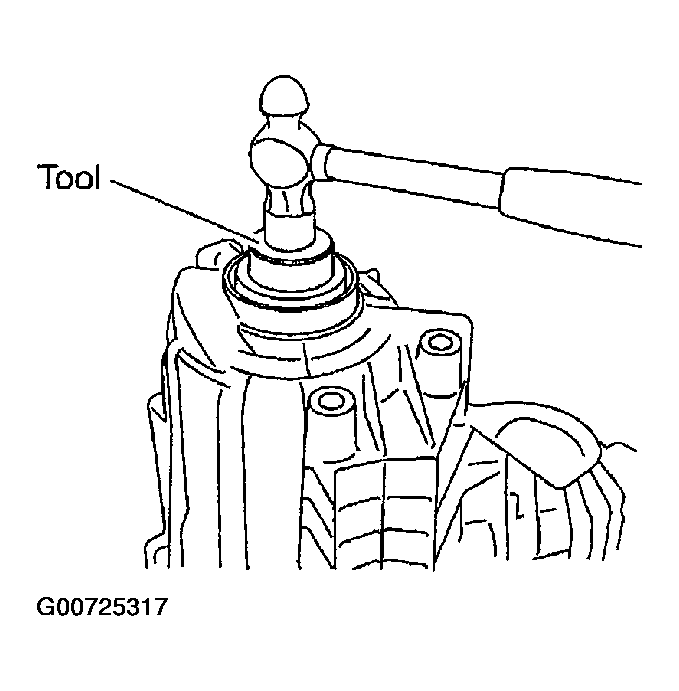
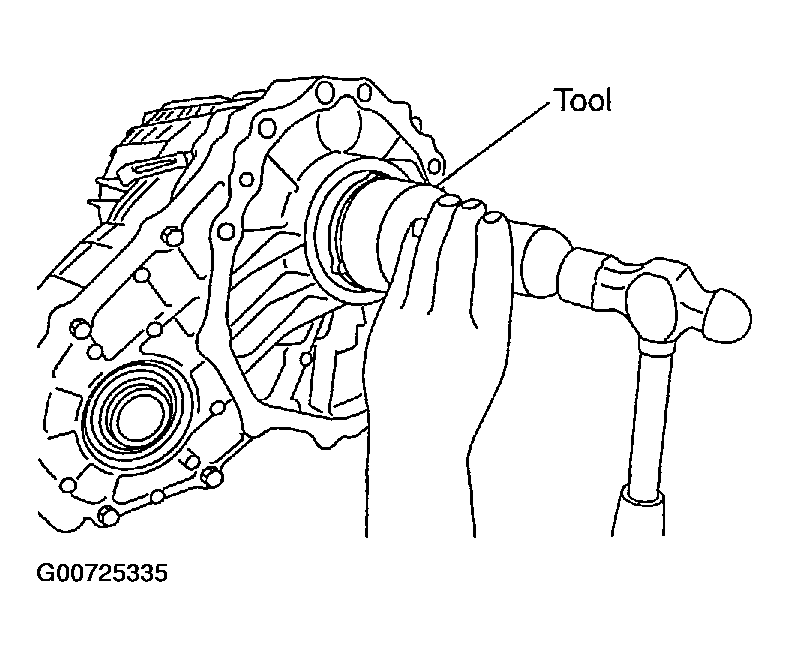
- Install rear bearing to rear case, using a drift.
- Tool number : KV38104010 ( - )
CAUTION:
Apply ATF to inside of rear bearing.
 Courtesy of NISSAN MOTOR CO., U.S.A.
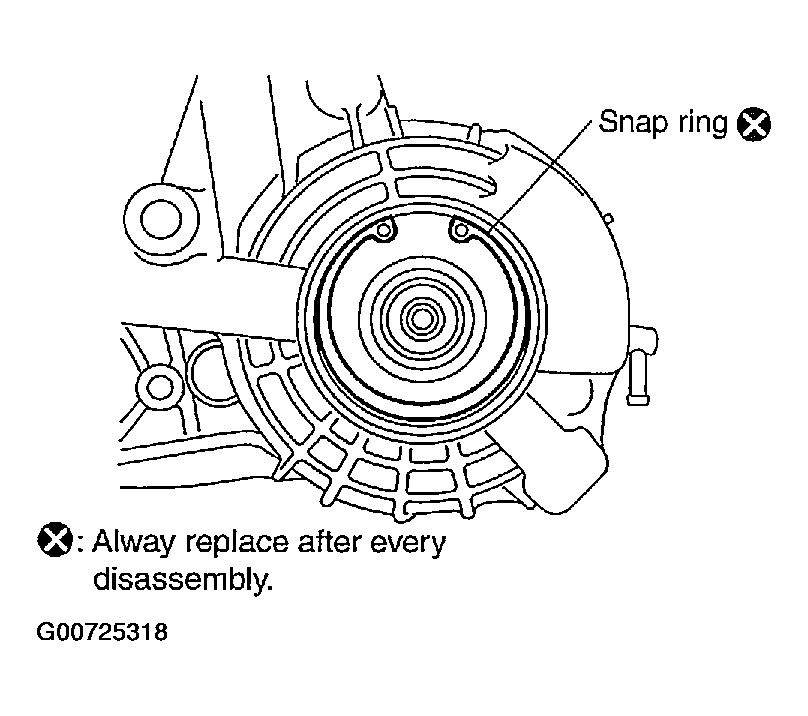
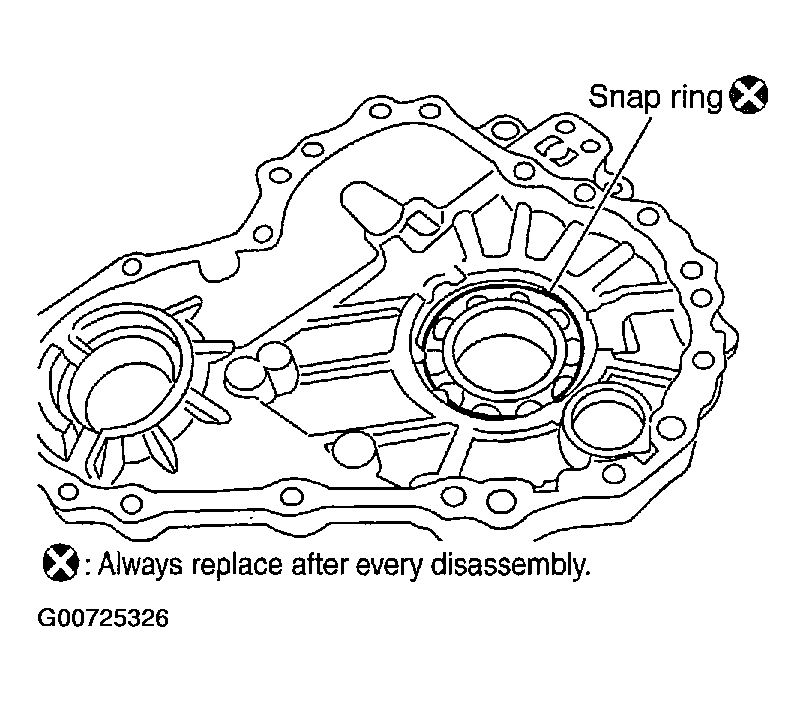
- Install snap ring to rear case.
CAUTION:
Do not reuse snap ring.
 Courtesy of NISSAN MOTOR CO., U.S.A.
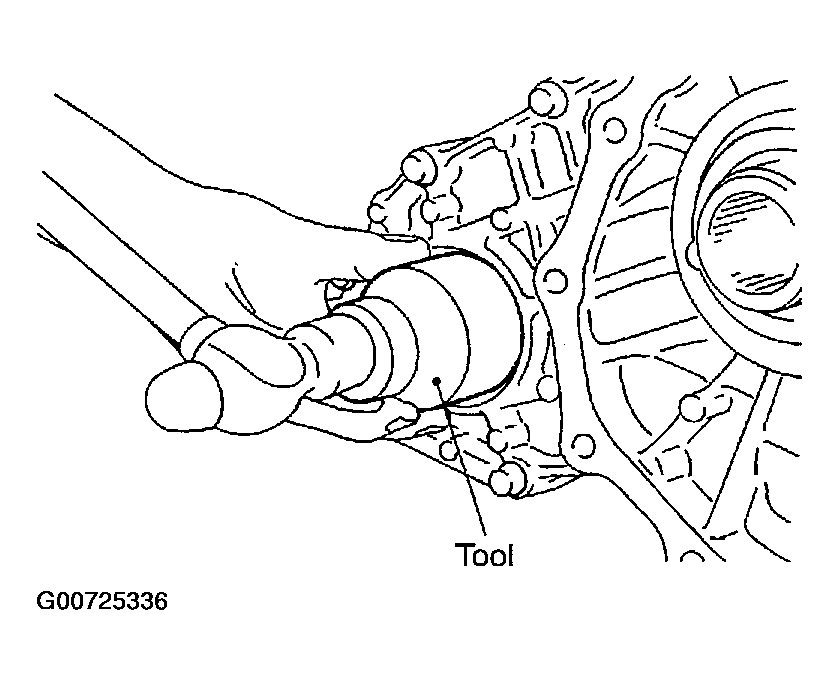
- Install mainshaft assembly to rear case, using a drift.
- Tool number : ST35321000 ( - )
CAUTION:
ATF should be applied to contact surface of mainshaft and rear bearing.
- Install O-ring to electric controlled coupling connector.
CAUTION:
- Do not reuse O-ring.
- Apply ATF to O-ring.
 Courtesy of NISSAN MOTOR CO., U.S.A.
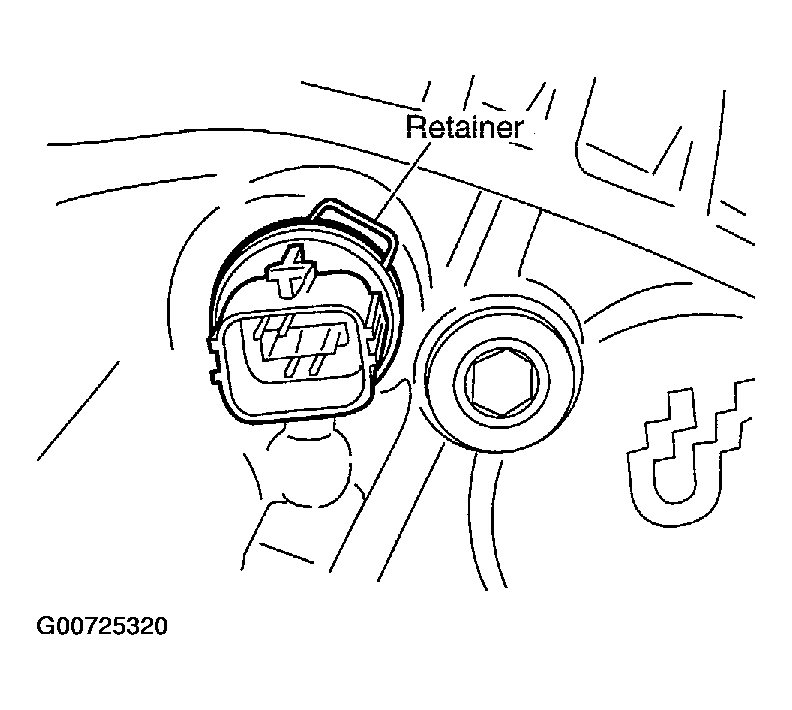
- Install electric controlled coupling connector into rear case.
- Install retainer to electric controlled coupling connector.
 Courtesy of NISSAN MOTOR CO., U.S.A.
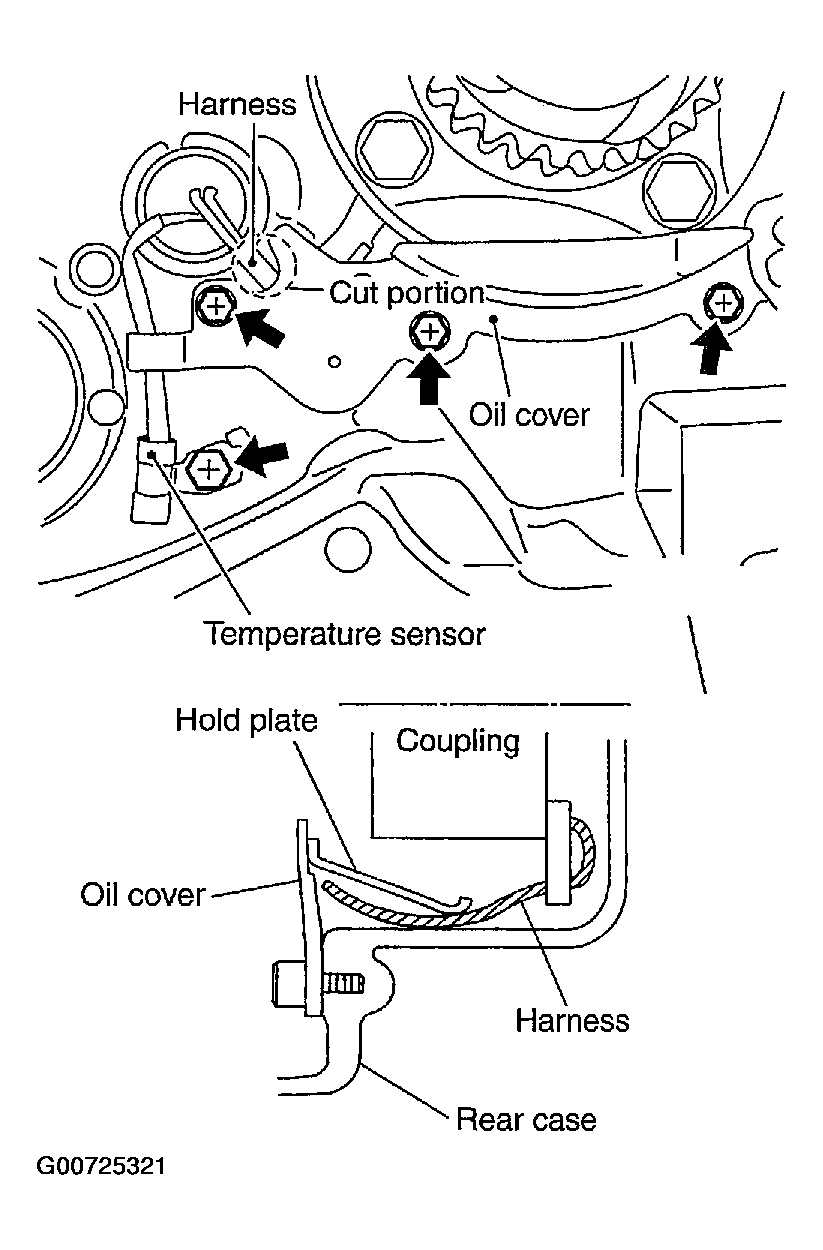
- Set temperature sensor and tighten bolt to the specified torque. Refer to COMPONENTS .
- Hold electric controlled coupling harness with oil cover hold plate, install oil cover to rear case, and tighten bolt to the specified torque. Refer to Components .
CAUTION:
The harness should be guided by a cut portion.
 Courtesy of NISSAN MOTOR CO., U.S.A.
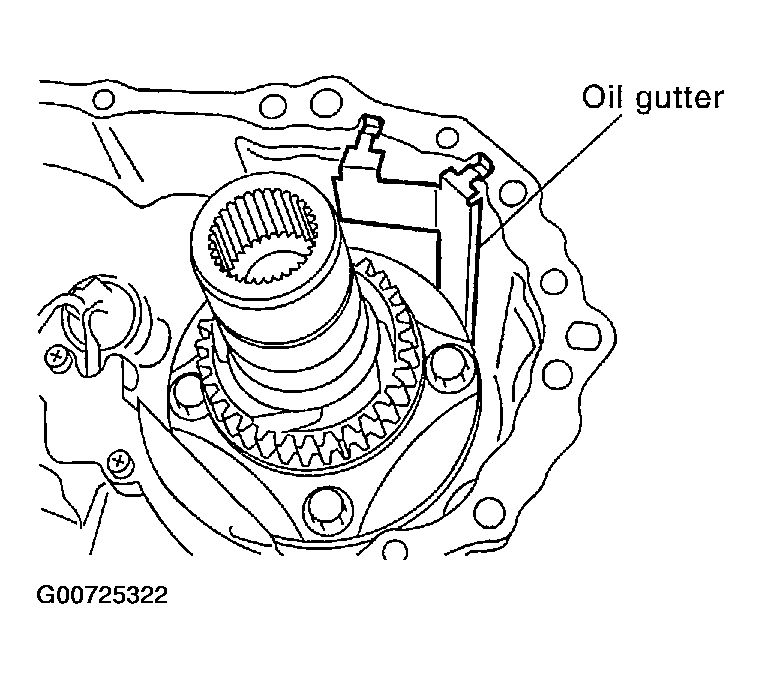
- Install oil gutter to rear case.
CAUTION:
The tip of oil gutter should be put into rear case groove.
 Courtesy of NISSAN MOTOR CO., U.S.A.
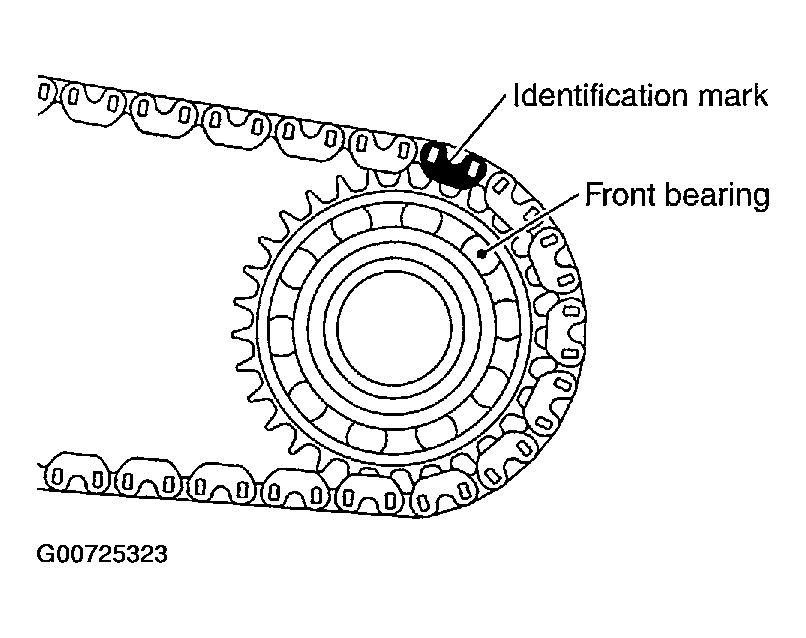
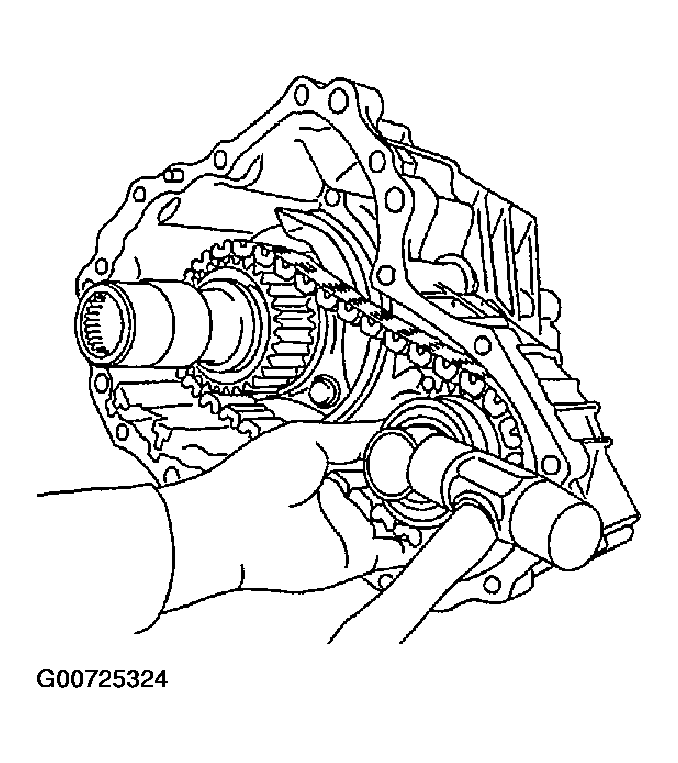
- Install drive chain to front drive shaft.
CAUTION:
Identification mark of drive chain should be in the side of front bearing of front drive shaft.
 Courtesy of NISSAN MOTOR CO., U.S.A.
- Install drive chain to mainshaft, and then install tap front drive shaft with plastic hammer. Press-fit rear bearing of front drive shaft to rear case.
CAUTION:
Be careful not to tap drive chain.
 Courtesy of NISSAN MOTOR CO., U.S.A.
- Install mainshaft bearing to front case, using a drift.
- Tool number : ST30621000 (J25742-5)
 Courtesy of NISSAN MOTOR CO., U.S.A.
- Install snap ring to front case.
CAUTION:
Do not reuse snap ring.
 Courtesy of NISSAN MOTOR CO., U.S.A.
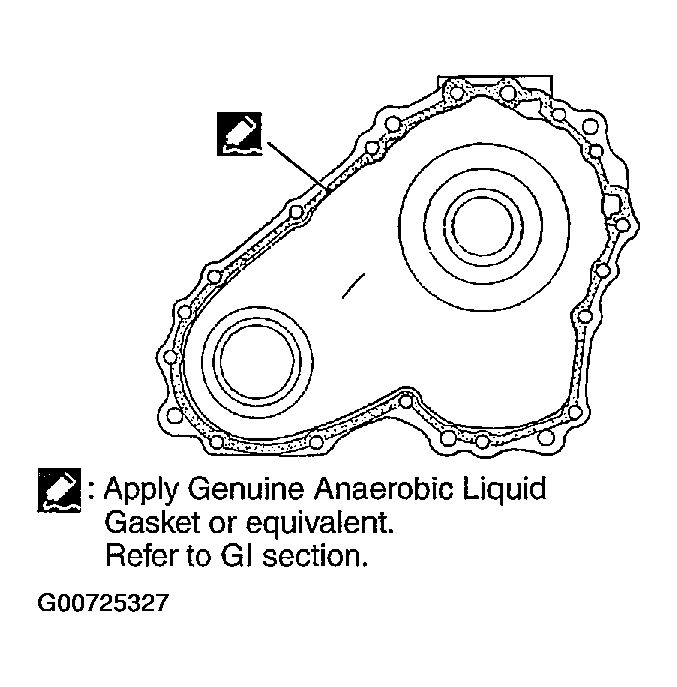
- Apply liquid gasket to mating surface of rear case.
CAUTION:
Remove old sealant adhering to mounting surfaces. Also remove any moisture, oil, or foreign material adhering to application and mounting surfaces.
 Courtesy of NISSAN MOTOR CO., U.S.A.
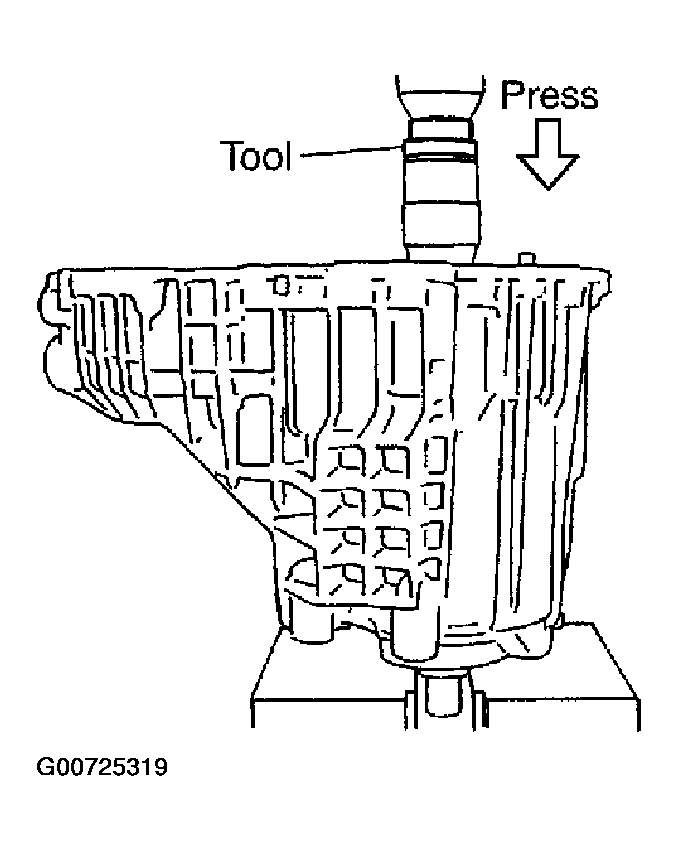
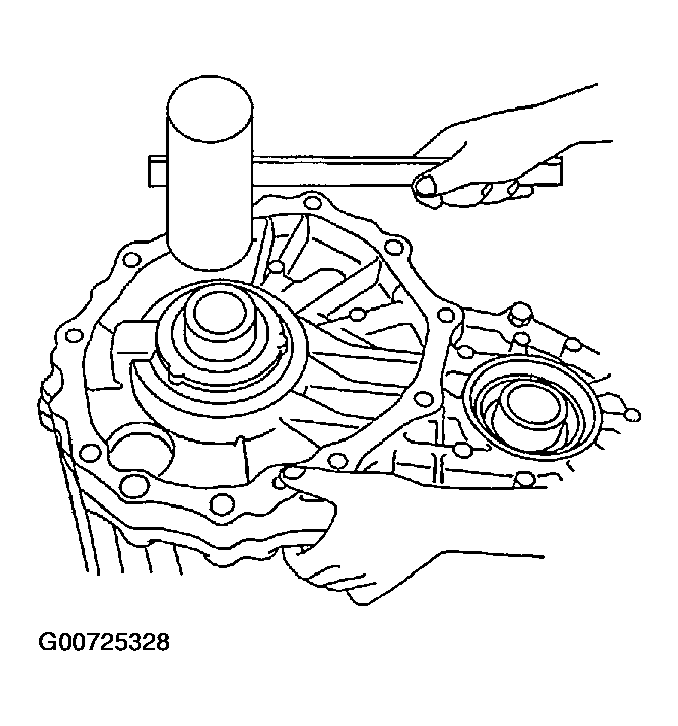
- Set front case to rear case.
CAUTION:
Be careful not to damage the mating surface transmission side.
 Courtesy of NISSAN MOTOR CO., U.S.A.
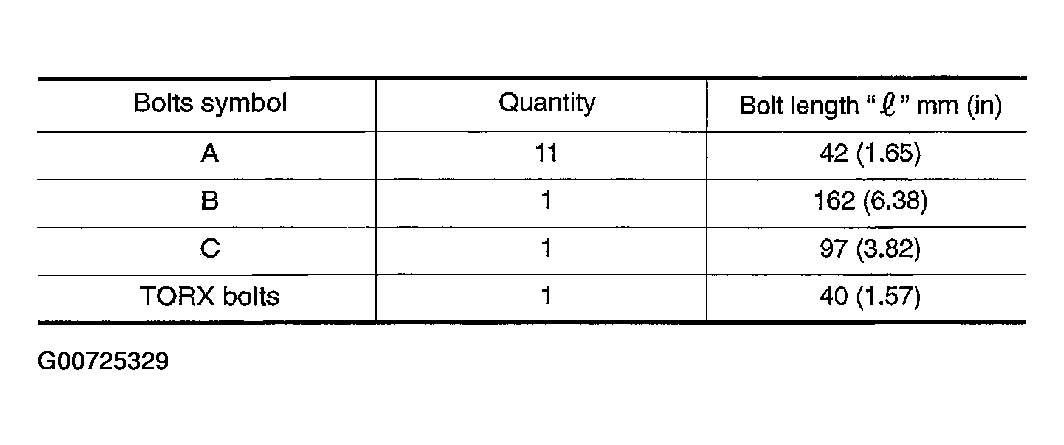
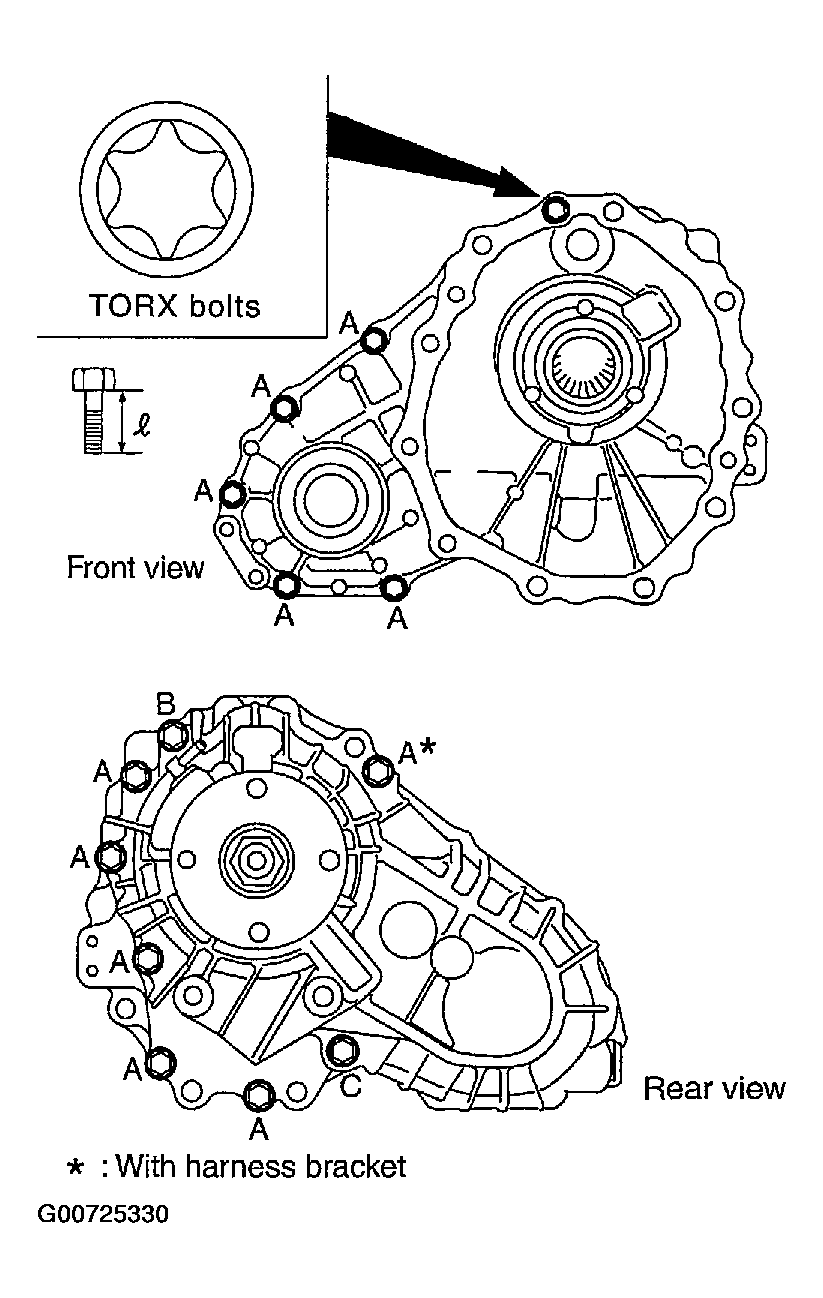
- Tighten front case and rear case fixing bolts to the specified torque. Refer to COMPONENTS .
 Courtesy of NISSAN MOTOR CO., U.S.A.
 Courtesy of NISSAN MOTOR CO., U.S.A.
- Install spacer to mainshaft.
CAUTION:
Apply ATF to spacer.
 Courtesy of NISSAN MOTOR CO., U.S.A.
- Install rear oil seal to rear case, using a drift.
- Dimension A : 6.7 - 7.3 mm (0.264 - 0.287 in)
- Tool number A: ST30720000 (J25405)
- B: KV40104830 ( - )
CAUTION:
- Do not reuse rear oil seal.
- Apply ATF to rear oil seal.
- When installing, do not incline rear oil seal.
 Courtesy of NISSAN MOTOR CO., U.S.A.
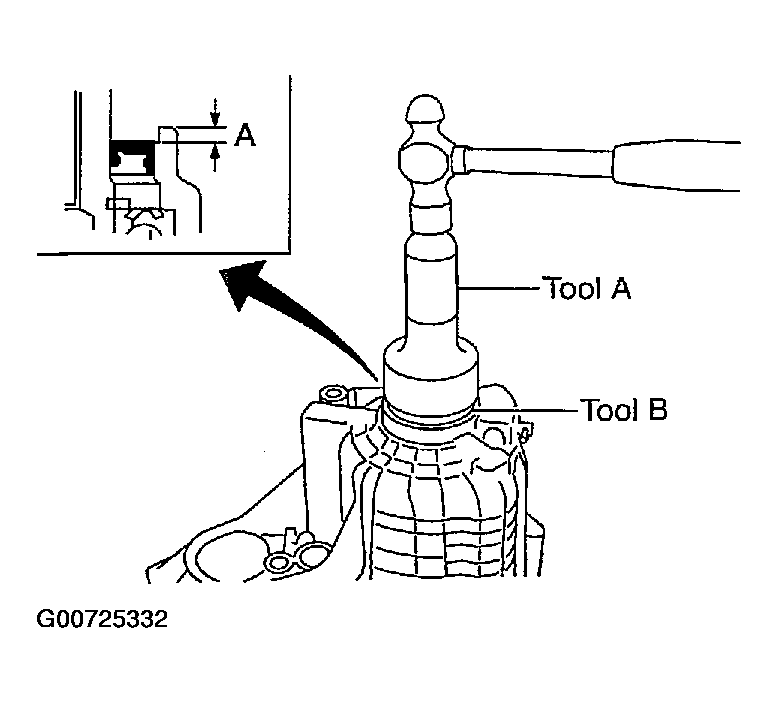
- Install companion flange while align the matchmark of mainshaft with the mark of companion flange.
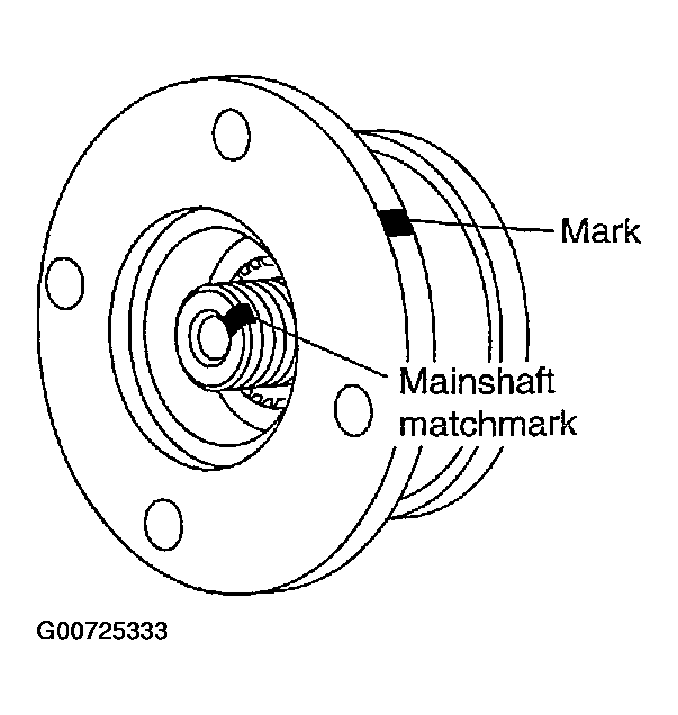 Courtesy of NISSAN MOTOR CO., U.S.A.
- Tighten self-lock nut to the specified torque, with flange wrench. Refer to COMPONENTS .
CAUTION:
Do not reuse self-lock nut.
 Courtesy of NISSAN MOTOR CO., U.S.A.
- Install mainshaft oil seal until it is flush with end face of front case, using drift.
- Tool number : ST30720000 (J25405)
 Courtesy of NISSAN MOTOR CO., U.S.A.
CAUTION:
- Do not reuse mainshaft oil seal.
- Apply ATF to mainshaft oil seal.
- When installing, do not incline mainshaft oil seal.
- Install front oil seal until it is flush with end face of front case, using drift.
- Tool number : ST27862000 ( - )
 Courtesy of NISSAN MOTOR CO., U.S.A.
CAUTION:
- Do not reuse front oil seal.
- Apply ATF to front oil seal.
- When installing, do not incline front oil seal.
- Apply sealant to threads of drain plug. Then install it to rear case and tighten to the specified torque. See COMPONENTS .
- Use Genuine Silicone RTV or equivalent.
CAUTION:
Remove old sealant and oil adhering to threads.
- Set gasket to filler plug. Install it to rear case and tighten to the specified torque. Refer to COMPONENTS .
CAUTION:
Do not reuse gasket.