Radiator, Engine Cooling: Installation: 3.2L
 Courtesy of CHRYSLER GROUP, LLC
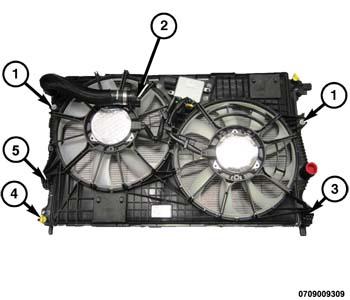
- If removed, install the cooling fan to the radiator and tighten to bolts (1) 9 N.m (80 in. lbs.).
 Courtesy of CHRYSLER GROUP, LLC
- With the help of an assistant. position the radiator into the lower mounting isolators (1) on the radiator lower support.
 Courtesy of CHRYSLER GROUP, LLC
- Install the right and left upper radiator mounts (1) and tighten bolts (2) to 9 N.m (80 in. lbs.).
 Courtesy of CHRYSLER GROUP, LLC
- Position the condenser to the radiator (1) and tighten the bolts (2) to 8 N.m (70 in. lbs.).
- Remove the cap/plug from the A/C lines
 Courtesy of CHRYSLER GROUP, LLC
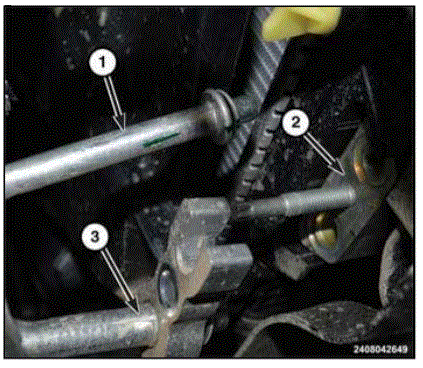
- Using NEW sealing washers, install the A/C discharge (3) and liquid line (1) to the jumper line junction block (1) and tighten the nut to 25 N.m (18 ft. lbs).
 Courtesy of CHRYSLER GROUP, LLC
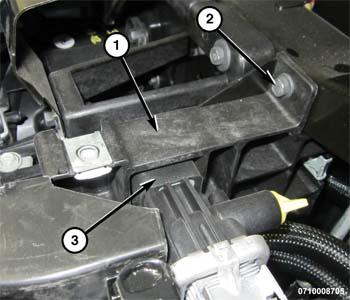
- Install and securely tighten the A/C fill port support bracket (1) bolt (2).
- Connect the A/C pressure switch wire harness connector.
 Courtesy of CHRYSLER GROUP, LLC
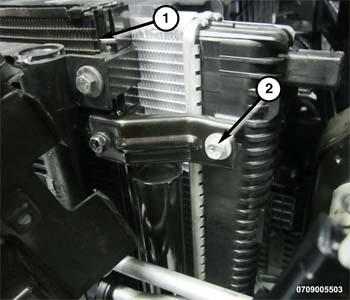
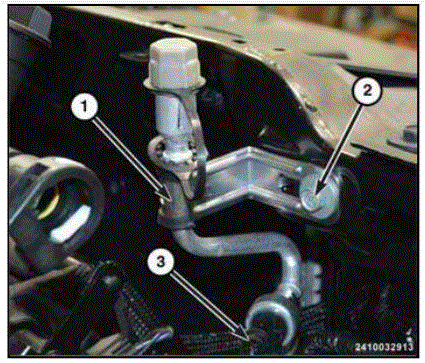
- Install and securely tighten the transmission cooler line support bracket bolt (1).
- Install the upper radiator hose to the radiator and secure the clamp.
 Courtesy of CHRYSLER GROUP, LLC
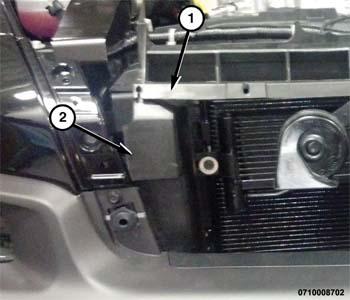
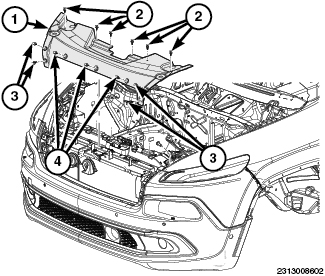
- Install the right and left side air deflectors (2).
 Courtesy of CHRYSLER GROUP, LLC
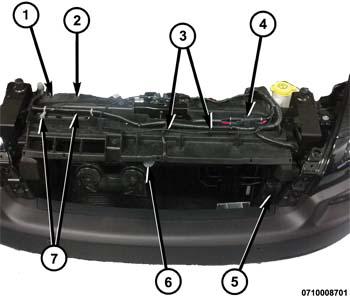
- Install the upper radiator close out panel (1) and securely tighten the fasteners.
- Install the wiring harness (7) to the air deflector.
- Connect the ambient air temperature sensor wire harness connector (5).
- Install the hood release cable (3) to the air deflector.
- Connect the horn wire harness connectors (6).
- Connect the cooling fan wire harness connector (4).
 Courtesy of CHRYSLER GROUP, LLC
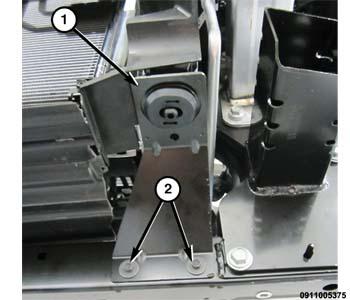
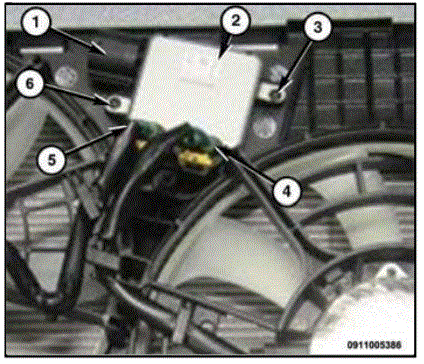
- Connect the wire harness connector (1) to the cooling fan module (2).
- Install the hood latch (Refer to LATCH, HOOD
) .
- Install the upper radiator close out panel cover (1) and the fasteners (2, 3, 4).
 Courtesy of CHRYSLER GROUP, LLC
- Raise and support the vehicle (Refer to HOISTING, STANDARD PROCEDURE
) .
 Courtesy of CHRYSLER GROUP, LLC
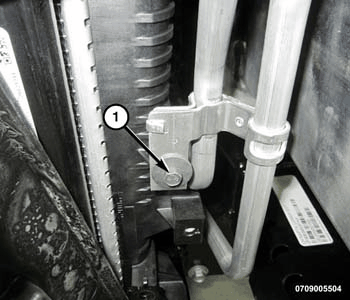
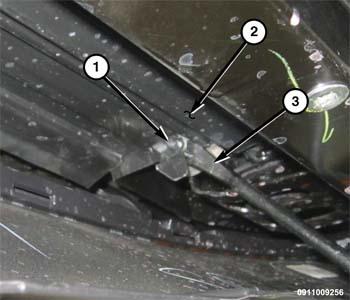
- Install the push pins (1) that secure the side close out deflector to the lower deflector (2).
- Install the lower radiator hose.
- Fill the cooling system (Refer to 0STANDARD PROCEDURE ) .
- Install the belly pan (Refer to BELLY PAN, INSTALLATION
) .
- Connect the negative battery cable. If equipped with an Intelligent Battery Sensor (IBS), connect the IBS connector.
- Evacuate and charge the A/C system (Refer to PLUMBING, STANDARD PROCEDURE
) .
- Install the engine cover.