Valve Body Assembly: Installation
- Install valve body:
- Install spring and check ball body. See Fig 4.
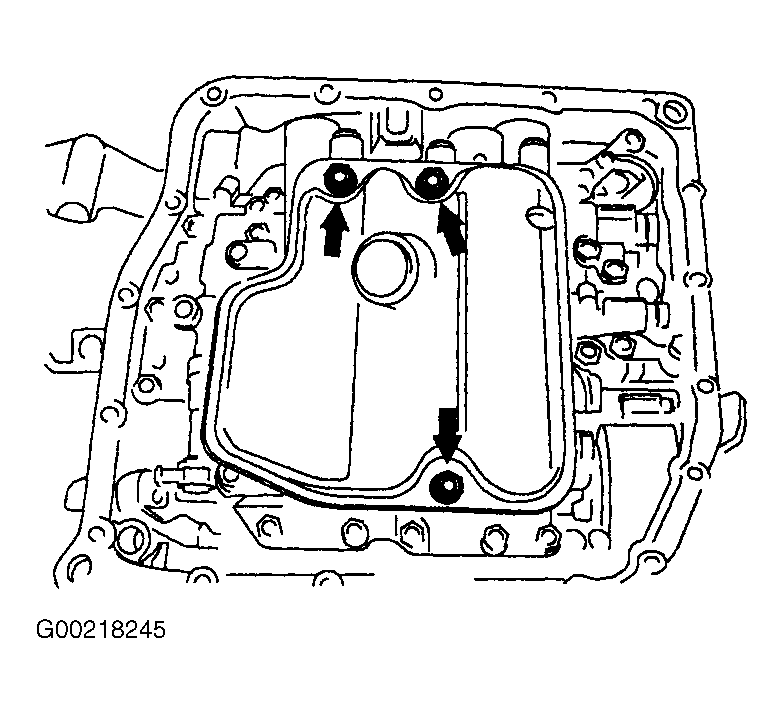
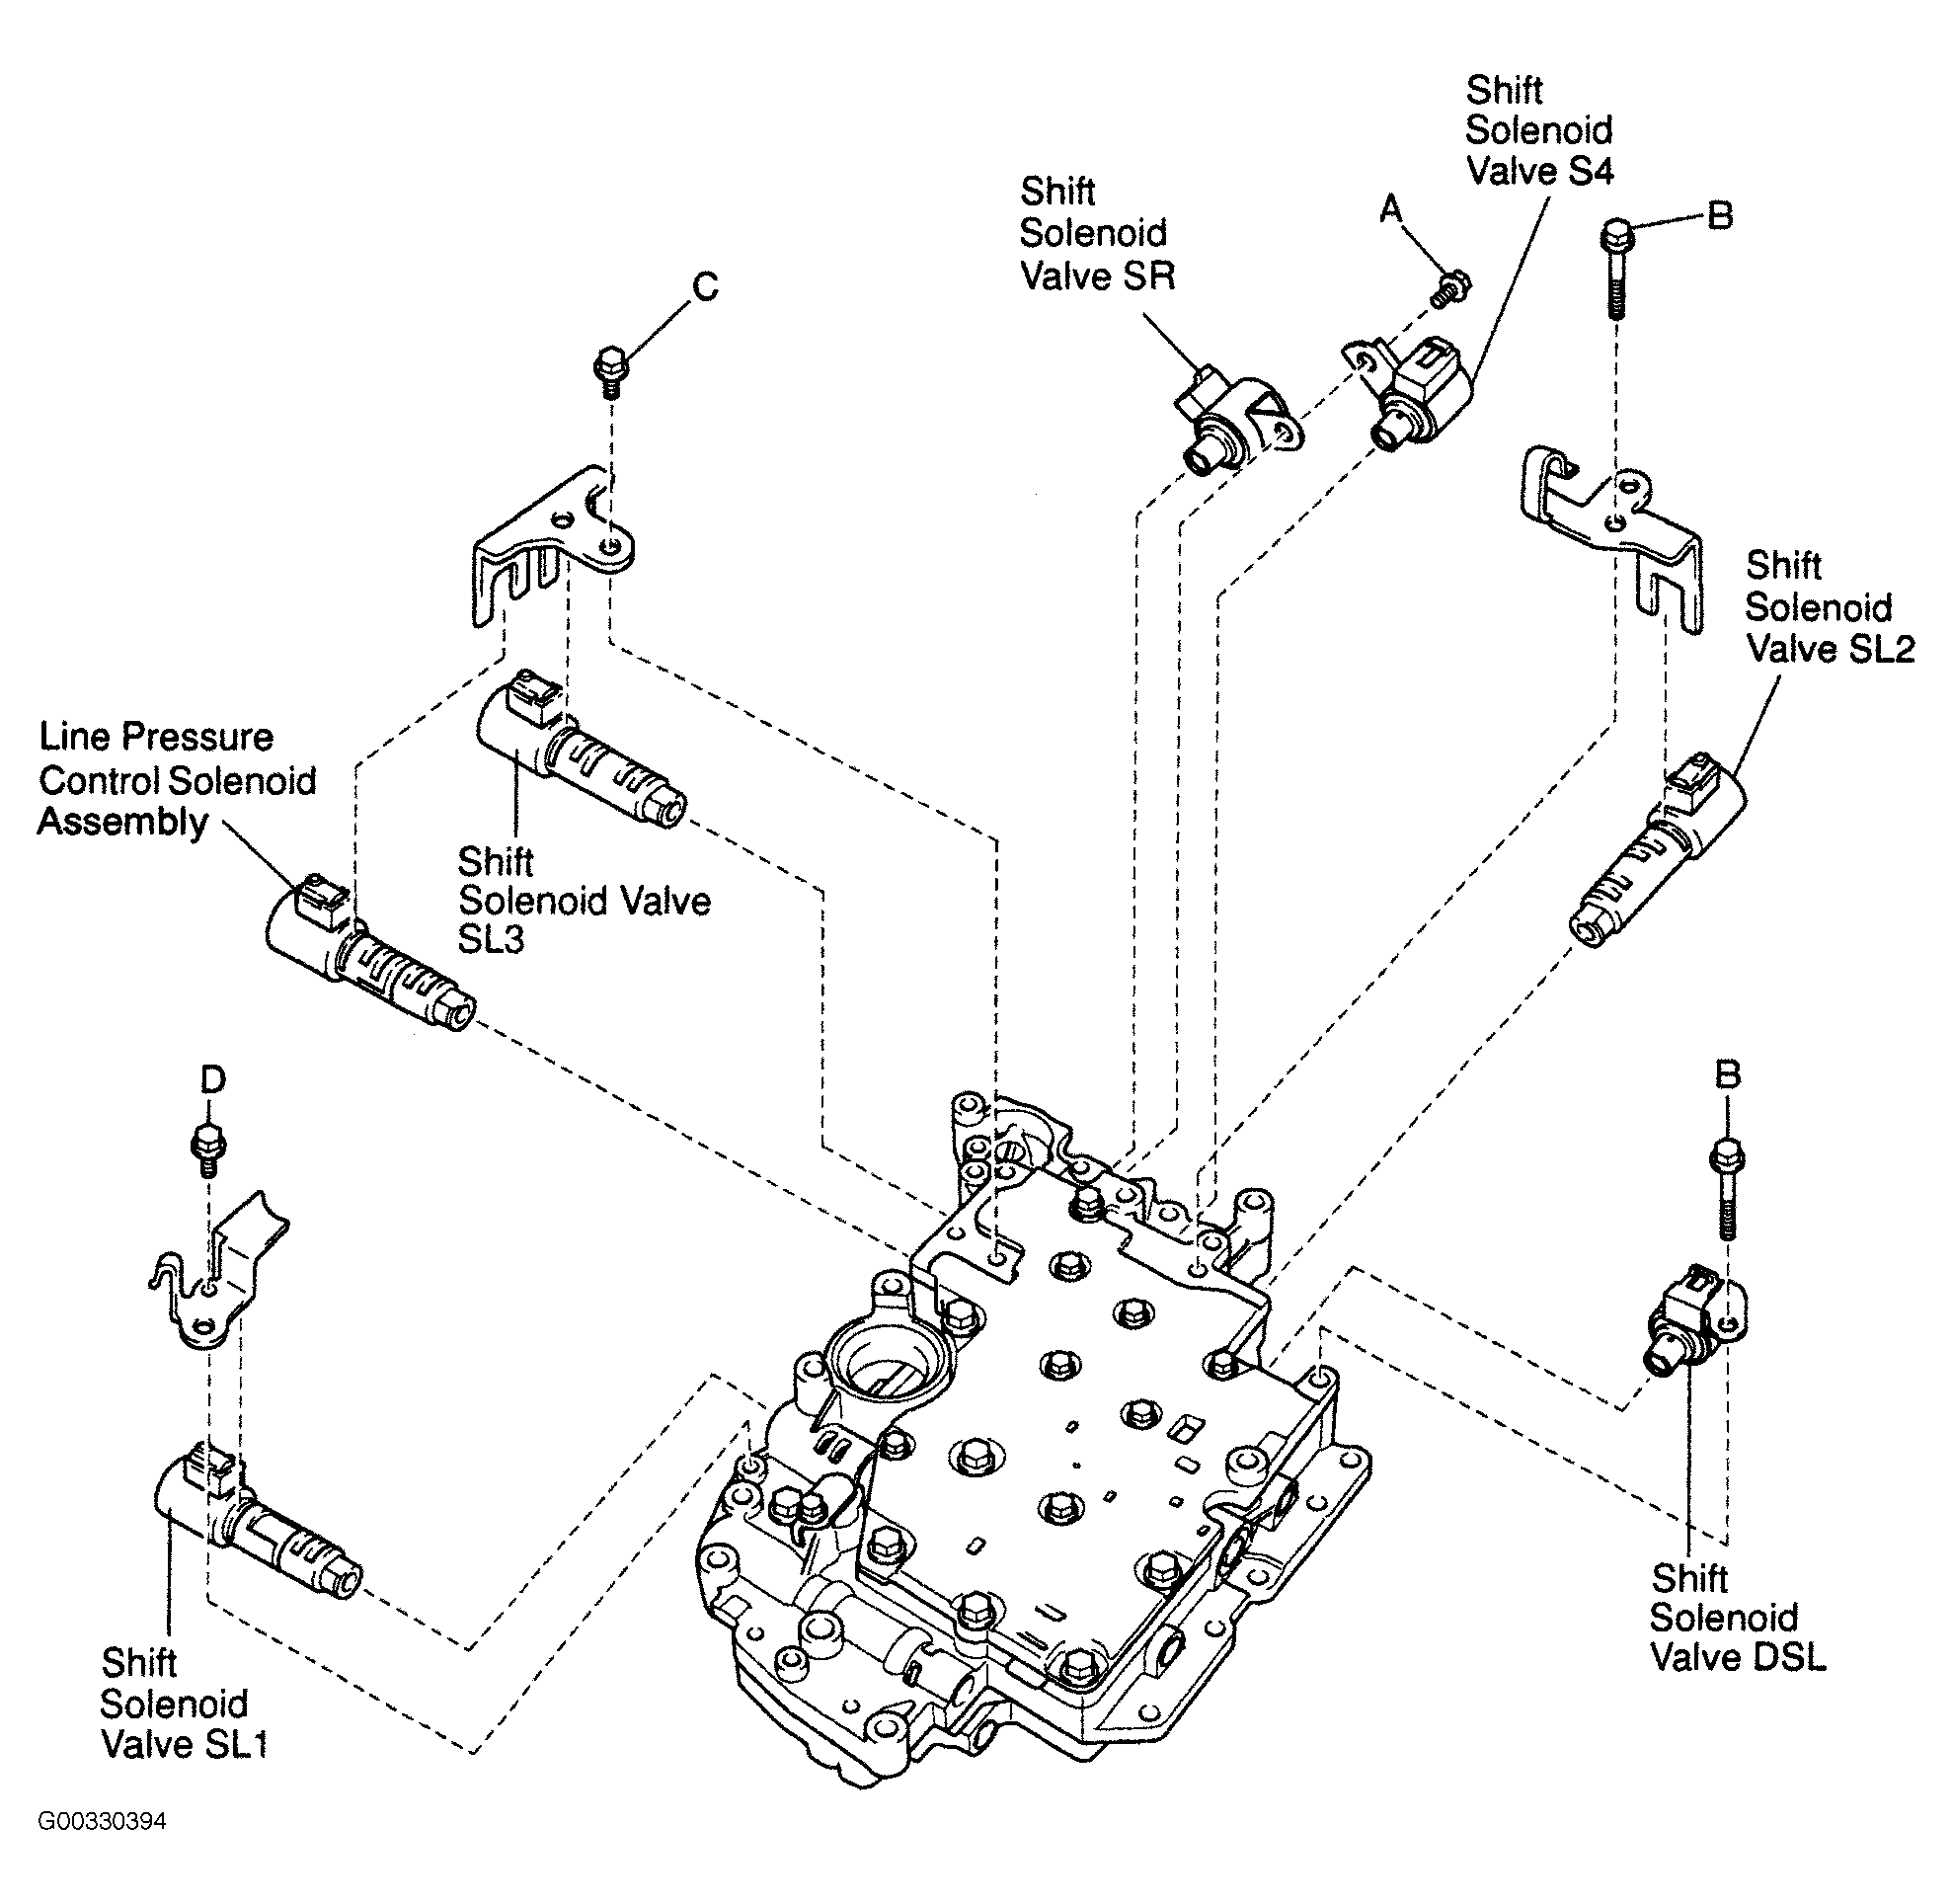
- Install shift solenoid valves hand tighten bolts. See Fig 5. Tighten bolts to specification. See TORQUE SPECIFICATIONS .
- Align groove of manual valve with pin of manual valve lever. Hand tighten 2 alignment bolts.
- Hand tighten valve body bolts. Tighten valve body bolts to specification. See TORQUE SPECIFICATIONS .
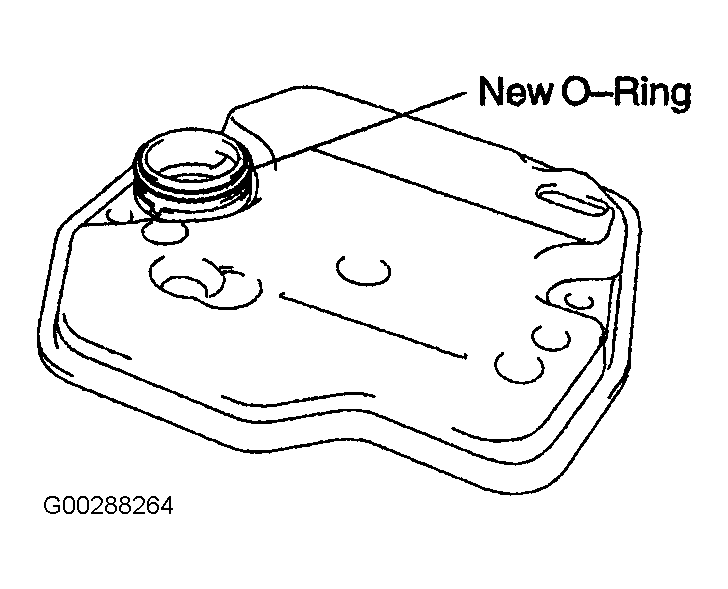
- Install oil strainer. See Fig 1:
- Coat a new "O" ring with ATF.
- Install "O" ring on oil strainer.
- Install oil strainer with 3 bolts. Tighten bolts to specification. See TORQUE SPECIFICATIONS .
- Install transaxle wire:
- Coat a NEW "O" ring with ATF.
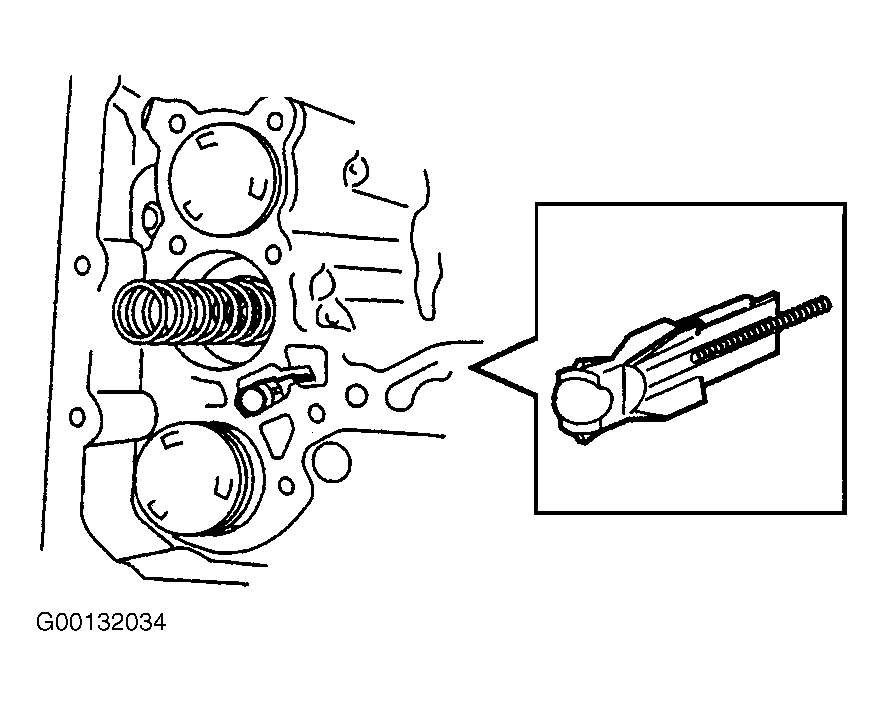
- Install ATF temperature sensor with lock plate and bolt. See Figure. Tighten bolt to specification. See TORQUE SPECIFICATIONS .
- Connect shift solenoid valve connectors.
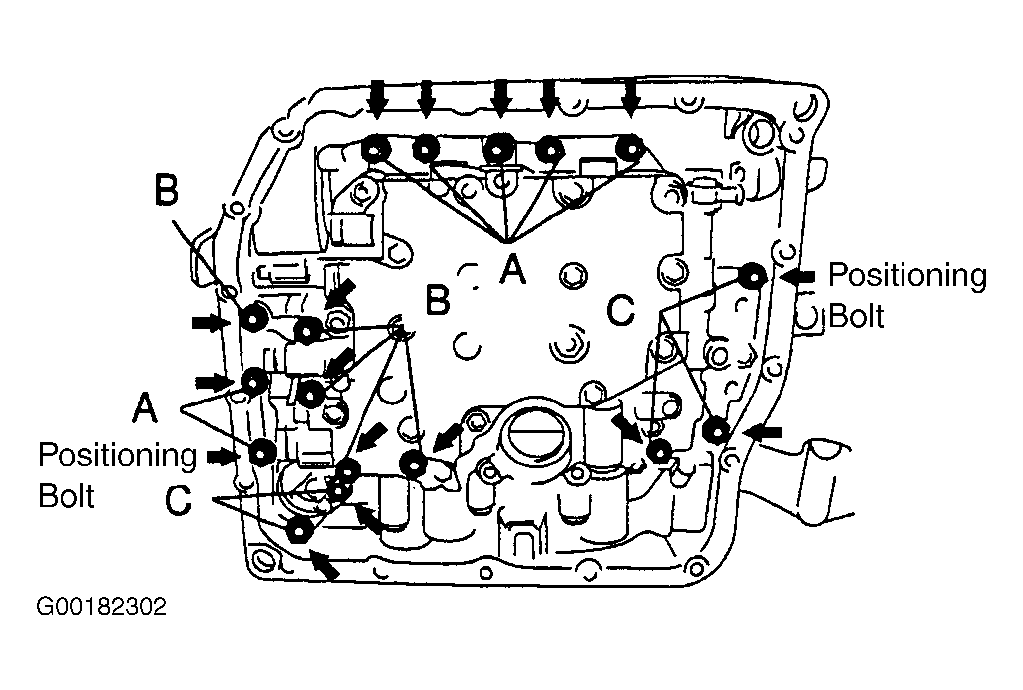
- Place magnets in oil pan. See Figure. Apply seal packing or equivalent to bolts (Manufacture recommends THREE BOND 2430). Hand tighten 18 bolts. Install oil pan and a NEW gasket. Within 10 minutes of application of seal packing, tighten bolts to specification. See TORQUE SPECIFICATIONS .
- Install a NEW oil drain plug gasket and drain plug. Tighten drain plug to specification. See TORQUE SPECIFICATIONS .
- Fill transaxle with ATF and check fluid level. See DRAINING & REFILLING in LUBRICATION.
- Install engine undercover No. 1.
- Reset Memory. See COMPUTER RELEARN PROCEDURES
.
- Lower vehicle.
 Courtesy of © TOYOTA, LICENSE AGREEMENT TMS1002
 Courtesy of © TOYOTA, LICENSE AGREEMENT TMS1002
 Courtesy of © TOYOTA, LICENSE AGREEMENT TMS1002
 Courtesy of © TOYOTA, LICENSE AGREEMENT TMS1002
 Courtesy of © TOYOTA, LICENSE AGREEMENT TMS1002