Differential Assembly: Service and Repair
AXLE ASSEMBLY REMOVAL/INSTALLATION
1. Remove the rear driveshaft assembly. See Removal and Replacement.
2. Remove the rear halfshafts. See Rear Axle / Rear Drive Halfshafts Removal/Installation.
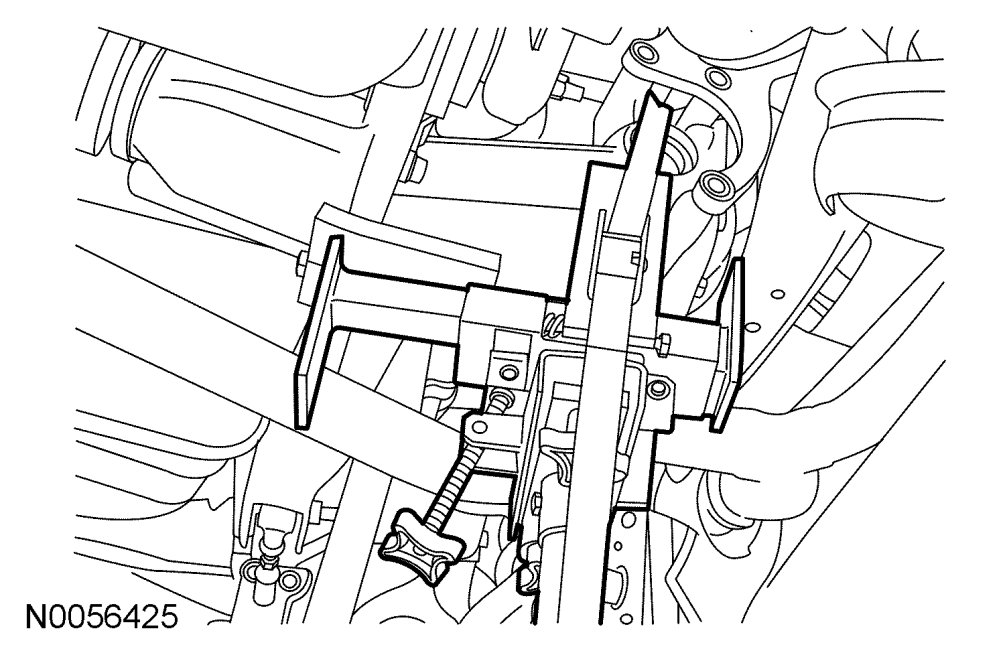
3. Position a suitable transmission hydraulic jack to the axle housing. Securely strap the jack to the housing.
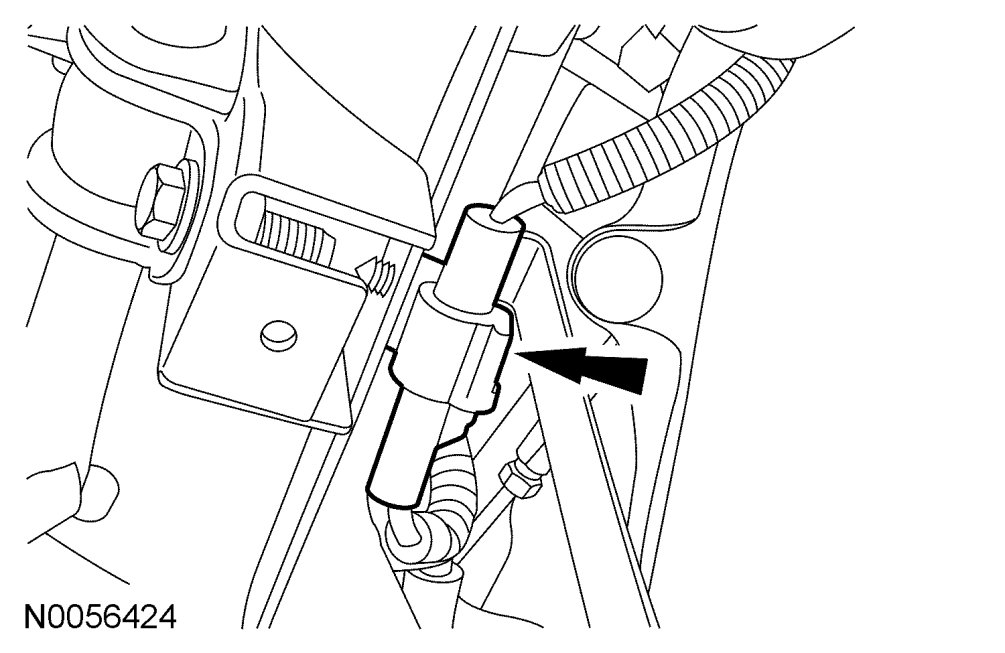
4. Disconnect the active torque coupling electrical connector.
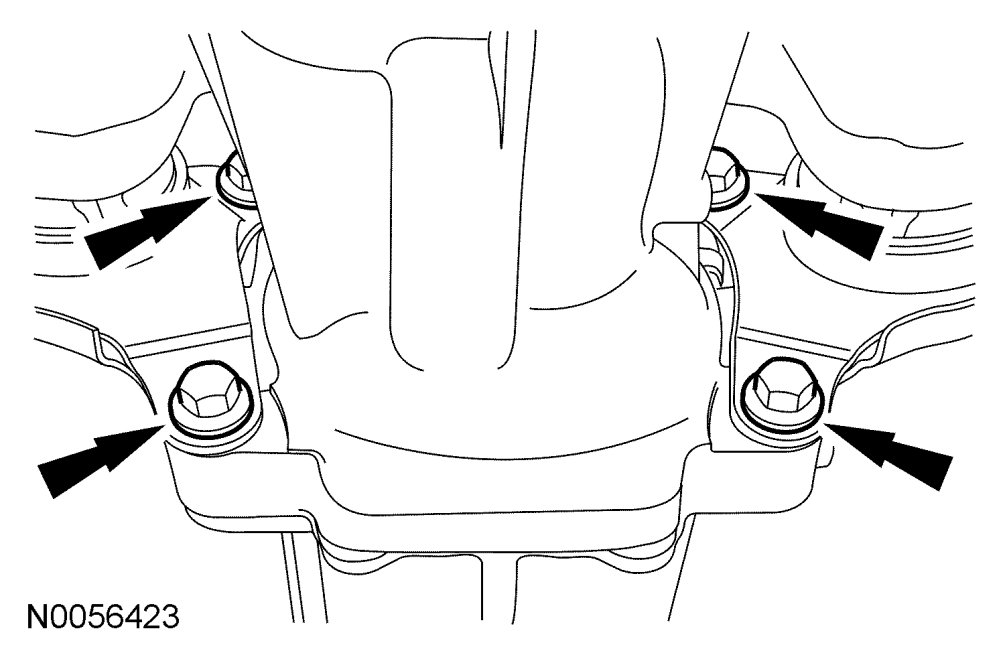
5. Remove the 4 differential housing-to-front insulator bracket bolts.
- To install, tighten to 90 Nm {9.2 kgf-m, 66 ft-lbf}.
6. Remove and discard the LH front insulator bracket-to-subframe bolt and rotate the bracket aside.
- To install, tighten the new bracket-to-subframe bolt to 90 Nm {9.2 kgf-m, 66 ft-lbf}.
7. Remove and discard the RH front insulator bracket-to-subframe bolt and the bracket.
- To install, tighten the new bracket-to-subframe bolt to 90 Nm {9.2 kgf-m, 66 ft-lbf}.
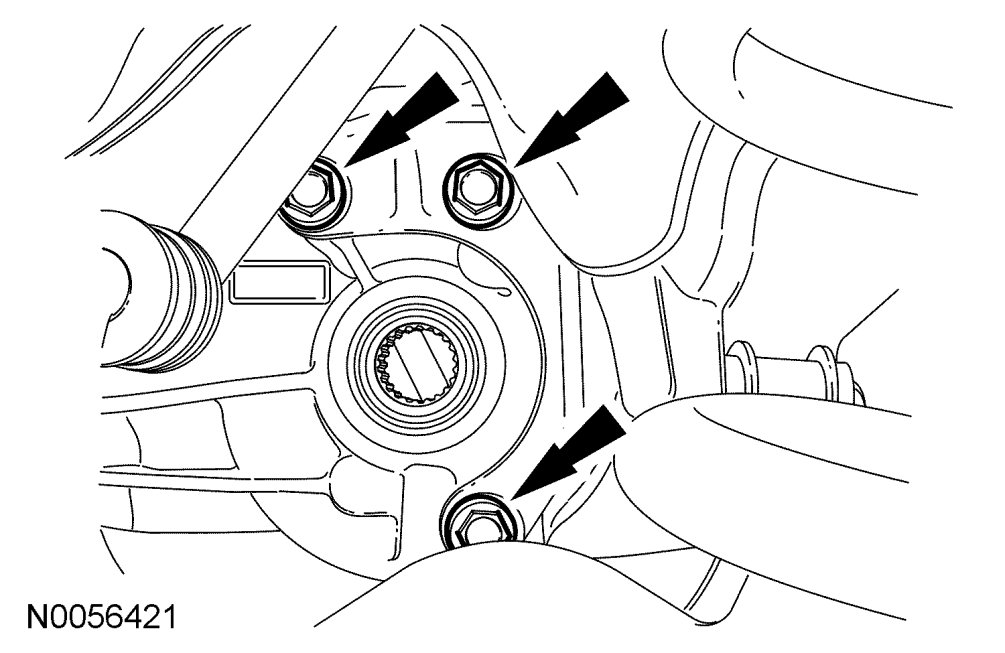
8. Remove the 3 LH side insulator bracket-to-rear axle differential bolts.
- To install, tighten to 90 Nm {9.2 kgf-m, 66 ft-lbf}.
9. Lower the rear axle assembly.
10. To install, reverse the removal procedure.