Shroud Panel Removal/Installation
SHROUD PANEL REMOVAL/INSTALLATION
1. Disconnect the negative battery cable.
2. Remove the following parts:
a. Front bumper (See Removal and Replacement)
b. Front combination lights (See Service and Repair)
c. Front bumper reinforcement (See Service and Repair)
d. Ambient temperature sensor (See Service and Repair)
e. Crash zone sensor (See Crash Zone Sensor Removal/Installation)
f. Bonnet latch (See Service and Repair)
3. Put the oil cooler aside.
4. Remove the front crossmember extension. Front Suspension - Crossmember Removal/Installation
5. Remove in the order indicated in the table.
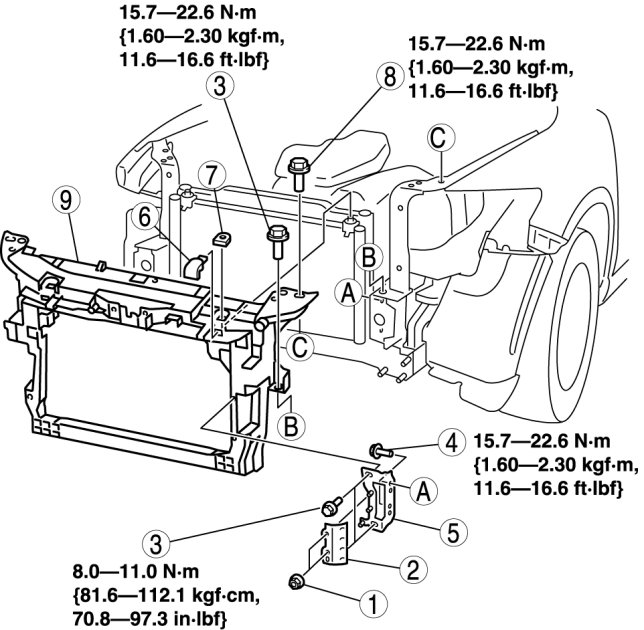
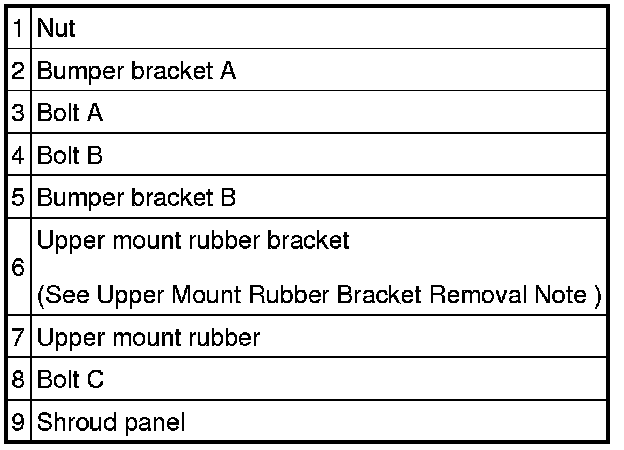
6. Install in the reverse order of removal.
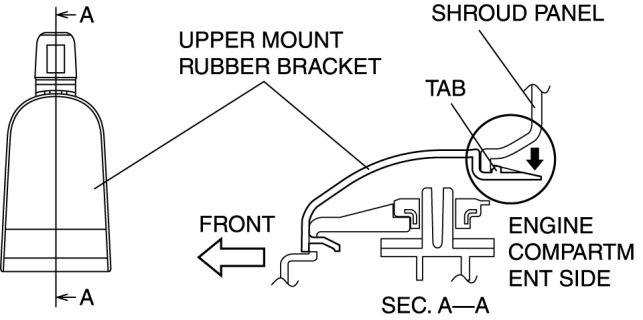
Upper Mount Rubber Bracket Removal Note
1. Remove the upper mount rubber bracket while pressing down the upper mount rubber bracket tab in the direction of the arrow.