September 30: LEMON manuals is back up on a temporary server! Slowness is possible
SUNVISOR Removal/Installation
- Disconnect the negative battery terminal. (See NEGATIVE BATTERY TERMINAL DISCONNECTION/CONNECTION
.)
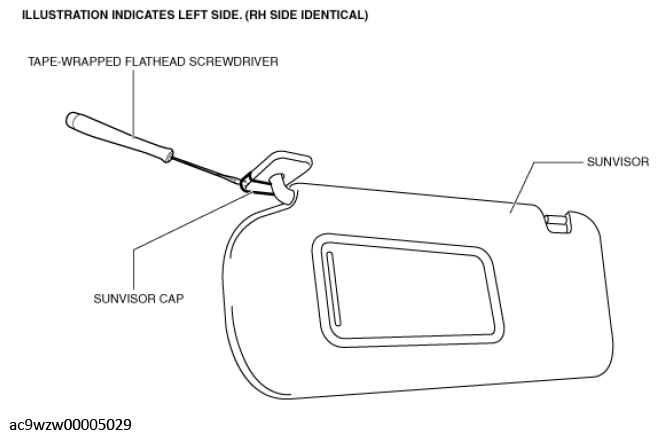
- Insert a tape-wrapped flathead screwdriver into the position shown in the figure. (with sunvisor cap)
 Courtesy of MAZDA MOTORS CORP.
|
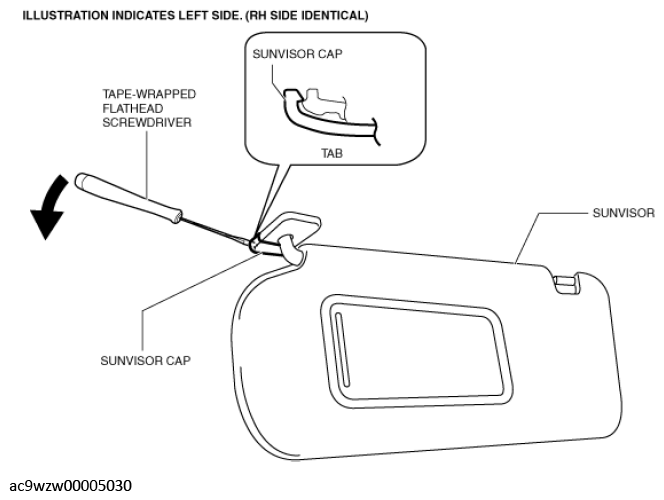
- Move the tape-wrapped flathead screwdriver in the direction of the arrow shown in the figure, detach the tab, and remove the sunvisor cap. (with sunvisor cap)
 Courtesy of MAZDA MOTORS CORP.
|
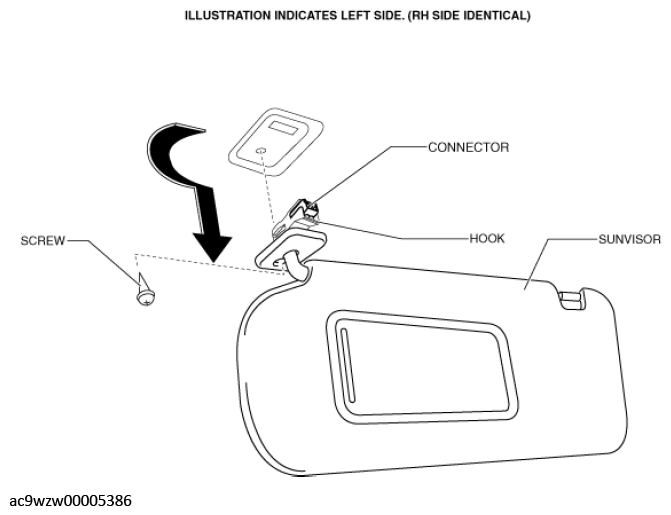
- Remove the screw.
 Courtesy of MAZDA MOTORS CORP.
|
- Remove the sunvisor in the direction of the arrow shown in the figure while detaching the hook.
- Disconnect the vanity mirror illumination connector.
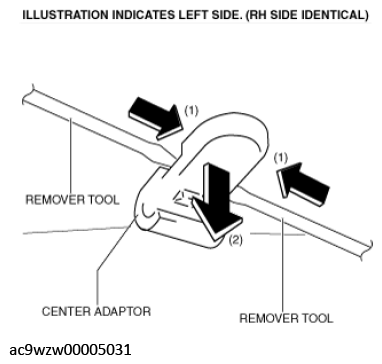
- Press the center adaptor tabs in the direction of arrows (1) shown in the figure using two remover tools.
 Courtesy of MAZDA MOTORS CORP.
|
- Remove the center adaptor in the direction of arrow (2) shown in the figure.
- Install in the reverse order of removal.