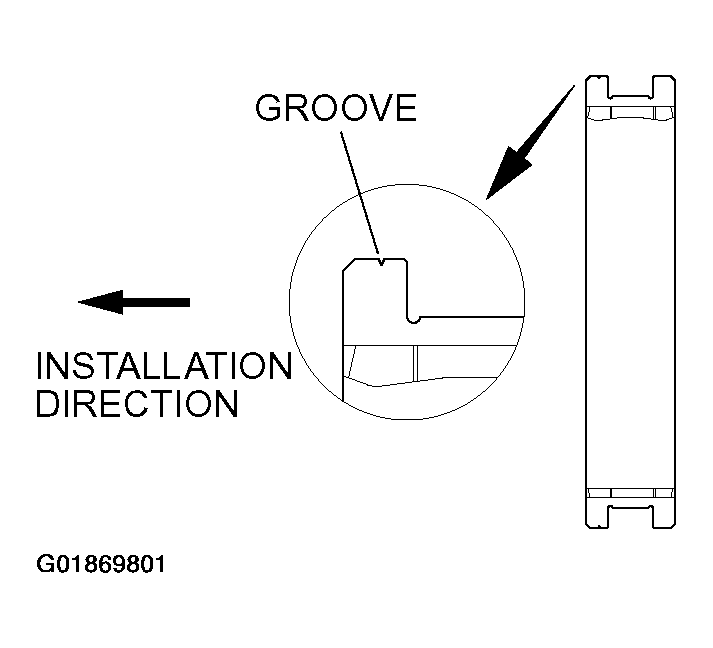
>> F << Synchronizer Sleeve Installation
- Check the installation of the synchronizer sleeve, and install it onto the 3rd-4th speed synchronizer hub.
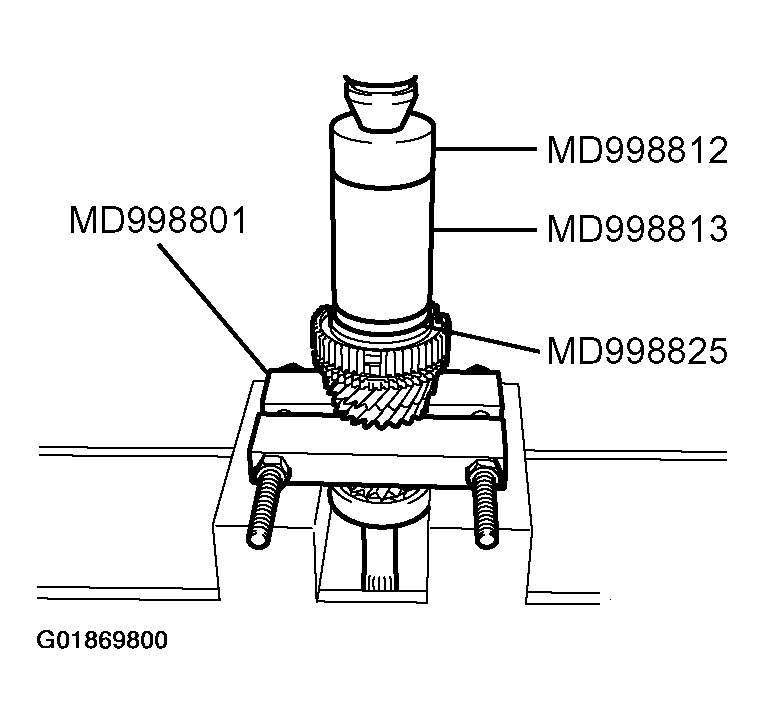 Courtesy of MITSUBISHI MOTOR SALES OF AMERICA.
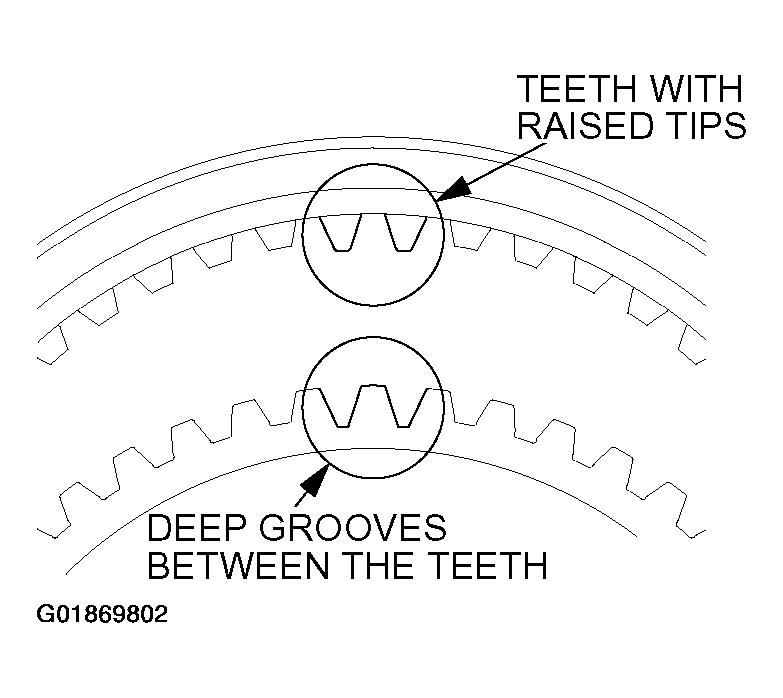
- Install the synchronizer sleeve so that the areas with teeth that have raised tips (three areas total) are aligned with the areas on the synchronizer hub that have deep grooves between the teeth (three areas total).
 Courtesy of MITSUBISHI MOTOR SALES OF AMERICA.
 Courtesy of MITSUBISHI MOTOR SALES OF AMERICA.