>>G<< Synchronizer Ring Assembly/Synchromesh Shifting Key Spring No. 3 (A)/Synchromesh Shifting Key Spring No. 3 (B) And Synchronizer Hub No. 3 Installation
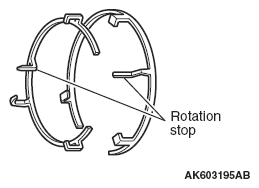
- Install the synchromesh shifting key springs No. 3 onto the synchronizer ring assembly holding the claws and rotation stops of the key springs in the illustrated positions.
 Courtesy of MITSUBISHI MOTOR SALES OF AMERICA.
- Make sure that the rotation stops of the synchromesh shifting key springs No. 3 fit into the mating holes in the synchronizer ring assembly.
 Courtesy of MITSUBISHI MOTOR SALES OF AMERICA.
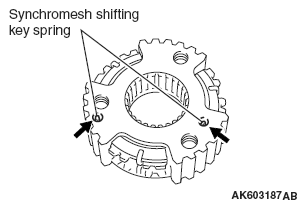
- Compress the key springs into place inside the hub as shown.
 Courtesy of MITSUBISHI MOTOR SALES OF AMERICA.
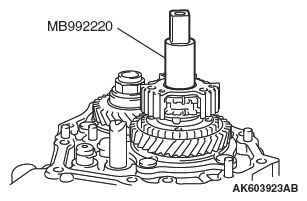
- Install special tool MB992220 until it hits the end face of the input shaft.
 Courtesy of MITSUBISHI MOTOR SALES OF AMERICA.
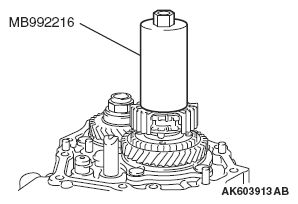
- Set special tool MB992216 on top of the synchronizer hub No. 3.
 Courtesy of MITSUBISHI MOTOR SALES OF AMERICA.
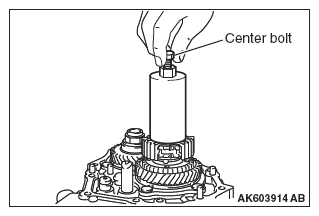
- Install the center bolt that is a part of the set of special tool MB992216 as shown.
 Courtesy of MITSUBISHI MOTOR SALES OF AMERICA.
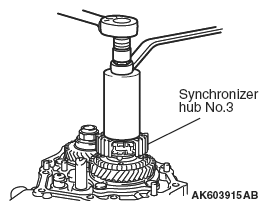
- Press-fit the synchronizer hub No. 3 as shown.
 Courtesy of MITSUBISHI MOTOR SALES OF AMERICA.