Learning Procedure
- After the ignition switch is in "LOCK" (OFF) position, disconnect the battery cable from the negative battery terminal.
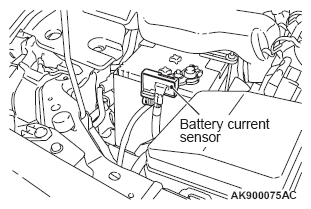
- Remove the battery current sensor from the battery cable (Do not disconnect the battery current sensor connector).
- Connect the battery cable without the battery current sensor to the negative battery terminal.
 Courtesy of MITSUBISHI MOTOR SALES OF AMERICA.
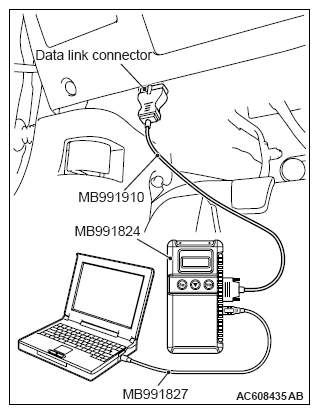
- Connect the M.U.T.-III to the diagnosis connector (But do not start the engine).
- Turn the ignition switch to the ON position.
- Select "MFI" from System select Screen of the M.U.T.-III.
- Select "Special Function" from MFI Screen.
- Select "Learning" from Special Function Screen.
- Select "Battery current SNSR.calibration" from Learning Screen.
- Start the calibration by pressing the "OK" button.
- Confirm that the M.U.T.-III data list item No. 119 Battery current sensor calibration is "Completed".
- After the ignition switch is in "LOCK" (OFF) position, disconnect the M.U.T.-III.
- Install the battery current sensor.
 Courtesy of MITSUBISHI MOTOR SALES OF AMERICA.