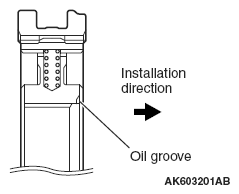
>> B << Synchronizer Hub No. 2 And Synchronizer Sleeve No. 2 Installation
- Before assembly, make sure that the hub and sleeve face the correct direction.
NOTE:
- Apply gear oil to the caulked area between the sleeve and the hub.
- After installation, confirm the sleeve and the hub slide smoothly.
 Courtesy of MITSUBISHI MOTOR SALES OF AMERICA.
- Using special tools MD998812, MD998813, MD998820 and MD998917, install the synchronizer sleeve No. 2 and synchronizer hub No. 2.
 Courtesy of MITSUBISHI MOTOR SALES OF AMERICA.