>>F<< Synchromesh Shifting Key No. 3 Spring/Synchromesh Shifting Key No. 3/Synchronizer Clutch Hub No. 3/Synchronizer Ring No. 3 Installation
- Synchronizer ring No. 3 and synchronizer clutch hub No. 3 are attached beforehand and it is made synchronizer assembly.
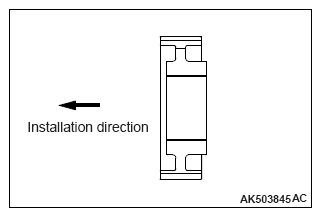
- Check that the synchronizer clutch hub No. 3 and synchronizer ring No. 3 is in the correct installation direction, and put it on the output shaft.
 Courtesy of MITSUBISHI MOTOR SALES OF AMERICA.
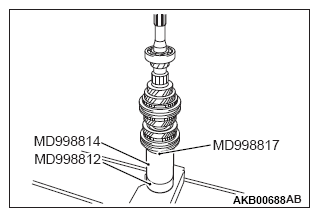
- Using special tools, install the synchronizer clutch hub No. 3 with the press.
- Installer cap (MD998812)
- Installer-200 (MD998814)
- Installer adapter (MD998817)
- Make sure that the outer synchronizer ring on the 5th gear sub-assembly side can rotate freely.
 Courtesy of MITSUBISHI MOTOR SALES OF AMERICA.