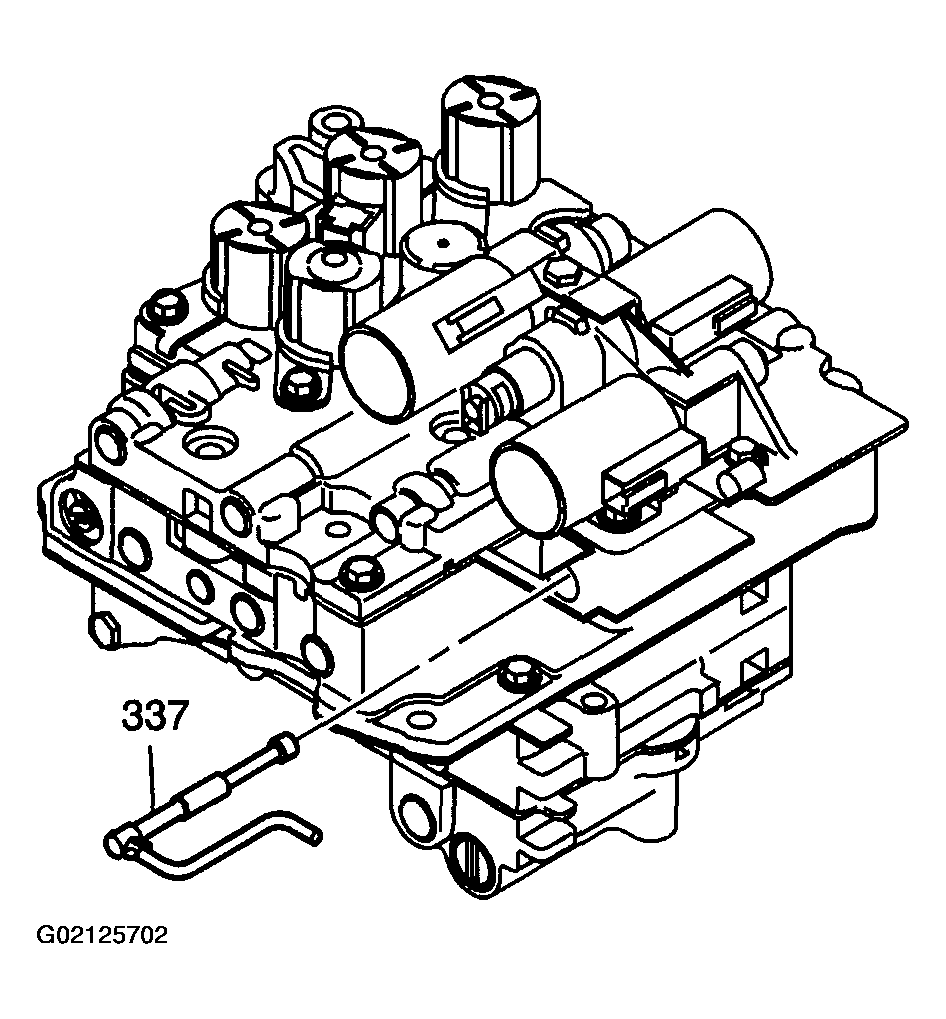
Control Valve Body Assembly Disassemble
- Remove the manual valve (337).
 Courtesy of GENERAL MOTORS CORP.
- Remove the bolt/screw (307), the wiring harness clip (318), and the TCC lock up pressure control solenoid valve retainer (319).
- Remove the TCC lock up pressure control solenoid valve assembly (339).
 Courtesy of GENERAL MOTORS CORP.
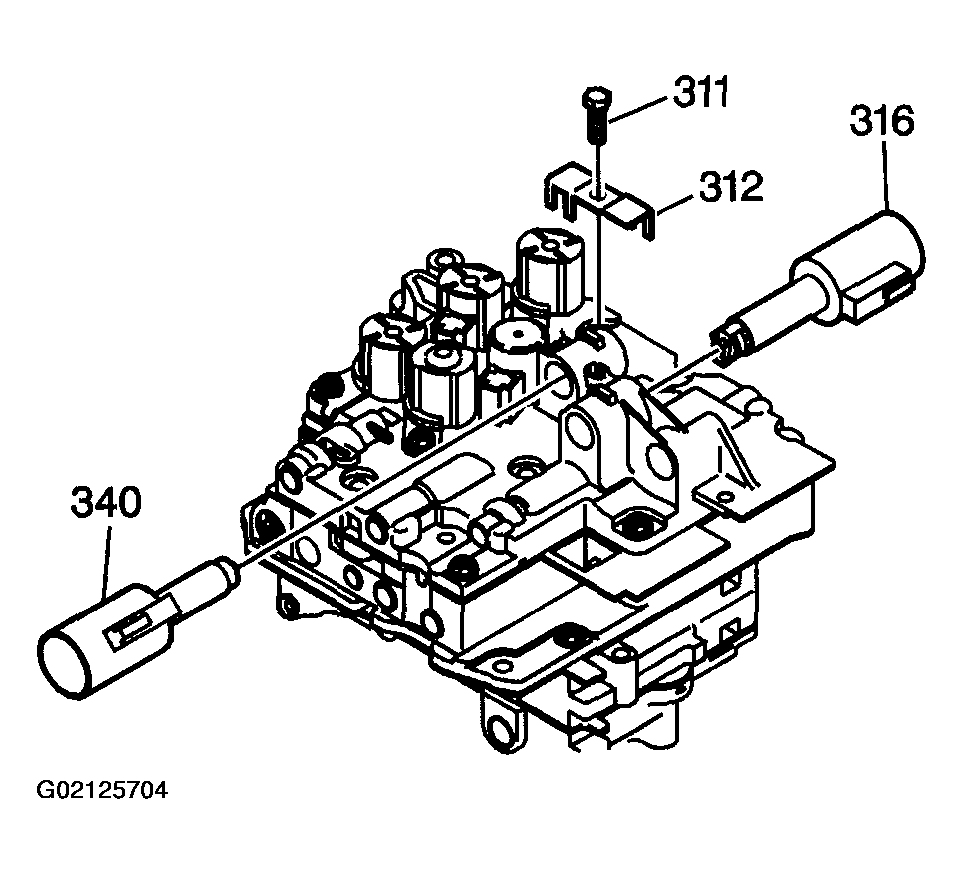
- Remove the bolt/screw (311), and control valve body solenoid valve retainer (312).
- Remove the line pressure control solenoid valve assembly (316) and the shift pressure control solenoid valve assembly (340).
 Courtesy of GENERAL MOTORS CORP.
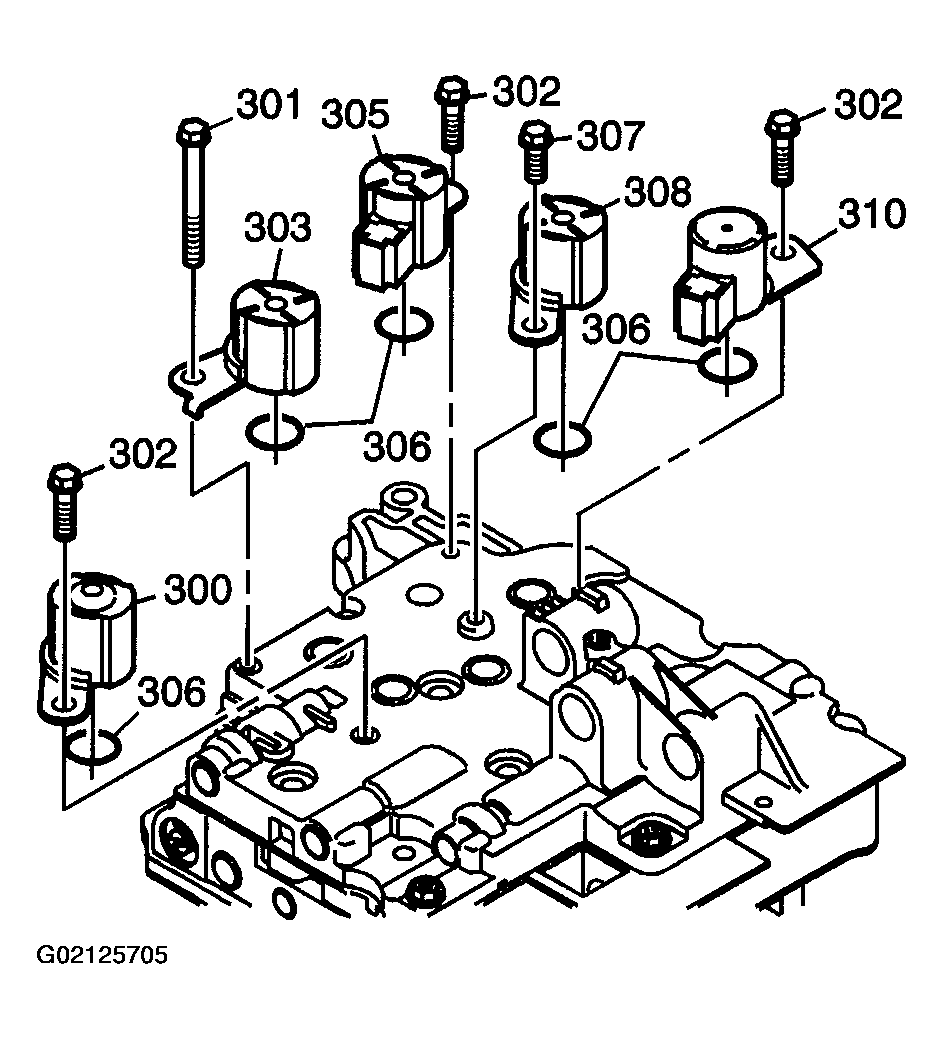
- Remove the 5 solenoid retaining bolts/screws (1-301, 3-302, 1-307).
- Remove the 5 shift solenoid valves (300, 303, 305, 308, 310), and the 5 shift solenoid valve O-ring seals (306).
 Courtesy of GENERAL MOTORS CORP.
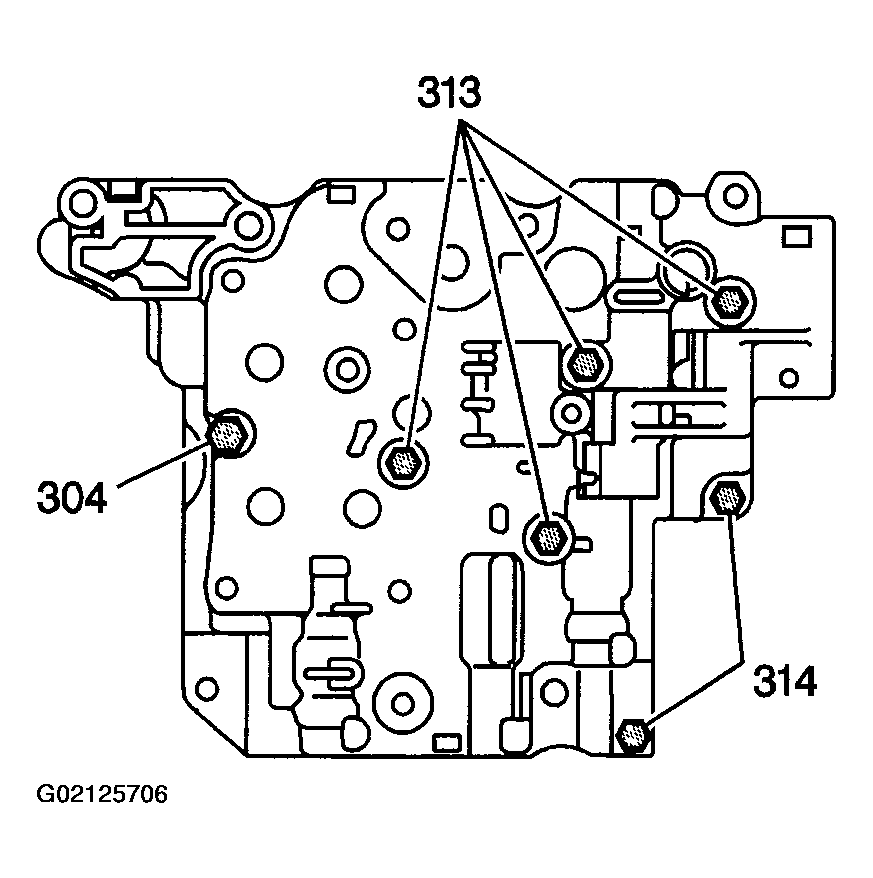
- Remove the 7 front control valve body bolts/screws (1-304, 4-313, 2-314).
 Courtesy of GENERAL MOTORS CORP.
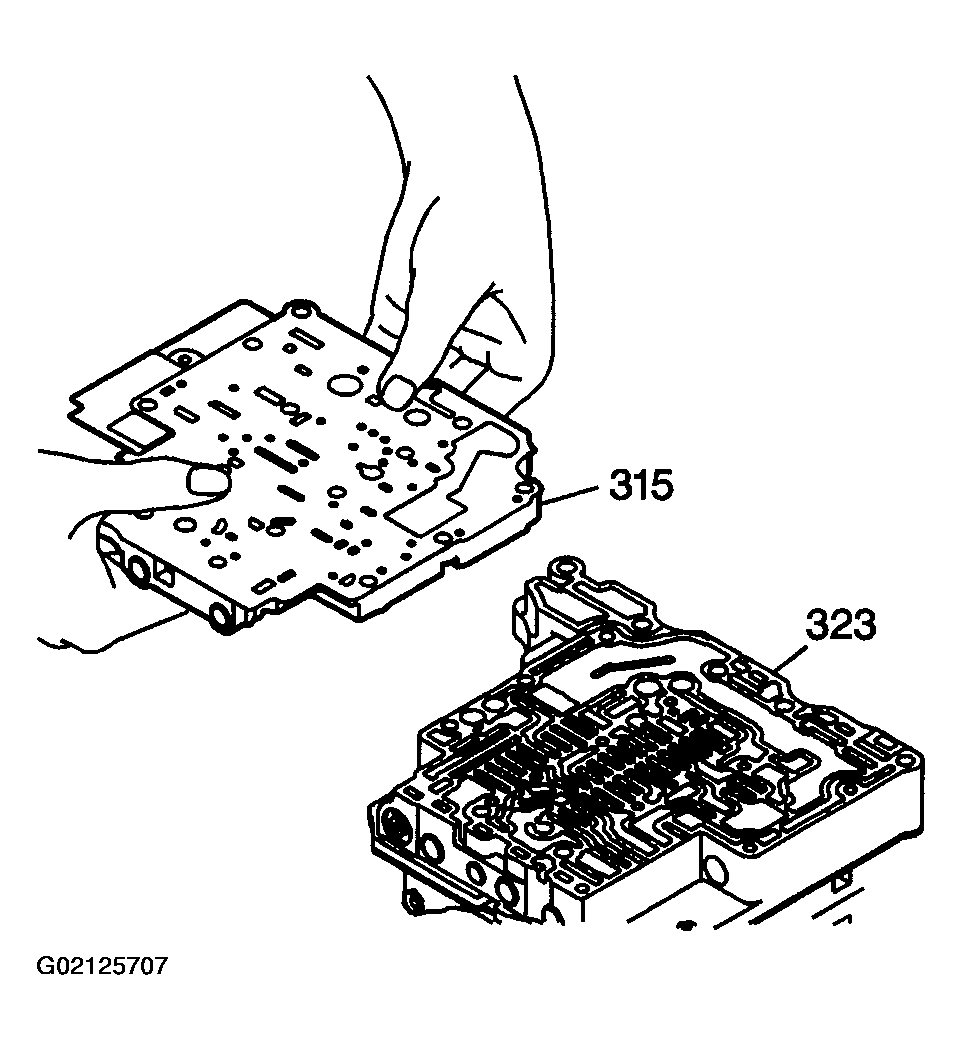
- Remove the front control valve body assembly (315), spacer plate and gaskets as an assembly from the middle control valve body assembly (323).
 Courtesy of GENERAL MOTORS CORP.
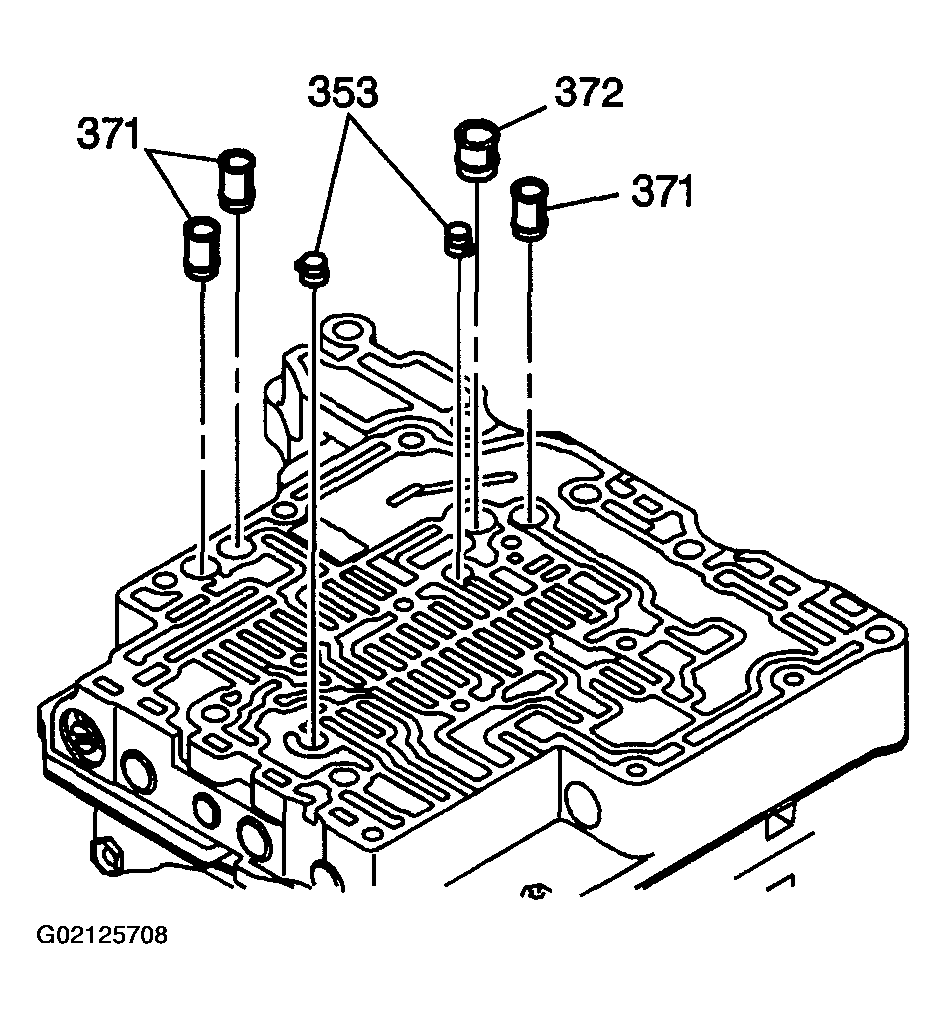
- Remove the 3 fluid strainers (371), 1 fluid strainer (372), and the 2 accumulator check valve assemblies (353) from the middle control valve body.
 Courtesy of GENERAL MOTORS CORP.
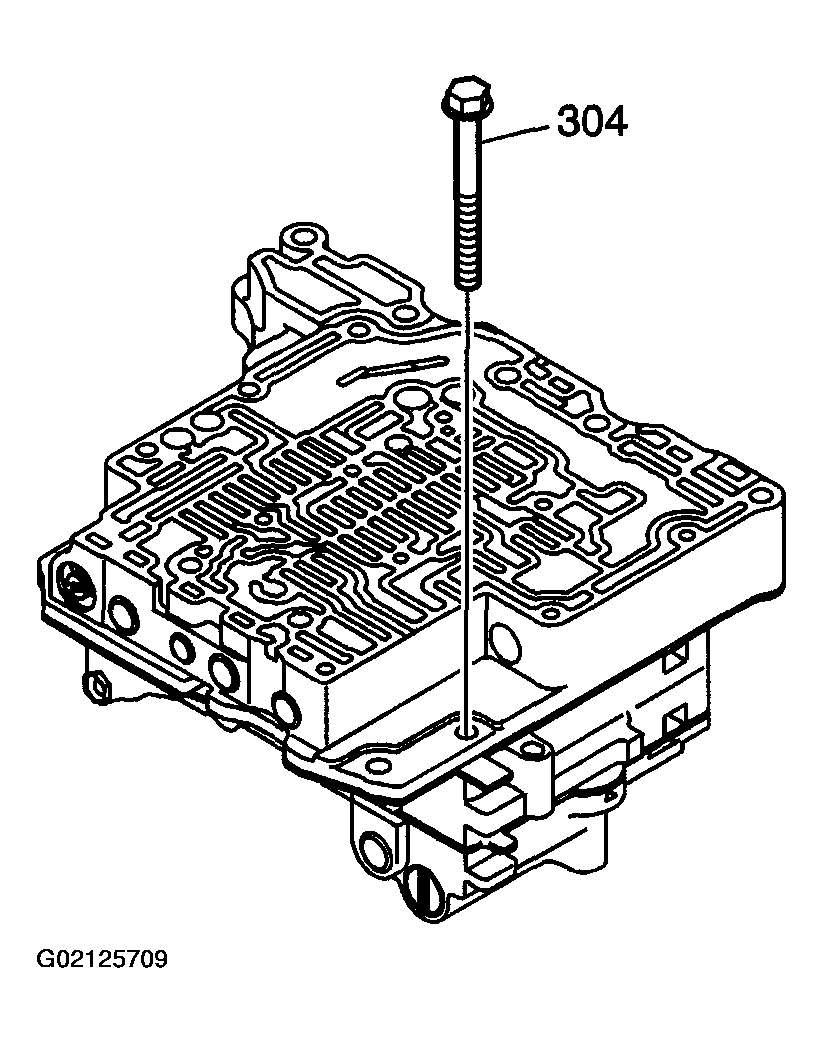
- Remove the bolt/screw (304) from the middle control valve body.
 Courtesy of GENERAL MOTORS CORP.
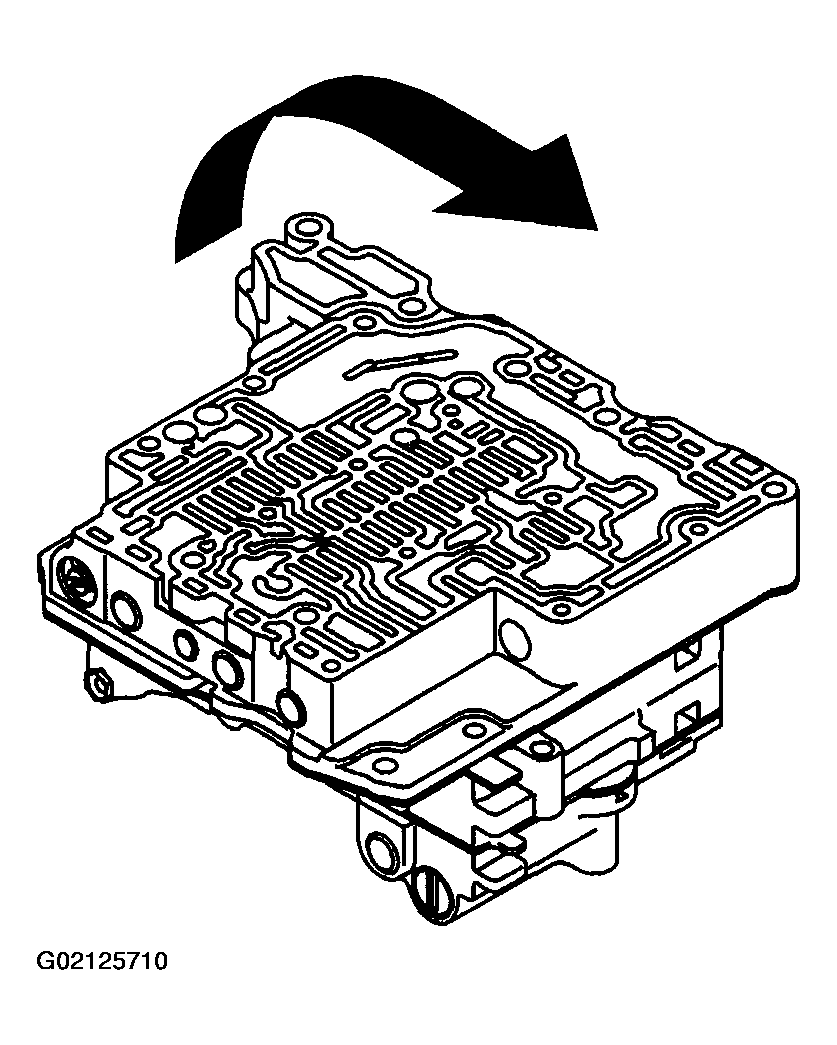
- Turn the middle control valve body over in order to remove the remaining bolts.
 Courtesy of GENERAL MOTORS CORP.
- Remove the 5 bolts/screws (331, 332) from the No. 2 rear control valve body assembly.
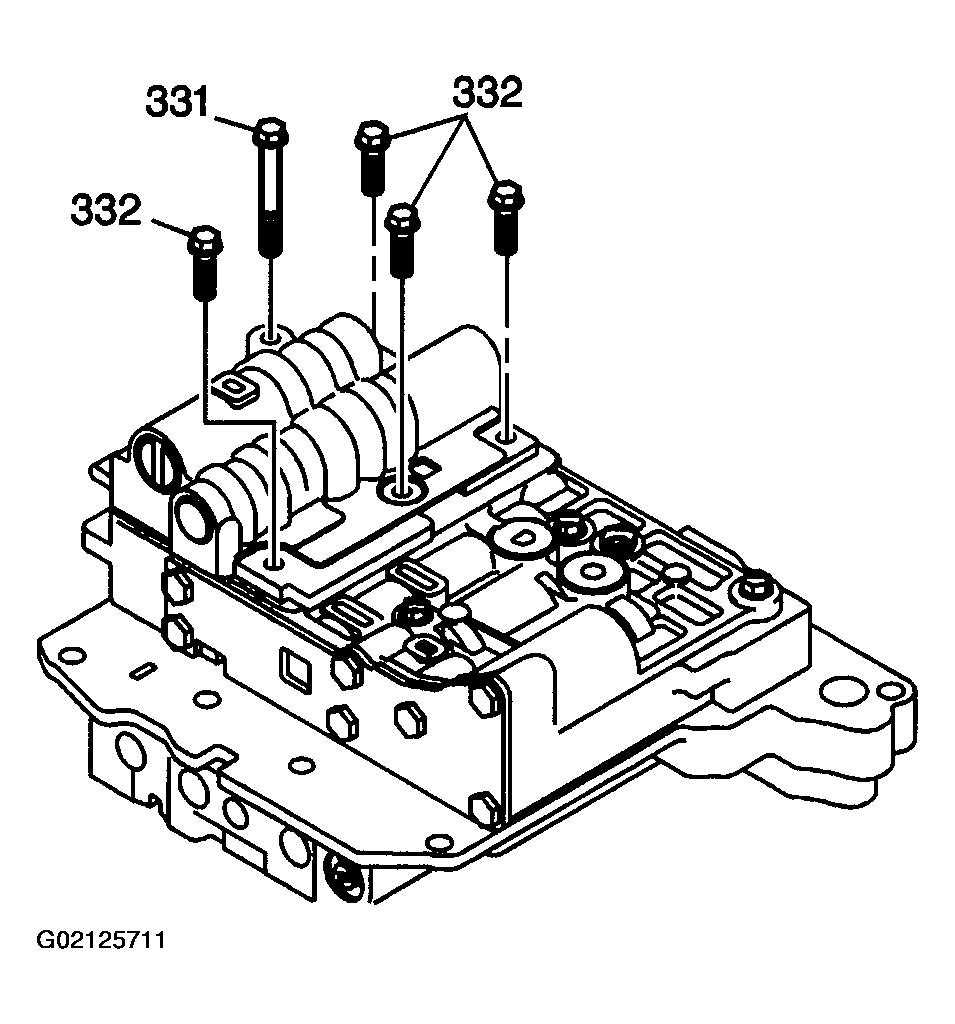 Courtesy of GENERAL MOTORS CORP.
- Remove the No. 2 rear control valve body assembly (330), spacer plate and gaskets as an assembly from the rear control valve body assembly (326).
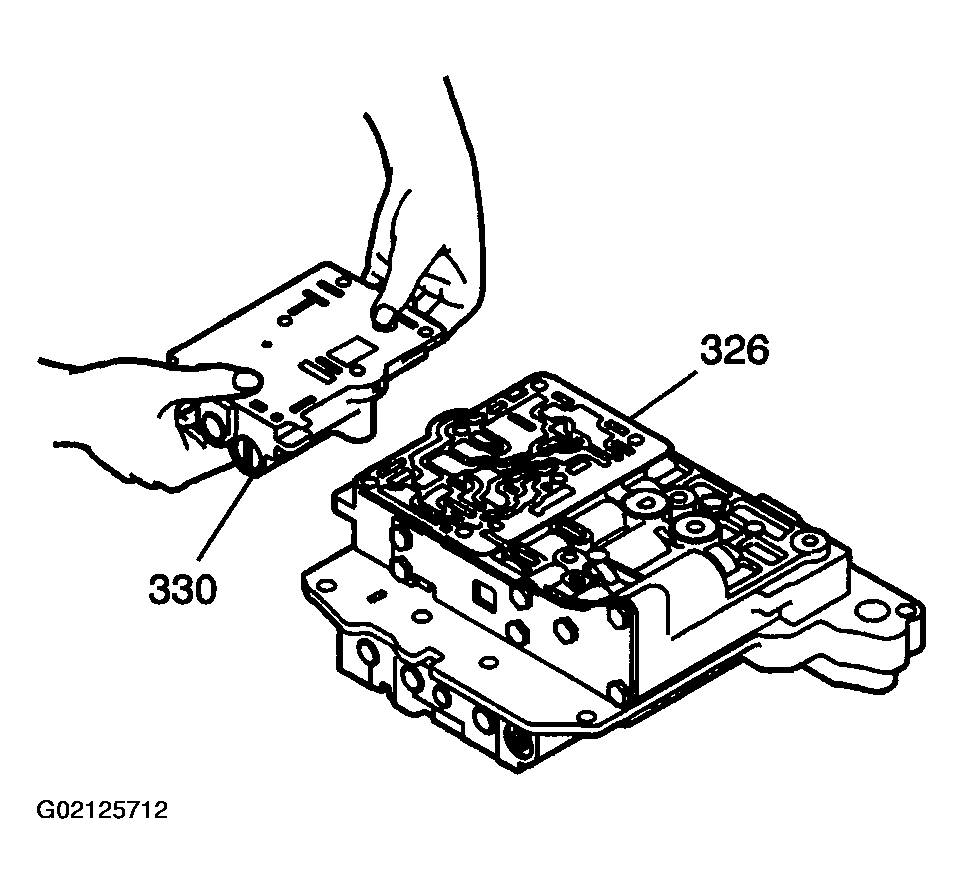 Courtesy of GENERAL MOTORS CORP.
- Remove the 3 rear control valve body bolts/screws (333, 335).
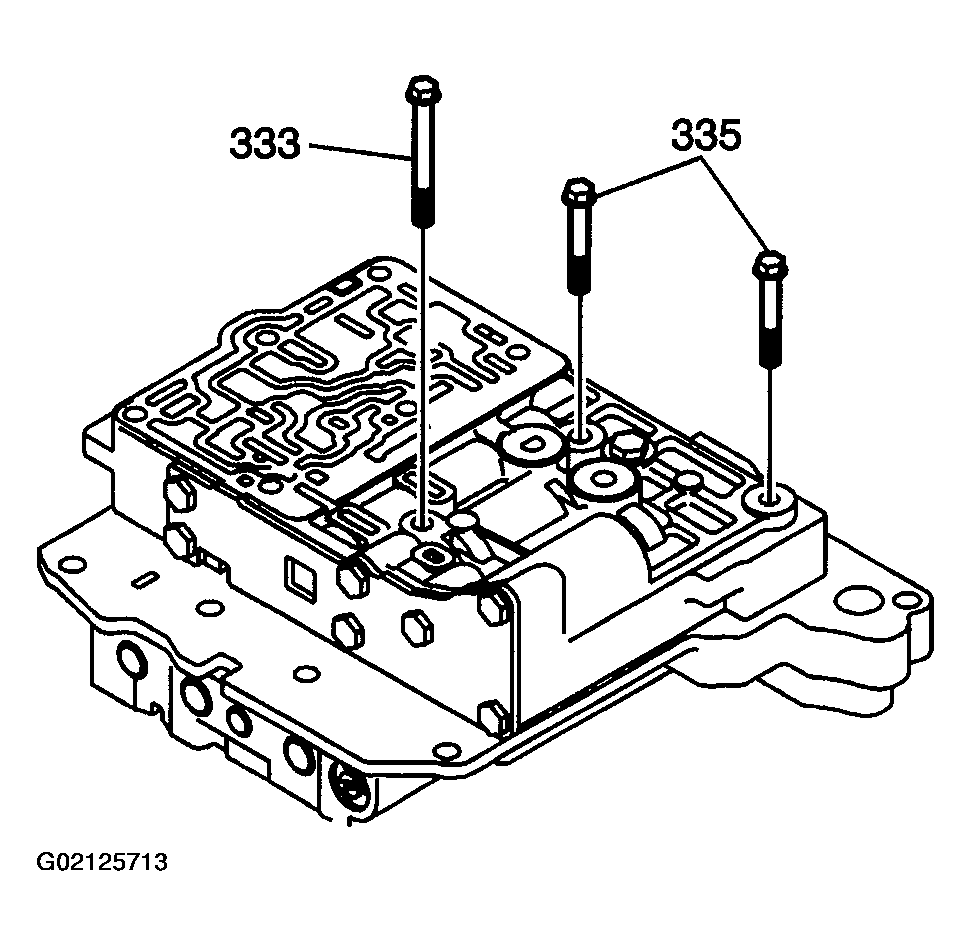 Courtesy of GENERAL MOTORS CORP.
- Remove the rear control valve body assembly (326) from the middle control valve body assembly (323).
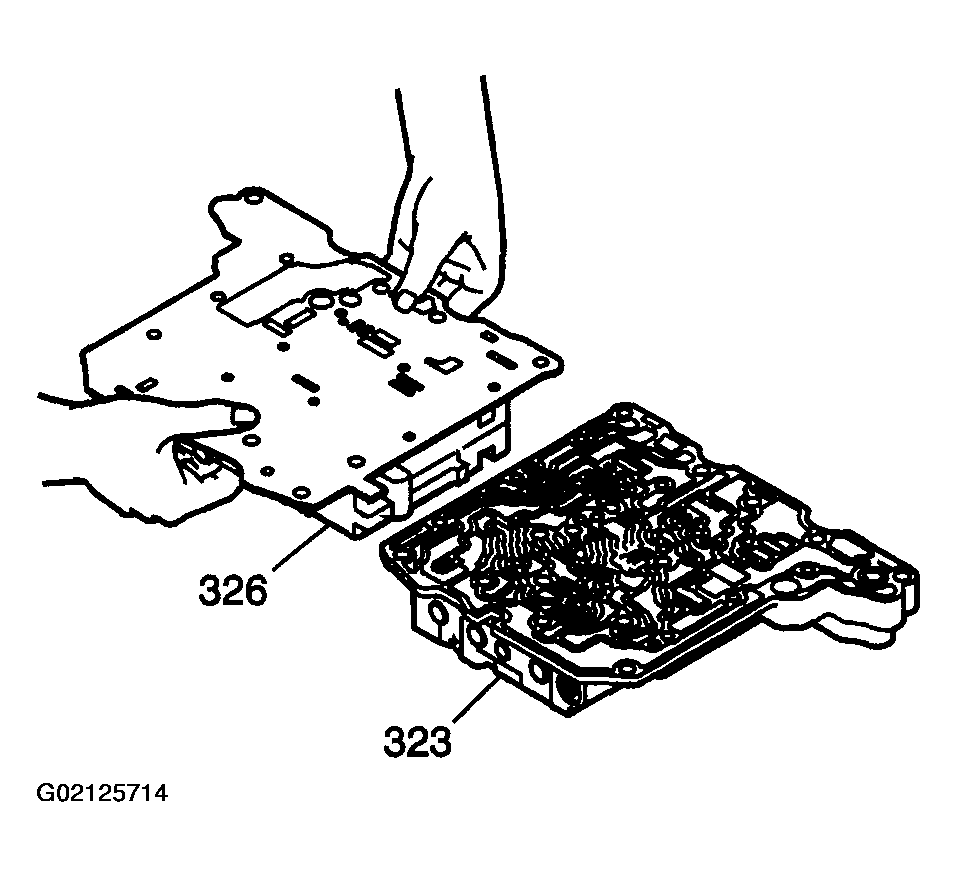 Courtesy of GENERAL MOTORS CORP.