Distributor (2.4L): Installation
- Install new "O" ring into housing. Coat "O" ring with oil. Turn crankshaft until No. 1 cylinder is in compression stroke and timing mark aligns with 5°BTDC mark on timing case cover. Check that rocker arms on No. 1 cylinder are loose. If rocker arms are not loose, turn crankshaft one full turn.
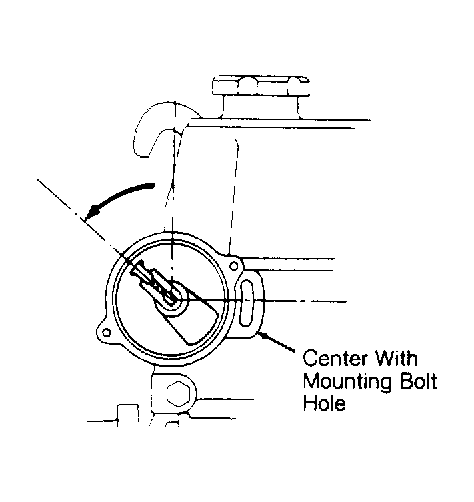
- Temporarily install rotor. Begin inserting distributor with rotor pointing upward and distributor mounting hole aligned with center of mounting bolt hole. When fully installed, rotor will rotate to position shown. See Fig 1.
 Courtesy of © TOYOTA, LICENSE AGREEMENT TMS1002
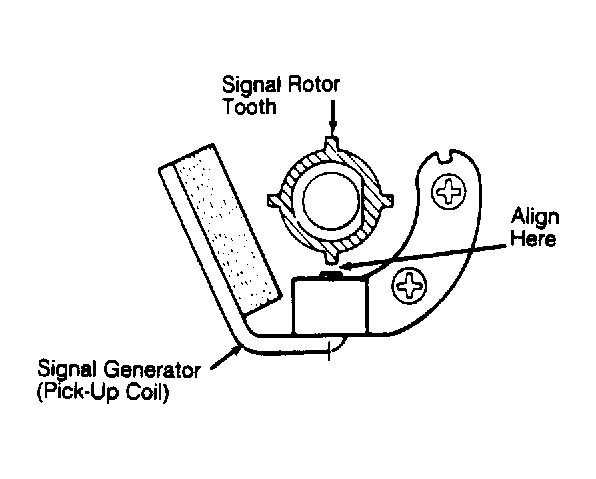
- Align signal rotor tooth with signal generator (pick-up coil) projection. See Fig 2. Install distributor cap and spark plug wires. Connect distributor wiring connector.
- Connect negative battery cable. Set ignition timing. Tighten distributor hold-down bolt. See TORQUE SPECIFICATIONS at end of this article.
 Courtesy of © TOYOTA, LICENSE AGREEMENT TMS1002