Engine Control System (1AR-FE) - Circuit Testing, Component Inspection, Removal & Installation: ECM: Removal
- DISCONNECT CABLE FROM NEGATIVE BATTERY TERMINAL
NOTE:
When disconnecting the cable, some systems need to be initialized after the cable is reconnected (See INITIALIZATION
).
- REMOVE FRONT DOOR SCUFF PLATE RH
(See REMOVAL
)
- REMOVE COWL SIDE TRIM SUB-ASSEMBLY RH
(See REMOVAL
)
- REMOVE NO. 2 INSTRUMENT PANEL UNDER COVER SUB-ASSEMBLY
(See REMOVAL
)
- REMOVE LOWER INSTRUMENT PANEL SUB-ASSEMBLY
(See REMOVAL
)
- REMOVE ECM
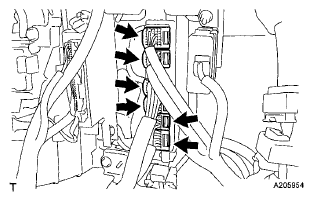
- Disconnect the 6 ECM connectors.
 Courtesy of © TOYOTA, LICENSE AGREEMENT TMS1002
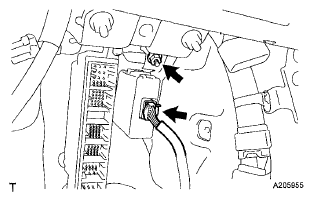
- Disconnect the tire pressure warning ECU connector and remove the nut and the tire pressure warning ECU.
 Courtesy of © TOYOTA, LICENSE AGREEMENT TMS1002
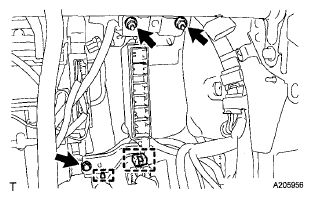
- Separate the 2 wire harness clamps.
- Remove the 2 nuts, bolt and ECM with bracket.
 Courtesy of © TOYOTA, LICENSE AGREEMENT TMS1002
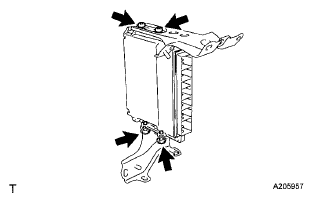
- Remove the 4 screws and 2 ECM brackets from the ECM.
 Courtesy of © TOYOTA, LICENSE AGREEMENT TMS1002