Front Wiper Motor: Removal: Removal
- REMOVE FRONT WIPER ARM HEAD CAP
- Remove the 2 front wiper arm head caps.
 Courtesy of © TOYOTA, LICENSE AGREEMENT TMS1002
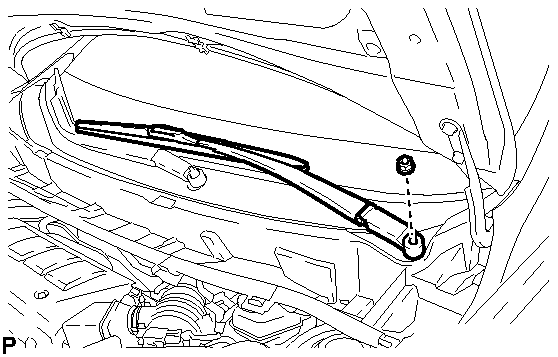
- REMOVE FRONT WIPER ARM AND BLADE ASSEMBLY LH
- Remove the nut and the front wiper arm and blade assembly LH.
 Courtesy of © TOYOTA, LICENSE AGREEMENT TMS1002
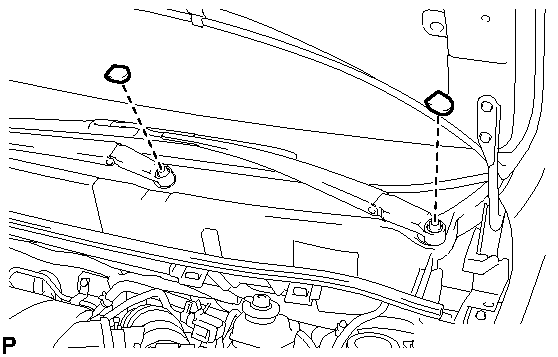
- REMOVE FRONT WIPER ARM AND BLADE ASSEMBLY RH
- Remove the nut and the front wiper arm and blade assembly RH.
 Courtesy of © TOYOTA, LICENSE AGREEMENT TMS1002
- REMOVE HOOD TO COWL TOP SEAL
- Disengage the 2 claws.
 Courtesy of © TOYOTA, LICENSE AGREEMENT TMS1002
- Disengage the 7 clips and remove the hood to cowl top seal.
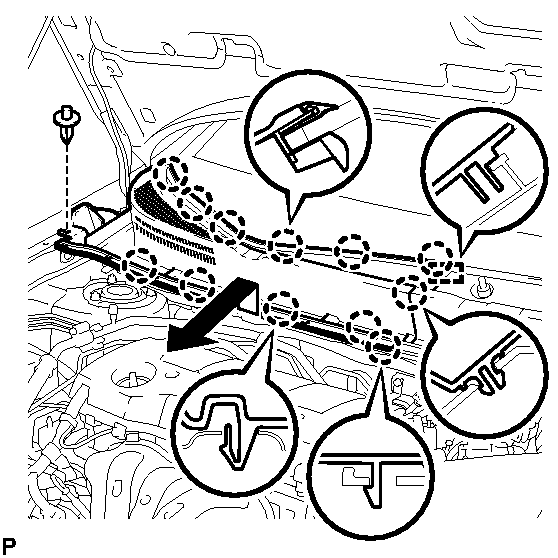
- REMOVE COWL TOP VENTILATOR LOUVER RH
- Remove the clip.
 Courtesy of © TOYOTA, LICENSE AGREEMENT TMS1002
- Disengage the 12 claws and guide, and remove the cowl top ventilator louver RH as shown in the illustration.
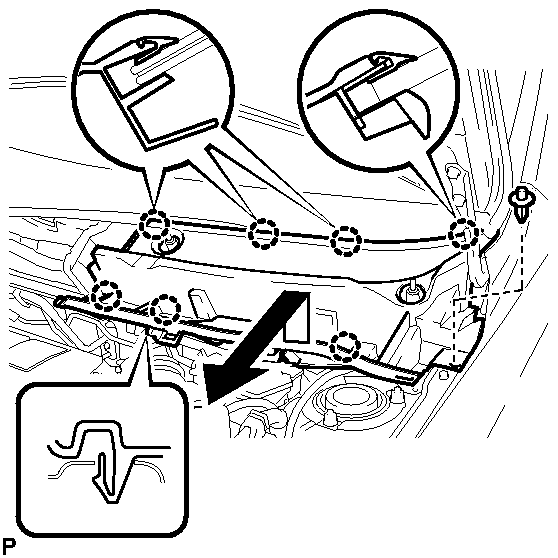
- REMOVE COWL TOP VENTILATOR LOUVER LH
- Remove the clip.
 Courtesy of © TOYOTA, LICENSE AGREEMENT TMS1002
- Disengage the 7 claws and remove the cowl top ventilator louver LH as shown in the illustration.
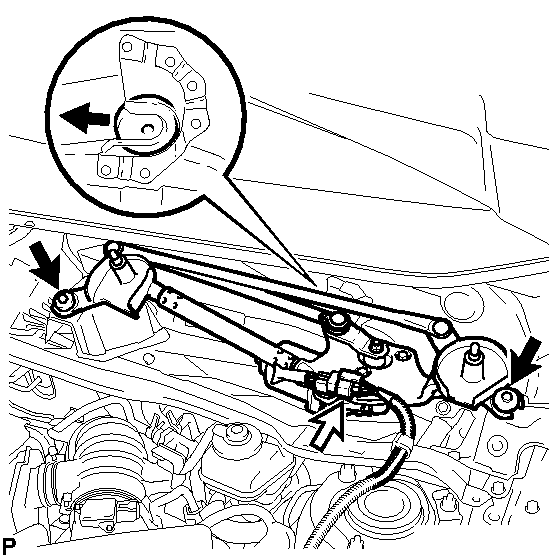
- REMOVE WINDSHIELD WIPER MOTOR AND LINK ASSEMBLY
- Disconnect the connector.
 Courtesy of © TOYOTA, LICENSE AGREEMENT TMS1002
- Remove the 2 bolts and the windshield wiper motor and link assembly as shown in the illustration.
- REMOVE WIPER MOTOR WIRE
- Cut the clamp to remove it.
 Courtesy of © TOYOTA, LICENSE AGREEMENT TMS1002
 TEXT IN ILLUSTRATION
- Disengage the connector clamp.
- Disconnect the connector and remove the wiper motor wire.
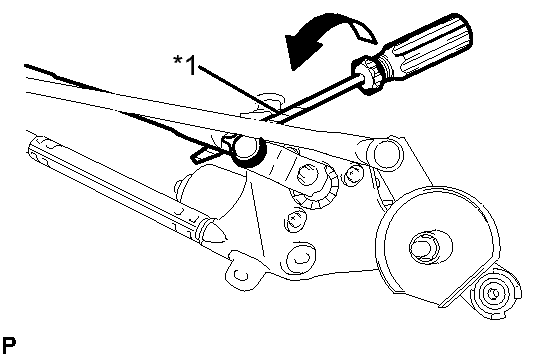
- REMOVE WINDSHIELD WIPER MOTOR ASSEMBLY
- Using a screwdriver with its tip wrapped with protective tape, disconnect the rod of the windshield wiper link assembly from the crank arm pivot of the windshield wiper motor assembly as shown in the illustration.
 Courtesy of © TOYOTA, LICENSE AGREEMENT TMS1002
 TEXT IN ILLUSTRATION
- Remove the 3 bolts and the windshield wiper motor assembly.
 Courtesy of © TOYOTA, LICENSE AGREEMENT TMS1002