Real Time AWD Relay Removal and Installation: Installation
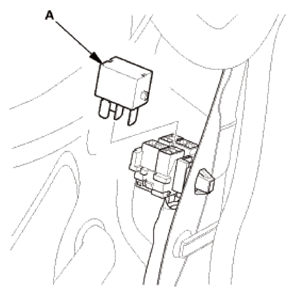
- Real Time AWD Relay
- Install the real time AWD relay (A).
 Courtesy of AMERICAN HONDA MOTOR CO., INC.
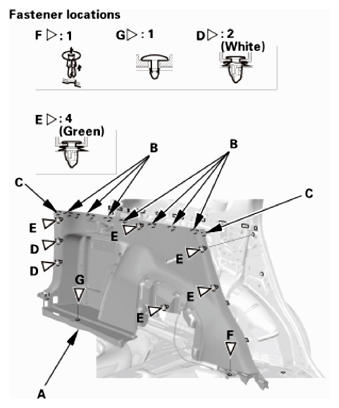
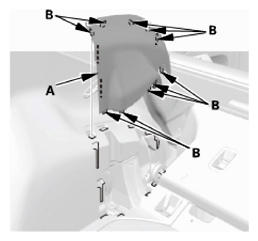
- Left Rear Side Trim Panel
- Install the left rear side trim panel (A). Make sure the hooks (B), the tabs (C), and the clips (D, E) snap into place securely.
- Install the clips (F, G).
 Courtesy of AMERICAN HONDA MOTOR CO., INC.
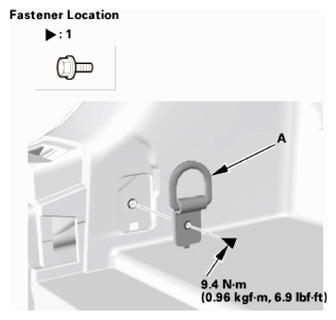
- Install the tie-down hook (A).
 Courtesy of AMERICAN HONDA MOTOR CO., INC.
- Install the trunk hook (A).
 Courtesy of AMERICAN HONDA MOTOR CO., INC.
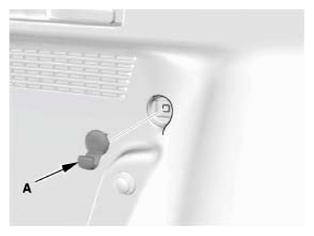
- Install the screws, then install the left rear seat release lever cap (A).
 Courtesy of AMERICAN HONDA MOTOR CO., INC.
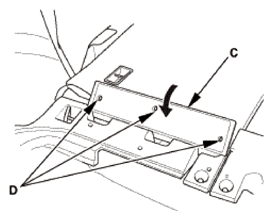
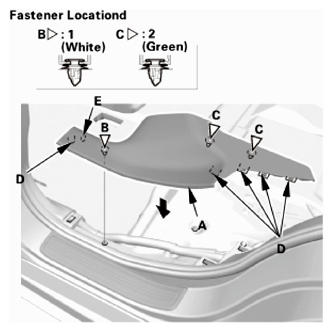
- Rear Trim Panel
- Install the rear trim panel (A). Make sure the clips (B, C), the hooks (D), and the tabs (E) snap into place securely.
- Install the clips (F).
 Courtesy of AMERICAN HONDA MOTOR CO., INC.
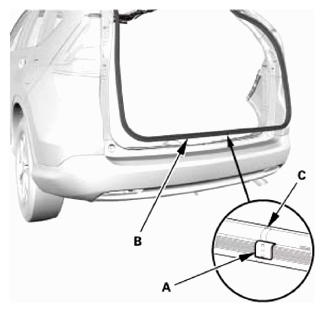
- Tailgate Weatherstrip As Needed
- Locate the alignment mark (A) of the tailgate weatherstrip (B). Align the alignment mark (C) with the center of the lower area on the tailgate opening, then install the tailgate weatherstrip all the way around.
 Courtesy of AMERICAN HONDA MOTOR CO., INC.
- Left Rear Carpet Trim
- Install the left rear carpet trim (A). Make sure the clips and the hooks (B) snap into place securely.
- Install the rear seat-back cover (C). Make sure the clips (D) snap into place securely.
 Courtesy of AMERICAN HONDA MOTOR CO., INC.
 Courtesy of AMERICAN HONDA MOTOR CO., INC.
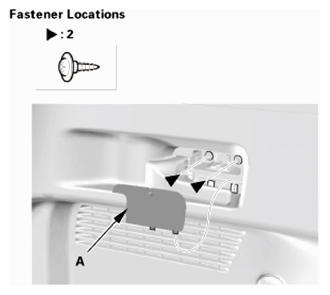
- Left Rear Damper Maintenance Cover
- Install the rear damper maintenance cover (A). Make sure the hooks (B) snap into place securely.
 Courtesy of AMERICAN HONDA MOTOR CO., INC.
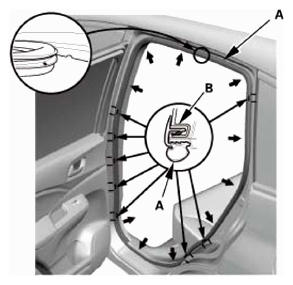
- Rear Door Opening Seal As Needed
- Install the rear door opening seal (A). Make sure the seal is installed securely into the hooks (B).
 Courtesy of AMERICAN HONDA MOTOR CO., INC.
- Left Rear Door Sill Trim
- Lift up and latch the left rear seat back in the up right position.
- Install the left rear door inner sill trim (A). Make sure the clips (B, C), the hooks (D), and the tab (E) snap into place securely.
 Courtesy of AMERICAN HONDA MOTOR CO., INC.
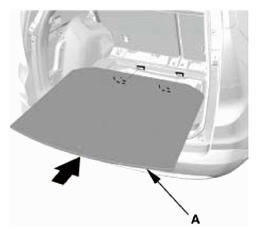
- Cargo Floor Cover
- Install the cargo floor cover (A).
 Courtesy of AMERICAN HONDA MOTOR CO., INC.
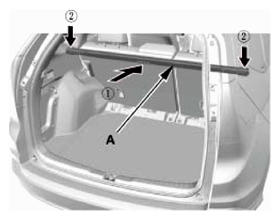
- Tonneau Cover (For Some Models)
- Install the tonneau cover (A).
 Courtesy of AMERICAN HONDA MOTOR CO., INC.