October 30: LEMON manuals on a temporary server, it is slow and having issues, download the manuals you need! Later in November we will switch back to the fast server.
Intake Manifold Assembly: Removal
- Release the fuel pressure. Ref. to FUEL INJECTION (FUEL SYSTEMS) (H4DO)>FUEL>PROCEDURE>RELEASING OF FUEL PRESSURE .
- Open the fuel filler lid and remove the fuel filler cap.
NOTE:
This operation is required to release the inner pressure of the fuel tank.
- Disconnect the ground terminal from battery sensor. Ref. to REPAIR CONTENTS>NOTE>BATTERY
.
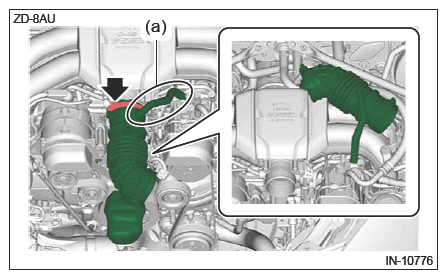
- Perform the steps below to remove the air intake boot, and place it aside so that it does not interfere with the work.
CAUTION:
Do not disconnect the PCV hose No. 2 (a).
- Remove the air cleaner case. Ref. to INTAKE (INDUCTION) (H4DO)>AIR CLEANER CASE>REMOVAL
.
- Loosen the clamp, remove the air intake boot, and place it aside so that it does not interfere with the work.
CAUTION:
Be careful not to pull out the PCV hose No. 2 (a).
 Courtesy of SUBARU OF AMERICA, INC.
|
- Remove the PCV hose No. 1. Ref. to EMISSION CONTROL (AUX. EMISSION CONTROL DEVICES) (H4DO)>PCV HOSE>REMOVAL>PCV HOSE NO. 1
.
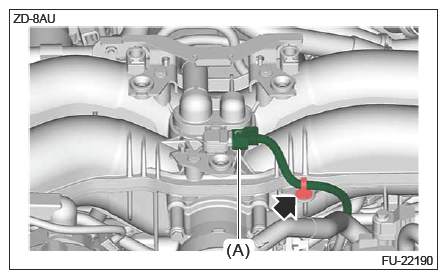
- Disconnect the connector (A) from manifold absolute pressure sensor and remove the clip.
 Courtesy of SUBARU OF AMERICA, INC.
|
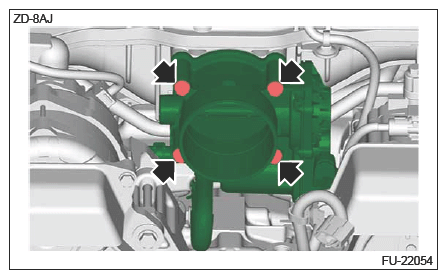
- When the engine coolant remains before removing the intake manifold assembly
- Remove the bolts securing the throttle body, and move the throttle body aside so that it does not interfere with the work.
 Courtesy of SUBARU OF AMERICA, INC.
|
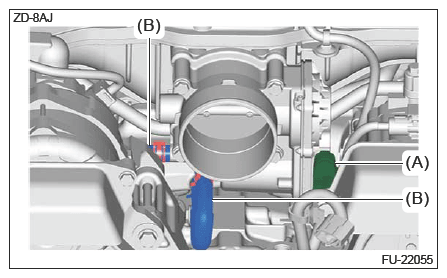
- When the engine coolant has been drained before removing the intake manifold assembly
- Disconnect the connector (A) from the throttle body, and disconnect the preheater hose (B).
 Courtesy of SUBARU OF AMERICA, INC.
|
- Remove the fuel pipe protector RH No. 1. Ref. to FUEL INJECTION (FUEL SYSTEMS) (H4DO)>FUEL PIPE PROTECTOR>REMOVAL>FUEL PIPE PROTECTOR RH>FUEL PIPE PROTECTOR RH NO. 1 .
- Disconnect the connector (A) from the fuel injector (port injection side) RH and remove the clip.
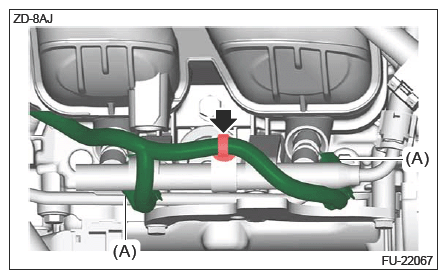 Courtesy of SUBARU OF AMERICA, INC.
|
- Remove the engine wiring harness from the engine rear hanger.
- Remove clip securing the battery cable assembly.
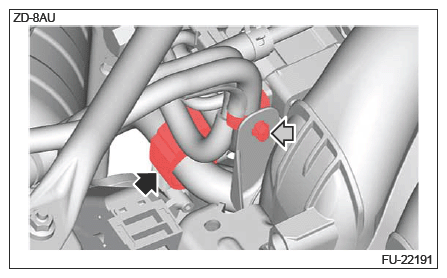 Courtesy of SUBARU OF AMERICA, INC.
|
- Remove the bolt securing the brake vacuum pipe, and place it aside so that it does not interfere with the work.
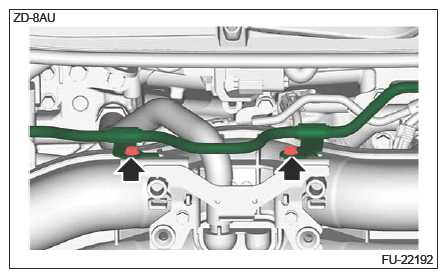 Courtesy of SUBARU OF AMERICA, INC.
|
- Remove the fuel pipe protector LH No. 1. Ref. to FUEL INJECTION (FUEL SYSTEMS) (H4DO)>FUEL PIPE PROTECTOR>REMOVAL>FUEL PIPE PROTECTOR LH>FUEL PIPE PROTECTOR LH NO. 1 .
- Disconnect the connector from the purge control solenoid valve.
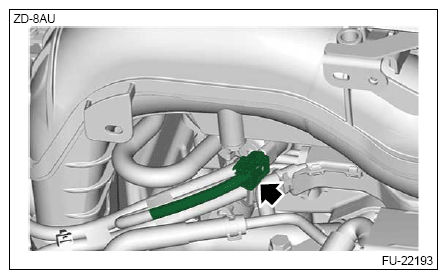 Courtesy of SUBARU OF AMERICA, INC.
|
- Use a pair of nippers to cut off the clip securing the engine wiring harness, and remove the clip from the intake manifold assembly.
NOTE:
Put alignment marks (a) on the clip and the engine wiring harness.
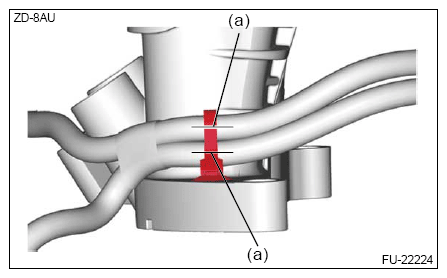 Courtesy of SUBARU OF AMERICA, INC.
|
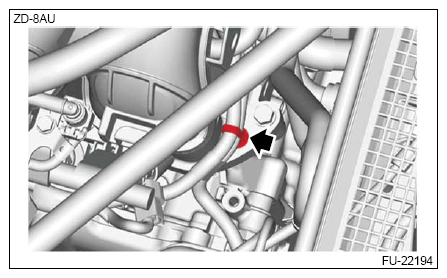 Courtesy of SUBARU OF AMERICA, INC.
|
- Disconnect the evaporation hose (A).
- Open the claw on the fuel delivery tube clamp.
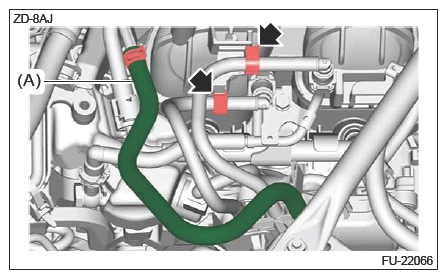 Courtesy of SUBARU OF AMERICA, INC.
|
- Disconnect the fuel delivery tube (cylinder direct injection side) (A). Ref. to FUEL INJECTION (FUEL SYSTEMS) (H4DO)>FUEL DELIVERY AND EVAPORATION LINES>REMOVAL>QUICK CONNECTOR DISCONNECTION (TYPE A) .
- Disconnect the fuel delivery tube (port injection side) (B). Ref. to FUEL INJECTION (FUEL SYSTEMS) (H4DO)>FUEL DELIVERY AND EVAPORATION LINES>REMOVAL>QUICK CONNECTOR DISCONNECTION (TYPE A) .
- Disconnect the fuel delivery pipe assembly (C). Ref. to FUEL INJECTION (FUEL SYSTEMS) (H4DO)>FUEL DELIVERY AND EVAPORATION LINES>REMOVAL>QUICK CONNECTOR DISCONNECTION (TYPE C) .
- Remove the fuel delivery pipe assembly.
NOTE:
Perform this procedure only when required.
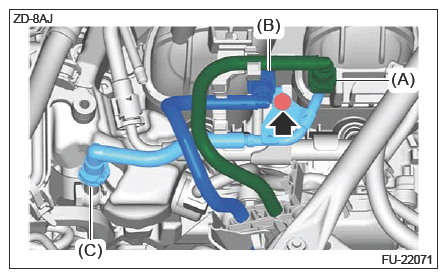 Courtesy of SUBARU OF AMERICA, INC.
|
- Disconnect the connector (A) from the fuel injector (port injection side) LH.
- Disconnect the connector (B) from high-pressure fuel pump.
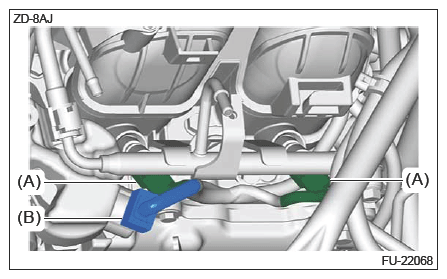 Courtesy of SUBARU OF AMERICA, INC.
|
- Move the A/C compressor aside so that it does not interfere with the work.
- Remove the V-belts. Ref. to MECHANICAL (H4DO)>V-BELT>REMOVAL>V-BELT
.
- Disconnect the connector.
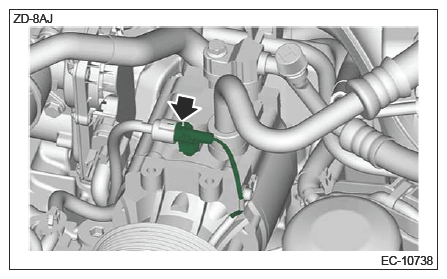 Courtesy of SUBARU OF AMERICA, INC.
|
- Remove the bolt securing the A/C compressor.
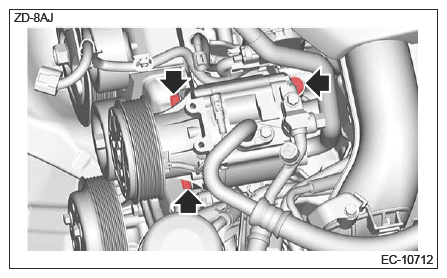 Courtesy of SUBARU OF AMERICA, INC.
|
- Move the A/C compressor as shown in the figure.
CAUTION:
- Do not bend the pipe portion of the hose pressure discharge and the hose pressure suction.
- Be careful not to drop the A/C compressor.
- Be careful not to damage the adjacent parts with the A/C compressor.
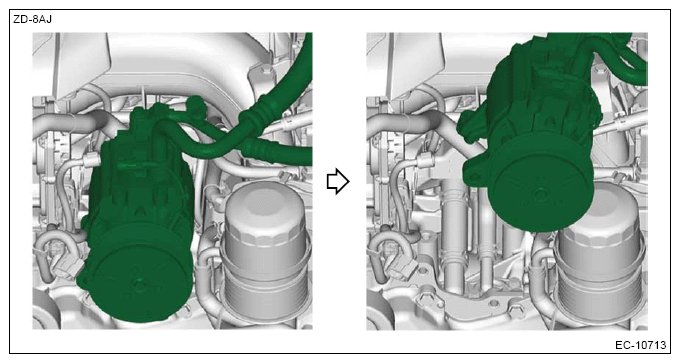 Courtesy of SUBARU OF AMERICA, INC.
|
- Remove the intake manifold assembly.
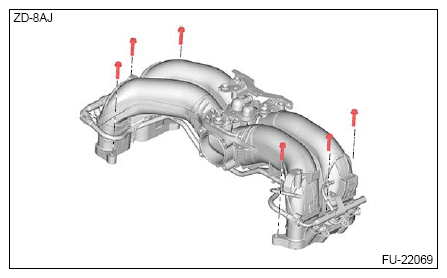 Courtesy of SUBARU OF AMERICA, INC.
|